Jun 28
Mordheim Terrain Update
I’m getting close and closer to finishing, but I still only have two days to complete it! Here is the progress I’ve done so far:
I have finished detailing the Mordheim Terrain, and finished painting the whole thing black:
My plan is Read the Rest of the Post >
Jun 19
More Work on Mordheim Terrain
I’ve been doing more work on my Mordheim terrain entry for the Terrain competition at Terragenesis. I’ve had “terrainer’s block” for the last couple days, as I haven’t been able to create the tops of the short pillars to my liking. I still don’t really know what I’m going to do.
Here’s the pictures of where I’m at right now:
Jun 8
Mordheim Terrain Rubble
This weekend has been very productive for my Mordheim hobby. I’ve been able to put some quality time into detailing my latest Mordheim Terrain “Elevation.” Since most of the main structure of this terrain has been created, I am now working on the terrain details; namely rubble.
Apr 15
Mordheim Stone Wall v1.0
Since I acquired my latest piece of packing foam, I have been trying to figure out the most believable way to create this large section of elevation. I have decided to make all of the edges of the foam look like it was created with a wall of stone, like a retaining wall. Then the rest of the elevated section of ground can be dirt ground like a normal Mordheim board.
I grabbed a spare piece of packing foam as a test piece and through some ideas together. Let me know what you think:
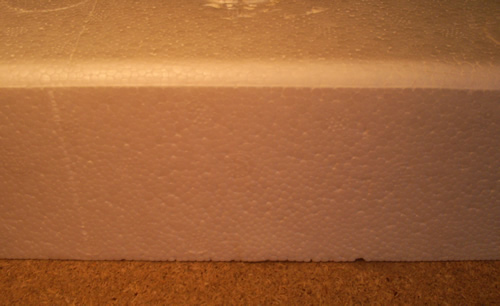
First, I started with my piece of packing Styrofoam about 3.5″ tall:
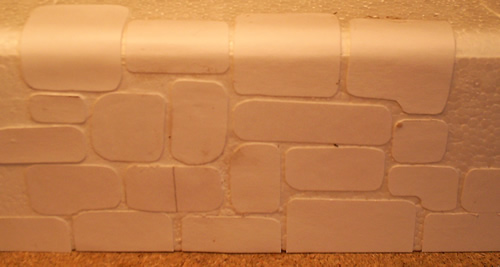
Second, I spackled the left half of the foam (for testing purposes) and cut out 20 different-sized stones from a sheet of business-card-thickness card stock. I glued them to the wall:
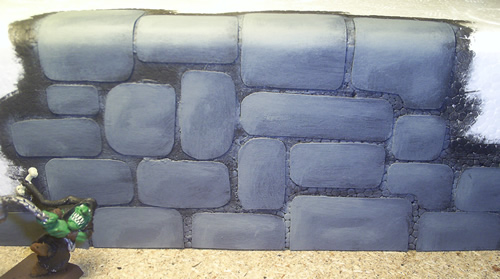
Third, I painted everything black, and highlighted the rocks (goblin fanatic for scale):
(You can see in this picture how much better the side with the spackle (left side) turned out. I definitely recommend spackling/texturing Styrofoam before using.)
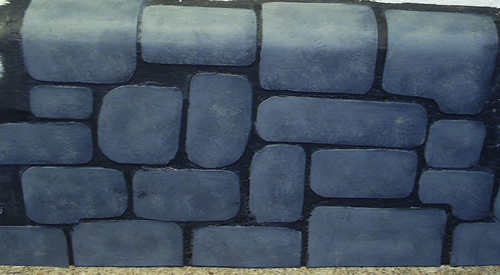
Finally, I took a thick-bristle brush with very little paint on it, and added some speckling and texture to the rocks. Since I was so sloppy painting the stones, I had to take paint over the black again with a thin paint brush:
“Voila!” (Or in the words of Ness: “Tadi-UMP!”) Instant Rock Wall.
I’m pretty happy with how it came out. I’ll update this if I come up with any other good ideas.
-Ashton Sanders
Apr 13
Mordheim Raised City Section
I got in a new computer the other day from Dell, and it came surrounded by two large sections of packing foam. Each section is 21″x18″x3.5″ and almost completely flat on 5 sides. These will act as a perfect raised part of Mordheim, and when placed on the (48″x48″) battlefield, they will take up less than 1/4th of the playing area.
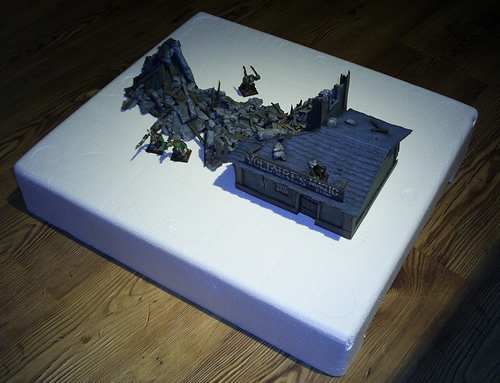
(A couple Orcs and Goblins and my Collapsed Mordheim Tower for Scale)
These are perfect because they don’t take up too much of the playing field, but can add some great elevation to a Mordheim board. My plan is to cut four sets of stairs into each section of foam so any warband will be able to access the “high road”, and make the edges look like they were built with bricks and large stones. I will be texturing the top section, and then leaving it empty so each new battle can have different Mordheim buildings/terrain on it.
Hopefully more on this project soon,
-Ashton Sanders
Mar 30
Mordheim Dice Tower Painting Update
Since this competition is ending on the end of this month, I have to paint this entire building in two days. Thankfully it’s been a weekend, and I’ve been able to put aside some time for my Mordheim Dice Tower. I have run into only a few small problems, but none were conquerable. Here are the pictures of today’s progress:
I painted all of the cement and debris with the same Dry Brushing Cement system I used on my last building (which I ended up using on the window bars as well). I chose to do a bright, barn red for the walls.
Final pictures are on the way,
–Ashton Sanders
Mar 12
Dice Tower Windows
I’ve added 6 more windows to the other side of my Mordheim Dice Tower Building! The window on the very top of the tower is cut all the way through the wall, so you can see through it.
I haven’t glued anything into place yet, I want to paint black behind the gratings before I totally secure them to the window and add a frame.
You can see the lines where I measured this time. I am using a smudge over 5cm for each story, and the window is a little up from being right in the middle of the story.
You can also see a couple trash cans in this picture. I’ve been experimenting with them, and I should have a tutorial on them soon.
Enjoy,
Ashton Sanders
Feb 29
Covering Foam Surface Tutorial
As promised, here’s a little tutorial of how I used Spackle to cover Styrofoam and packing foam surface.
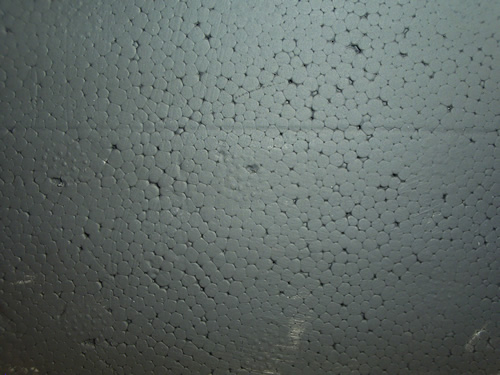
The Problem: If you have ever made anything out of the Styrofoam that comes packed around store-bought products (or seen it for that matter), you probably have noticed that the surface is definitely not smooth. Since it was made with little, round foam bubbles, the surface has lots of little bumps and gaps. If you are unfamiliar with this surface, you probably won’t need to read this tutorial. Here is a picture of Styrofoam with a base paint of black so you can see the surface:
Feb 23
Mad Scientist Terrain
There is a man by the name of “Froggy the Great” (on Terragenesis) who has been making a series of terrain models/pieces for his Mad Scientist. I enjoy them so much, I thought I’d share them with you. Here’s a link to see all of the pieces that go in Froggy’s Mad Scientist’s lab.
I love how every piece of terrain he creates has a name and function (and usually a humorous quote). He’s got quite the imagination. It’s times like these that I wish Mordheim was futuristic. =)
Enjoy,
Ashton Sanders


