Archive for the 'Terrain Tips' Category
Apr 14
Dice Tower Funnel Trick
How to keep dice from getting stuck in a funnel
While creating my Mordheim Dice Tower, I ran into a small problem. Since I wanted my dice tower to look like a normal Mordheim Building, and not look like a dice tower, I had to make my Dice Tower’s exit hole the size of a normal 28mm door. This presented a problem, because only one dice at a time would be able to exit the dice tower at once.
You can see in the next picture the final ramp/funnel, and how thin it gets before dice “exit the building.”
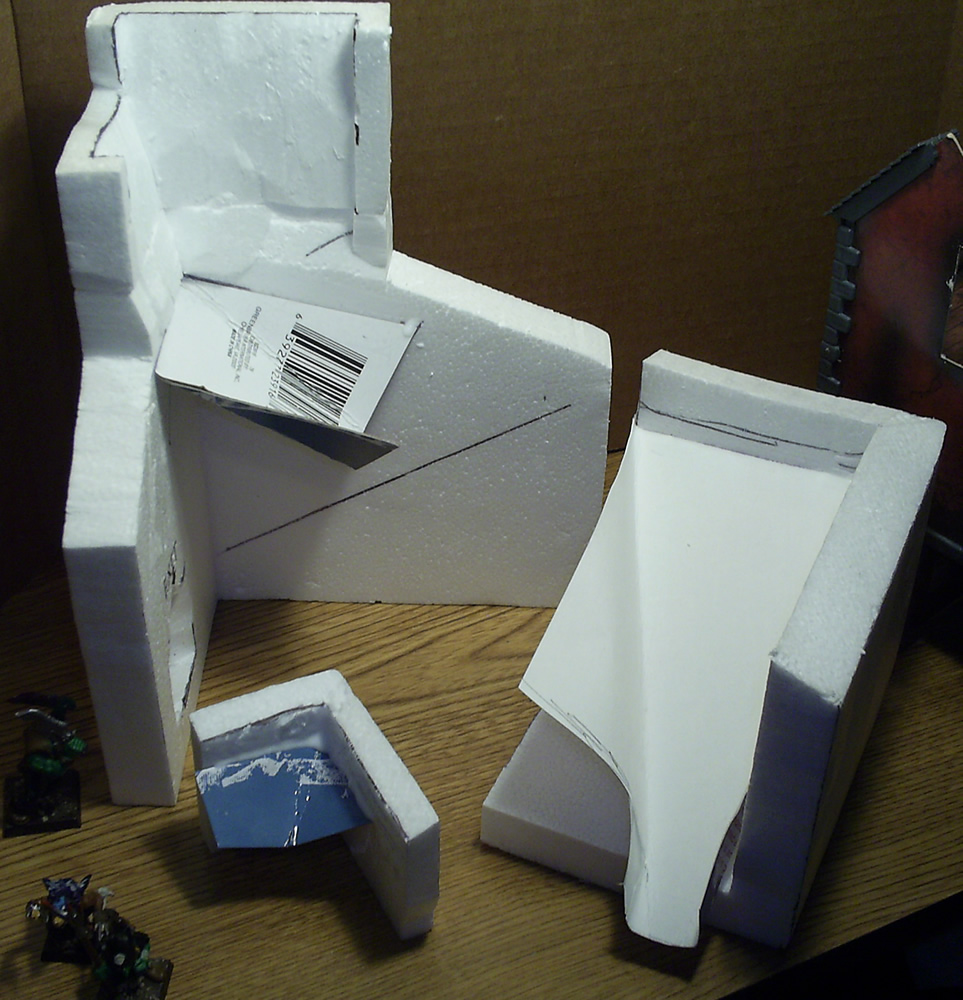
After hours of testing and fiddling with my ramps, I came up with a very simple solution to keep dice from getting stuck in my dice tower. Unfortunately, I couldn’t get any good pictures of what I created, so I will demonstrate below. Read the Rest of the Post >
Feb 29
Covering Foam Surface Tutorial
As promised, here’s a little tutorial of how I used Spackle to cover Styrofoam and packing foam surface.
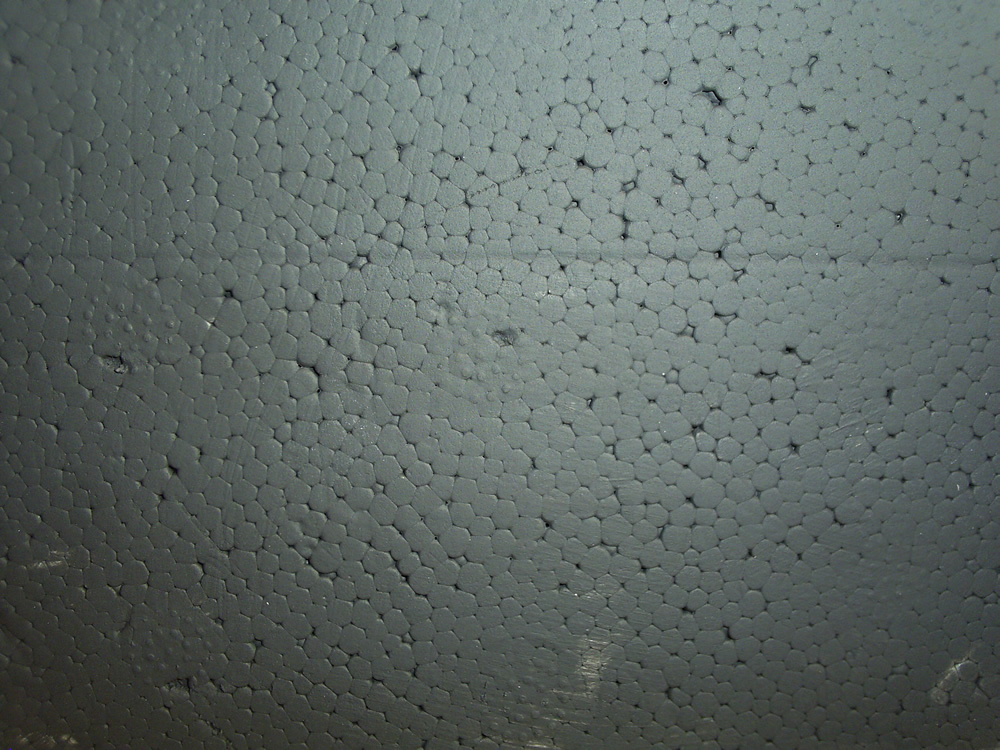
The Problem: If you have ever made anything out of the Styrofoam that comes packed around store-bought products (or seen it for that matter), you probably have noticed that the surface is definitely not smooth. Since it was made with little, round foam bubbles, the surface has lots of little bumps and gaps. If you are unfamiliar with this surface, you probably won’t need to read this tutorial. Here is a picture of Styrofoam with a base paint of black so you can see the surface:
Feb 28
Painting Styrofoam
As you may have noticed, my dice tower (and most of my buildings so far) are constructed mostly of packing foam (Styrofoam). As you can see in this picture, the foam bubbles and small holes in Styrofoam is not really a desired look for model building, so I have gone on a quest to find the best way to hide the Styrofoam texture. Here’s a picture of my Dice Tower Wall after I painted the Styrofoam, and before I filled in the Styrofoam holes:
Click on any of these image for an even larger view.

If you put 3-5 coats of acrylic paint on Styrofoam, it will eventually cover up these holes. Another tactic I’ve used is to spread Elmer’s Glue or PVA Glue (White Glue) over the surface of your building. Or you can mix in the previously mentioned white glue into the paint before painting the Styrofoam or foam. All of these create a very smooth and flat surface on your foam, which is nice but not realistic.
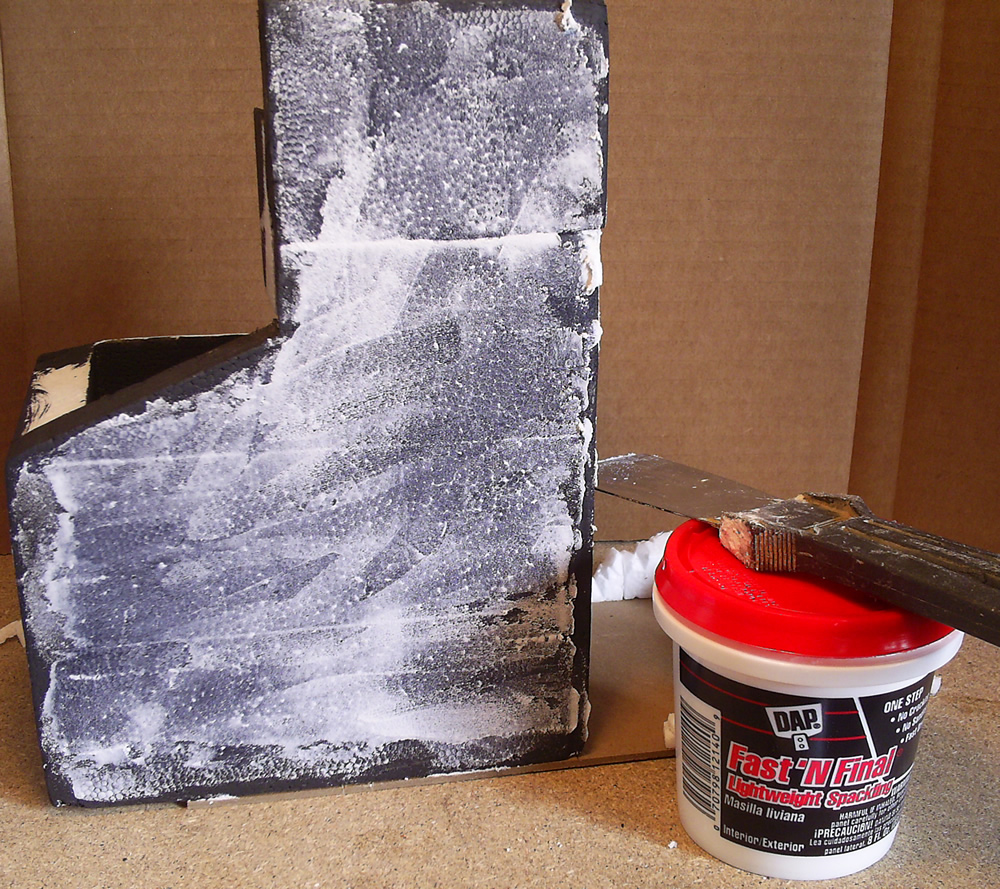
I happened to have a small tub of “light-weight” Spackle hanging out in my closet, so I spread it over the surface of my building. In this next picture you can see how the Spackle automatically filled in the Foam holes, surrounded the Styrofoam bubbles and filled in the cracks. I accidentally painted this building black before putting on the Spackle, but in the end has helped a lot for these pictures.
This next picture shows the thin layer of Spackle I spread on this foam dice tower building. I tried my best to thin out the Spackle and create a nice, smooth surface over the foam. In retrospect, I would definitely recommend a thicker layer of Spackle. The extra Spackle will add more texture to your building and cover the foam better.
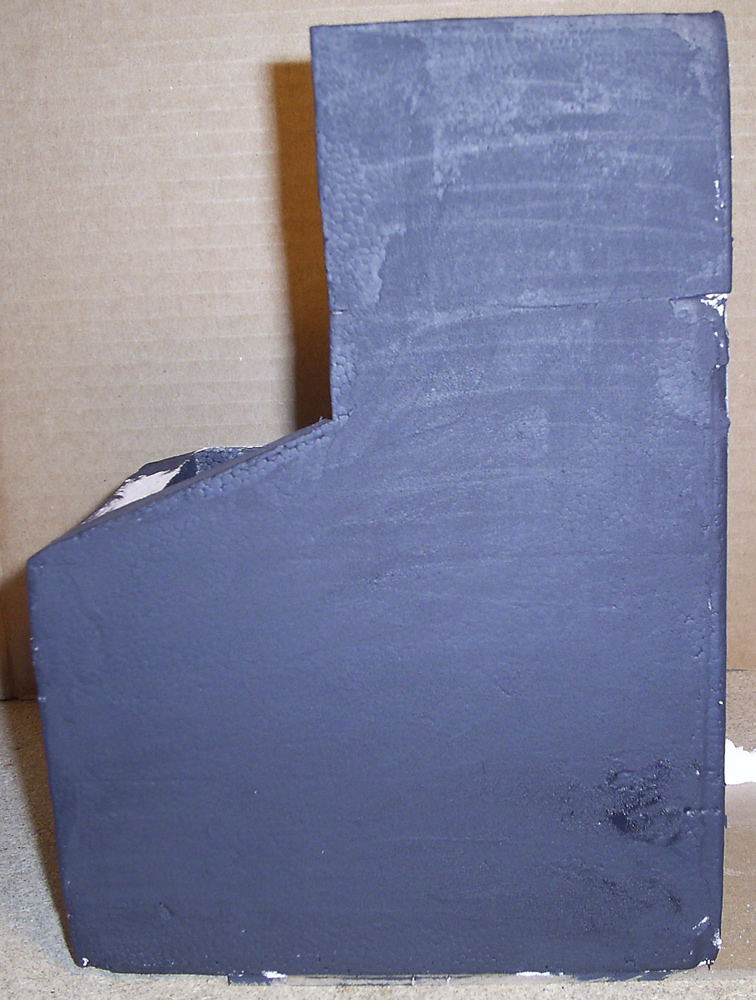
As you can see in this final picture, the layer of Spackle is too thin and shows some of the foam bumbles. I’ll be adding another layer of Spackle for texture and to cover the Styrofoam bubbles.
I’ll be putting together a Tutorial for Covering Styrofoam and Foam in the next couple days!
-Ashton
Jan 14
Highlighting the Cement
Although Cement is normally thought of as a “dull” material, sunlight gives just about everything highlights. After I gave my pile of rubbles a good think brushing of Dark Gray, I drybrushed it with subsequent coats of lighter and lighter gray. Each times the color got lighter, I used less paint and didn’t press as hard with my brush. This gave the impression of highlights on the edges of the cement.
Hover over this Picture to see the Before and After Differences:
Here are four different angles of the pile of rubble now: Read the Rest of the Post >
Jan 2
Making Rubble Look Real
Here’s some tips to making a realistic looking pile of rubble!
Most of the work I’ve been doing on this tower is detailing the pile of rubble. I noticed that on this competition entry on TerraGenesis.com, they made a pile of rubble to cover the batteries for the LED lights. This is the pile that he made:
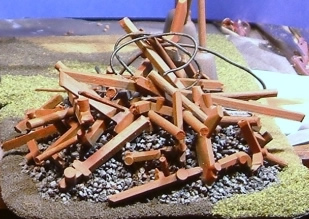
To me, this is a pretty ugly pile. I found that the reason is because the pieces of wood are on top of the gravel as opposed to in the pile. So I started making sure that my pile of rubble was very realistic. I’ve done about 4 hours of detailing work on my pile of rubble to make it look as real as possible. I’ve been filling in any deep crevices with glue and pieces of wood and foam. I filled the holes with glue and then covered it all with sand. After it dried, I shook off all the excess sand.
Here’s some pictures of the updates:
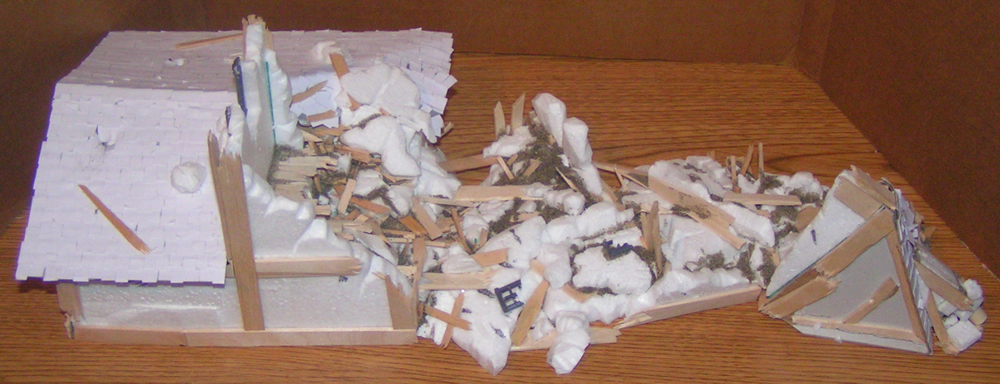
I also added a destroyed window frame to the rubble, You can see it still attached to a piece of wall in the rubble.
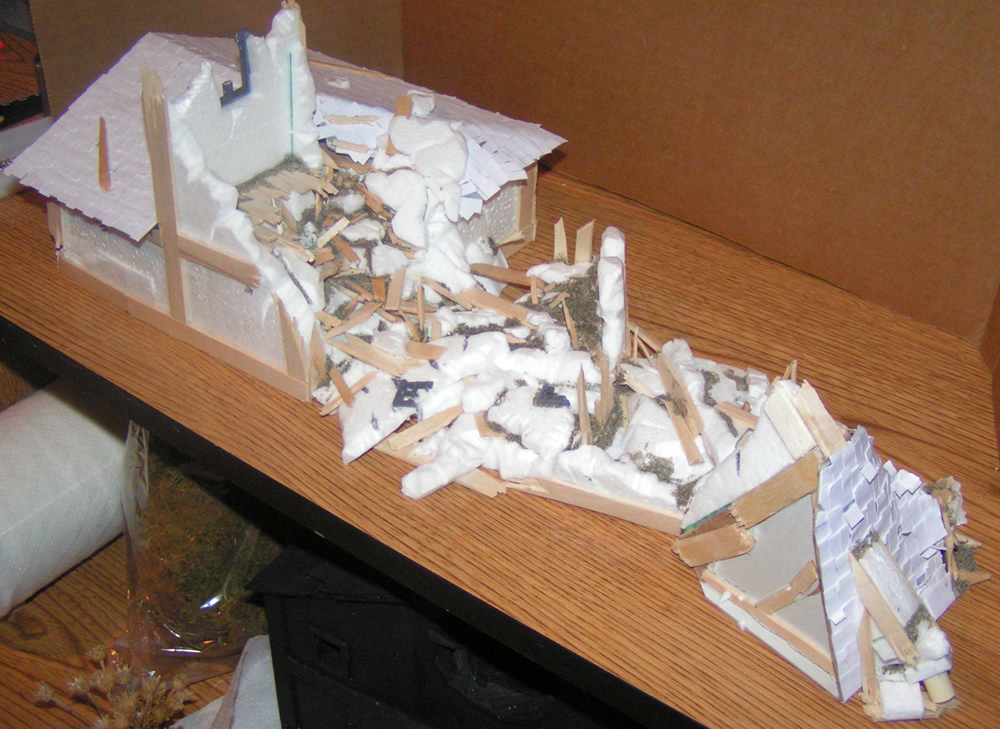
Here is a close up of the collapsed tower roof.

Here is a close up of the pile of rubble at the base of the building.

I hope this will help you to make great piles of rubble. =]
Enjoy,
Ashton Sanders
Dec 28
Adding Bases to Terrain
Since my last post about adding bases to buildings, I’ve done a lot of thinking about it. I’ve compiled more points, and put them below:
Good Things About Using a Base on Your Buildings and Terrain:
- Stability: With a base, you don’t even have to worry about the stability of your large building. Just glue it down.
- Debris and Junk: Read the Rest of the Post >
Nov 25
To Add a Base or Not to Add a Base
(That is the question…)
I’ve been toying with the idea of adding bases to my buildings. I am almost ready to add a coat of paint to my first Mordheim Building, and I need to decide whether or not I want to add a base to it. Here’s a picture of a Mordheim building with a base, and you can click on the link to my first Mordheim Building above to see a building without a base.
The Pros of adding a base to your Mordheim building:
- When a building has a base, it is much easier to add debris and trash to the floor around the building.
- It also adds a lot of stability to your building. It is much easier to keep your building from falling over from the weight of your Mordheim Models.
- You can use them to add hills and elevation to your Mordheim Board. I can guarantee the City of the Damned is not totally flat.
The Cons of adding a base to your building:
- You get that annoying lip around the edge of the base that can distract from.
- The base can easily end up as a different color than the board you are playing on. (Use a friends board, make a new one, etc.) I’m trying to build these buildings for aesthetics, this will cause them to look very ugly. Here’s an example of Mordheim bases looking ugly.
- Buildings with bases cannot be placed very close together, so if you are playing the “Street Fight” scenario, you will have trouble making a wall of buildings.
Can you think of any other Pros or Cons? I’ll try to update this list.
I think I will end up adding small bases to some of my buildings, but I’ll have to work on camouflaging the bases really well, and I’ll probably need to put together a board first. Does anyone know where I can find a tutorial about how to create a Games Workshop or Mordheim Board (with the sand on it)?
-Ashton Sanders
UPDATE: For a more detailed post on this subject check out my newer post: Adding Bases to Terrain.
