Aug 6
Modular Mordheim Models
If you’ve read many of my posts, you’ll realize that I love making things for Mordheim that I will never need to remake. That is the biggest reasons why I don’t put bases on terrain or buildings. I know that no matter what board I make later, my buildings will fit on it gorgeously!
Yesterday, I read a post by Pathfinder Dubstyles about How to Magnatize Mordheim Miniatures to make swappable arms, weapons and even heads! This way, you don’t have to make another whole miniature when you buy him a new weapon!
Pathfinder Dubstyles has created an amazing tutorial, and I hope to follow it very soon.
I hope you enjoy it as much as I did,
Ashton Sanders
Jun 7
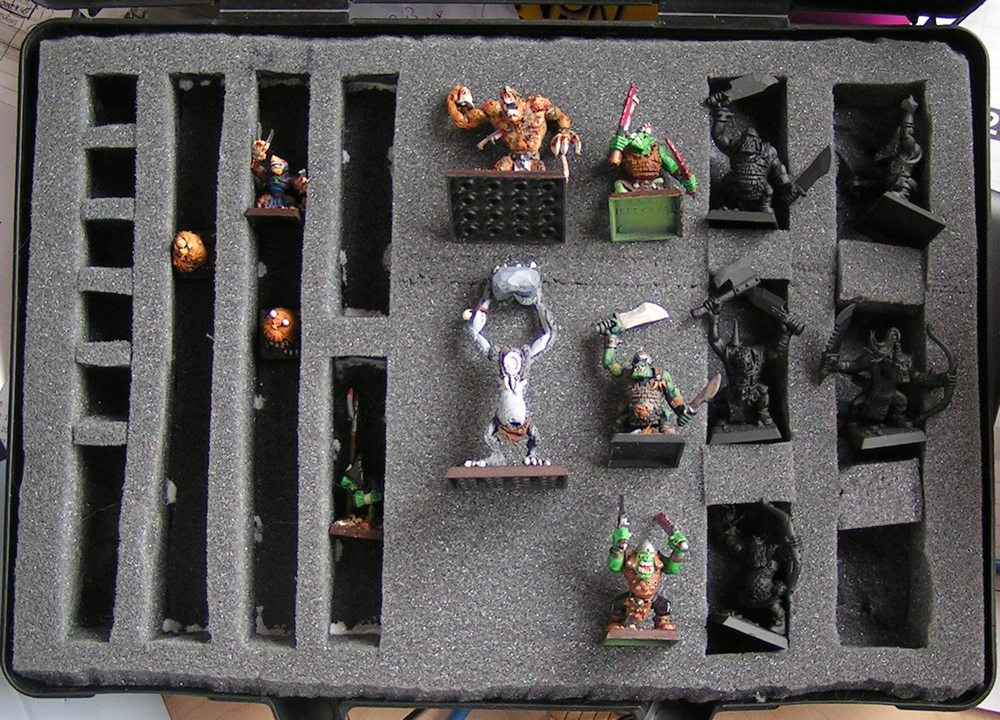
Mordheim Miniature Carrying Case 3
Although I wasn’t planning on working on my Mordheim Miniature carrying case for another month or so, I just couldn’t help myself.
Jun 2
Mordheim Miniature Carrying Case 2
Since my Mordheim Model Case post, I have cut the grey foam in half and cut three columns to put my miniatures in:
May 26
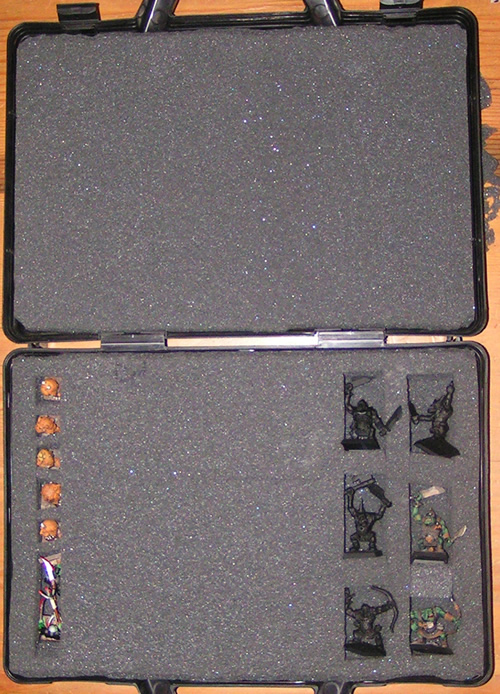
Miniature Carrying Case
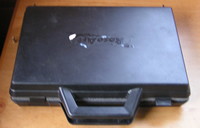 As a young’un, I’ve created two carrying cases for my minis, because there was no way I was going to pay GW a ridiculous amount of money for them to make one for me. I found a box I wanted to use, cut a piece of yellow foam (like what they use for seat cushions) to fit inside the box. Cut off a half an inch slab of the top with a razor blade, and then with scissors, cut a perfectly sized hole for my miniature. When we got into Orcs, we found a plastic “briefcase” for the Orc and Goblin warband, and we did the same thing for that. Since the briefcase is a cooler miniature carrying case, I’m going to see If I can get most of my miniatures to fit in that carrying case.
This of course means that I need to create another foam insert for my new miniatures. Read the Rest of the Post >
Apr 20
Painting Orcs – Almost Done
I’ve finally gotten around to painting my first two models since I grew up
Orc Warband Storyline:
I haven’t settled on a complete storyline for my Orc Warband yet, but these Orcs’ homeland has a odd, orange stone that when smashed into powder and rubbed on skin with water creates a great Orange Dye. This is why they have Orange warpaint all of themselves, kind of like Scottish Orcs with orange (instead of blue) woad… *stolen from Tom* I have yet to do the face painting, but I have decided that two orange stripes is this warbands signature.
I also wouldn’t normally take such up-close pictures, as it shows too many flaws ;}, but I’m still on a learning curve. =] Here’s a picture that isn’t too close:
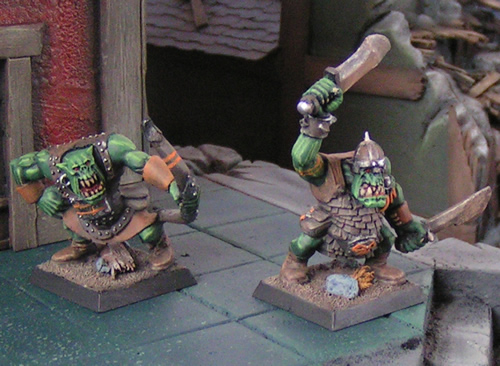
And without further ado, Here’s the close-ups: Read the Rest of the Post >
Apr 19
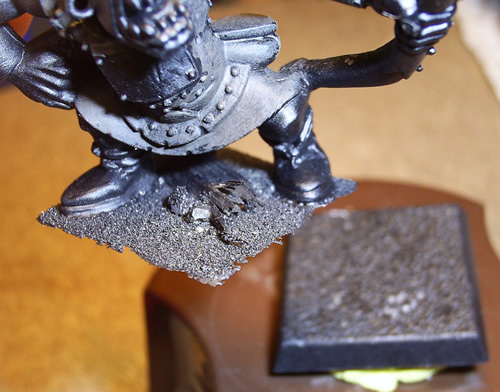
Oops… Miniature Basing Done Wrong
When I based my two orcs, I used PVA glue to glue down the sand, wood, etc. What’s wrong with that?
Apr 15
Mordheim Stone Wall v1.0
Since I acquired my latest piece of packing foam, I have been trying to figure out the most believable way to create this large section of elevation. I have decided to make all of the edges of the foam look like it was created with a wall of stone, like a retaining wall. Then the rest of the elevated section of ground can be dirt ground like a normal Mordheim board.
I grabbed a spare piece of packing foam as a test piece and through some ideas together. Let me know what you think:
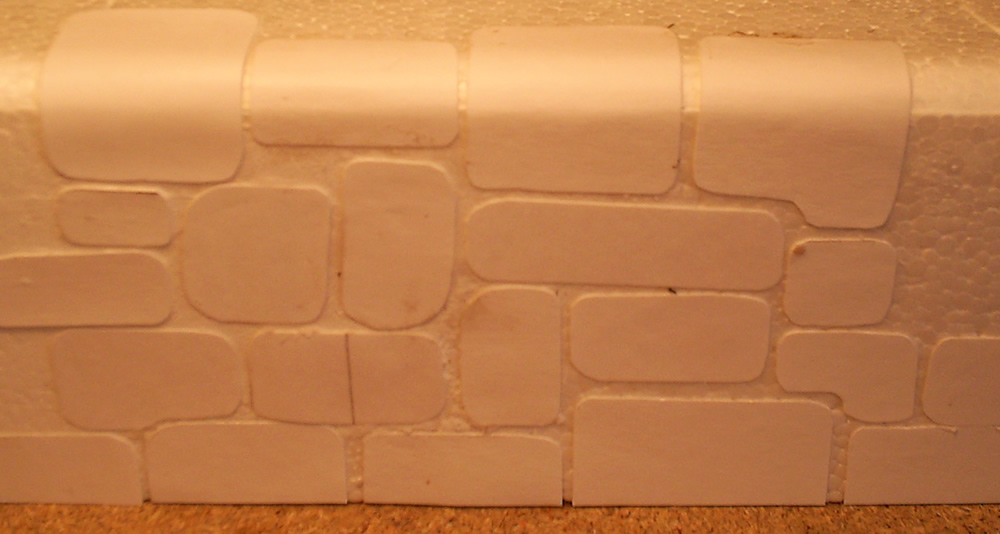
First, I started with my piece of packing Styrofoam about 3.5″ tall:

Second, I spackled the left half of the foam (for testing purposes) and cut out 20 different-sized stones from a sheet of business-card-thickness card stock. I glued them to the wall:
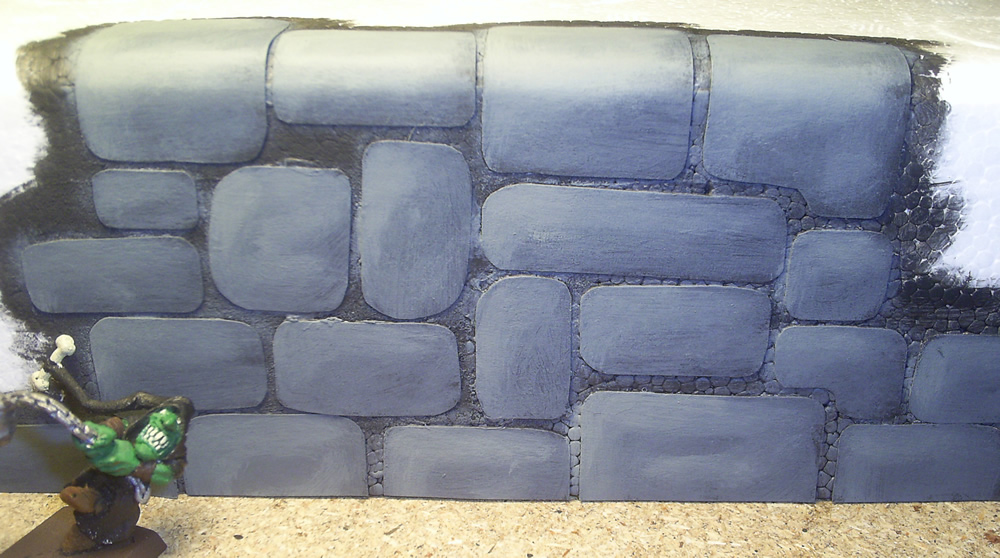
Third, I painted everything black, and highlighted the rocks (goblin fanatic for scale):
(You can see in this picture how much better the side with the spackle (left side) turned out. I definitely recommend spackling/texturing Styrofoam before using.)
Finally, I took a thick-bristle brush with very little paint on it, and added some speckling and texture to the rocks. Since I was so sloppy painting the stones, I had to take paint over the black again with a thin paint brush:
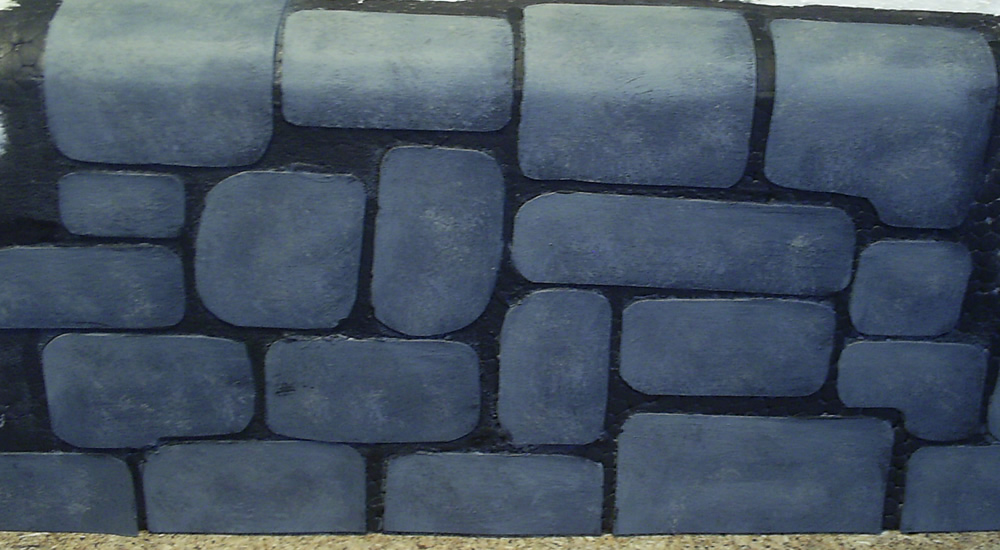
“Voila!” (Or in the words of Ness: “Tadi-UMP!”) Instant Rock Wall.
I’m pretty happy with how it came out. I’ll update this if I come up with any other good ideas.
-Ashton Sanders
Jan 28
Another Miniature Website
While browsing the internet for Miniature War Gaming sites, I’ve come upon this one many times. Here’s the link to the very useful Miniature WarGaming Site.
Miniature Wargaming
Free Wargames Resources
Enjoy,
Jan 27
Mordheim Tower – Sneak Peak
I’m getting very close to completing my Mordheim tower. All I have left is some final details for my collapsed tower, and I thought I’d give you a little sneak peak of the color I chose to use on the walls and what the wood in the rubble looks like.
Here’s a picture:

You can see an arrow that is sticking out of the side of the building in the shadows (top right) as well.
In this picture you can see the two different “kinds” of wood in the rubble. The floors of the tower were made with a nice light pine wood, while the wood on the outside of the building was mostly aged/weathered oak (the darker color).
More to come soon,
Enjoy,
Jan 26
Roof Painting
I’m getting very close to completing my collapsed tower.
The other day, I painted the roof tiles. Here is an image with the different dry brushing steps I went through.
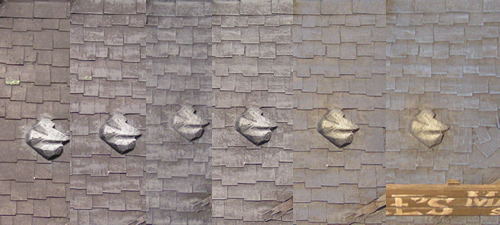
Unfortunately it’s hard to see a lot of difference in the color. I can tell you though that the very left tiles are completely black, and the tiles on the right are very blue. I’ll try to take some better pictures of it soon.
Enjoy
Ashton
