Mar 12
Dice Tower Windows
I’ve added 6 more windows to the other side of my Mordheim Dice Tower Building! The window on the very top of the tower is cut all the way through the wall, so you can see through it.
I haven’t glued anything into place yet, I want to paint black behind the gratings before I totally secure them to the window and add a frame.
You can see the lines where I measured this time. I am using a smudge over 5cm for each story, and the window is a little up from being right in the middle of the story.
You can also see a couple trash cans in this picture. I’ve been experimenting with them, and I should have a tutorial on them soon.
Enjoy,
Ashton Sanders
Mar 7
Windows for Dice Tower Terrain
While I was at a Montana-style estate auction (in someone’s backyard) I accidentally bought a bucket of crap for $2.00 when I thought I was only buying a T-square. Instead of throwing away the bucket, I brought it home and searched through it. This bucket was full of the most random construction stuff. It had some weird foam tubing, bolts, tails, etc., etc. It also had probably 100 of these small white vent-type plastic parts about 7 inches long and 3 inches wide. I have no idea what they are for exactly but I knew they could definitely come in handy for my Mordheim Buildings. I just hadn’t figured out what I could use them for… until now!
MORDHEIM WINDOWS!
This picture shows the plastic vent with one edge cut off and sliced into nice window sized pieces, and the other side of the plastic vent left in place. They end up being kind of thick borders, but I think after painting, it will look perfect. Here’s a progress shot I took while cutting a hole for this window. It was really quite simple; I just marked the hole, and cut it out with a razor blade, leaving a small ledge around the edged to keep the window grating from sinking too far into the wall.
My next step will be adding a window frame around the window.
-Ashton Sanders
Dec 2
Framing the Mordheim Church
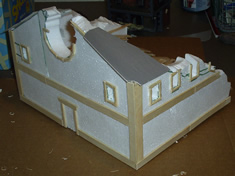
 Today I worked on framing the windows. I even decided to start framing the large circular window.
For these windows, I just cut a Popsicle stick into lengths of 1″ and 1/2″ and then cut those pieces into three (lengthwise). This gave me nice, thin and short pieces of wood to use as framing. The circlular window was framed with 1/2″ lengths with slightly slanted edges (to make the circle).
You can also see in this picture the gray boards I put in place for the roof. They will be used as the foundation to add the roof tiles too.
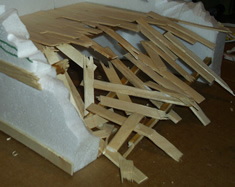
 Here’s another side view of the destroyed floorboards.
As I’m writing this, I’m realizing that this building only has one entrance/exit. It very well may not be used very much because of that. I think the best handling would be to make another entrance/exit on the front. I could destroy a portion of the front side of the building, or I could possibly make a second story deck on the front. That would create a door that units could come through. It would also add the character I was looking for to the front of the building. Yea, I like that idea a lot. Let’s see how it goes.
-Ashton Sanders


