Archive for the 'Mordheim Construction' Category
Dec 7
Mordheim Shopping Victoriously
Living in Montana means my closest neighbor is 3 miles away, and the closest Mordheim Player is a couple hundred miles away and the closest Games Workshop isn’t in this state. So if I’m ever going to play Mordheim, it will probably be with people who haven’t played before and don’t have their own warband. So it is basically required that I have enough warbands to play with when that blue moon comes around that I can play with someone.
(If you are ever near flathead lake, drop me a line, and we can play a game or 3. =])
Currently, I have my old Skaven warband and my brother’s old Orc and Goblin warband, and since humans/empire warbands should be the most popular in a destroyed human city, I had bought the Mordheim starter set when I first started playing, but I traded the humans off to a friend for his Skaven sprues. Since I didn’t have any humans, I thought it important that I get a human warband. This started my search through eBay to find a good deal on a Mordheim human warband. Eventually I found what I was looking for: The greatest Mordheim Deal ever!
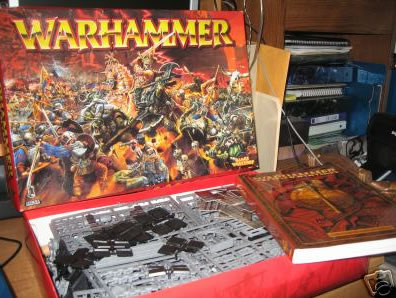
I found an old Warhammer Starter Box and a Warhammer Rulebook with a human army and an Orc and Goblin army! It’s not for sale by Games Workshop any more, so I couldn’t find any specifics as to what exactly is in it. But if it’s anything like the current Warhammer Starter Box, it’ll have about 109 models, which is more than enough for four warbands! I could probably get 6 starting warbands out of it.
Of course, it is an opened box, and some of the larger models have already been glued together, but the box definitely looks pretty full. I ended up paying (with shipping) less than I would have paid for the starter box alone (and I got a free rulebook)! Now I’ll be able to make some different human warbands. I’m very excited to get this box full of goodies!
I finally paid out some money for this Mordheim game. =]
-Ashton Sanders
Dec 6
Adding Dirt/Grime to Mordheim Church
After my last post about my Mordheim Church, i still had a couple incomplete projects to work on before I can actually start painting it. I have to add some roof tiles, and some dirt and grime. It’s not like someone is sweeping the floor every other day, and since their is no roof, the wind and rain filled the second story with dirt and grime; not to mention a large rock crashed into it.
If someone was to walk through the church, from inside to out, there would be a certain path of least resistance that is probably most taken. I tried to keep that section pretty clear, and worn down, while the rest of the floor is covered with dirt. To add dirt and grime to this Mordheim Church, I tried two different methods:
Applying Dirt Method 1: First, I put some glue direction on the floor, and spread it around the room. I filled in the corners and edges with lots of glue, and spread it around with my fingers. 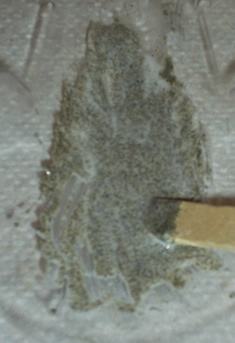 I dropped some wood chips and small wood shavings over the glue. Then I took some fine beach sand I collected at Camp Cherry Valley, and dropped it on the floor. I shook the building a little bit to get the dirt to stick to all of the glue. I needed to do this a couple times to cover all of the glue with sand. After that, I went on to…
Applying Dirt Method 2: Second, I mixed some sand, glue and water together to make a pretty fluid mix of sticky sand. You don’t want it to be too runny or too thick. Then I took a Popsicle stick to spread it around the floor of the building and into the cracks. I ran my finger over the pathway to keep the dirt in the cracks and off the worn path. When I got to the end of my second batch of sand/glue mixture, I used my fingers to rub the leftovers on the walls to add some character.
Here are some pictures of the completed product:

Here’s a close up of one of the corners with dirt and wood:

Next step will be adding the roof tiles. I did forget that I wanted to have some roof tiles in the dirt and grime. Hopefully I’ll be able to add it after the fact.
-Ashton Sanders
Dec 5
Impressive Wood Elf Modeling
Although I have never played with or even seen a wood elf warband in Mordheim, I have heard of them.
After a pretty long absence, Tom returned to “Tom’s Boring Mordheim Blog” with some great wood elf models. I can not express how much I love the color scheme he chose. The elves usually “have to be forest green,” but these elves aren’t, and yet they camouflage so well. He also did an amazing job on his bases. Here’s the link to view his Wood Elf Models.
-Ashton Sanders
Dec 4
Mordheim Terrain Competition
In my daily perusing the Internet, I came upon a website with lots of good content (and web ranking).
Terra Genesis has a new terrain competition that starts every month and lasts for two months. So at any given time, they’ll have two competitions going at the same time! Then all the visitors vote on the best completed submission. If you like to create Mordheim or just plain miniature terrain, Terra Genesis is a great website community to get hooked up with!
Right now, they don’t have any good competitions that I could build a Mordheim building (or terrain) for, but they should have another Competition starting on the 10th (of every month). I’ll see if I can do anything for the next competition.
I’ll keep you posted,
-Ashton Sanders
Dec 3
Building a Mordheim Deck/Porch
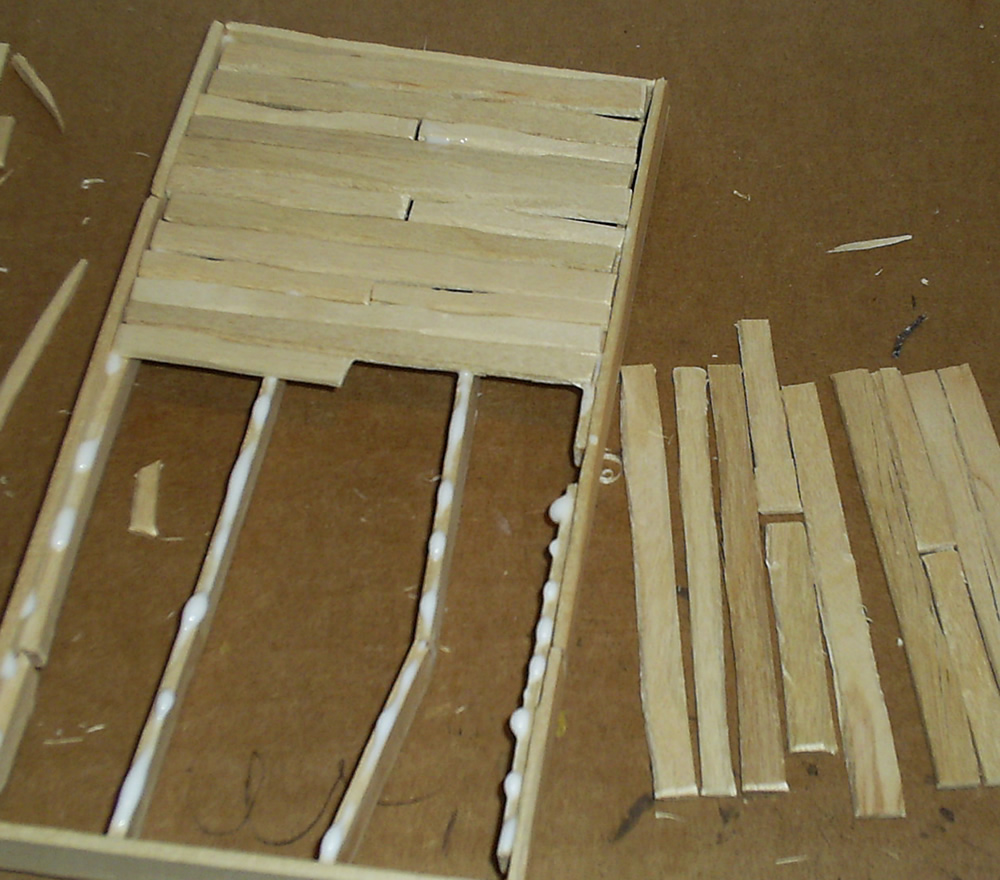
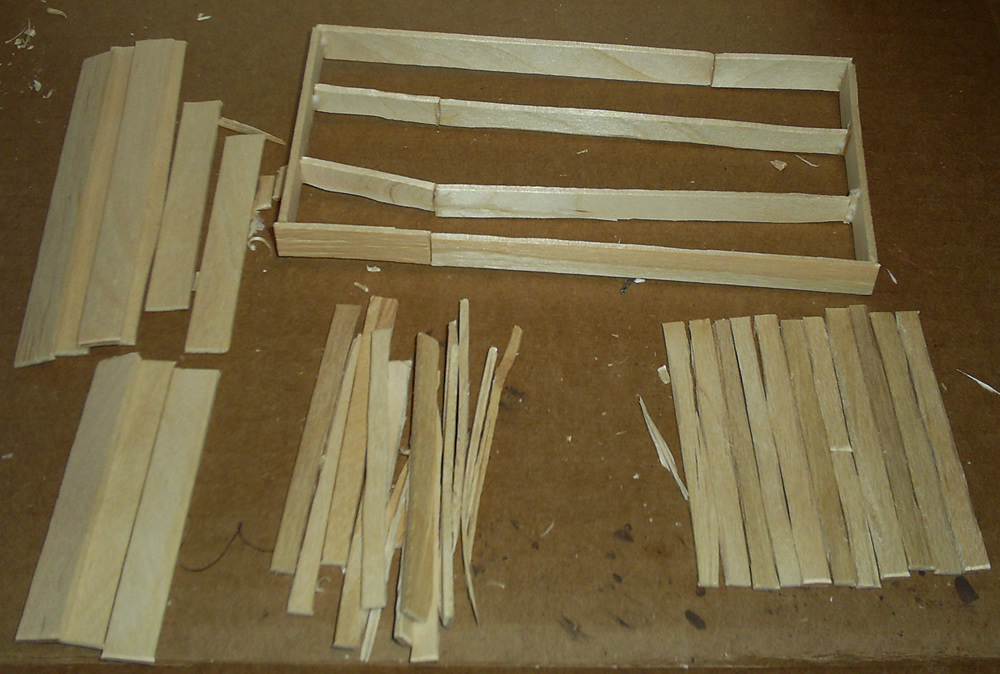 In my latest Mordheim Building post, I discussed creating an entrance at the front of my Church (even though it could easily pass as a tavern, pub or other gathering place). I did quite a number to create this deck. The first thing I did, was figure out how far forward I wanted the deck to be, and then cut up a bunch of Popsicle sticks to fit the proportions. I chose to create the porch 2.7″ deep and almost 7″ wide. To the right you can see my lumber yard, and my sticks in their assorted stages.
First I cut the ~4″ Popsicle sticks down to 2.7″, and then I cut those pieces in half lengthwise to get thinner planks. I also used some of the 1.5″ pieces as planking. I scraped my knife over every edge of each plank to add “character.”
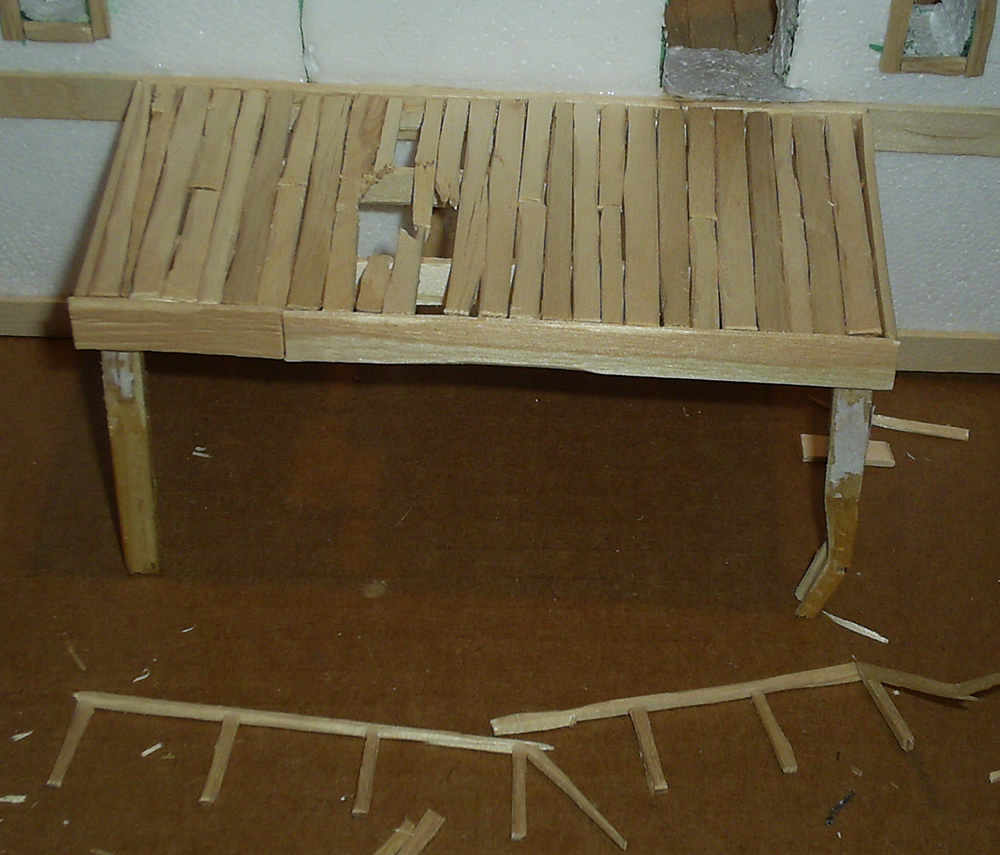
 You can see in this next picture the frame I created for my Mordheim Deck. The four beams that are on the inside of the deck are suck down to allow the planks on top to sit level with the top of the outside planking.
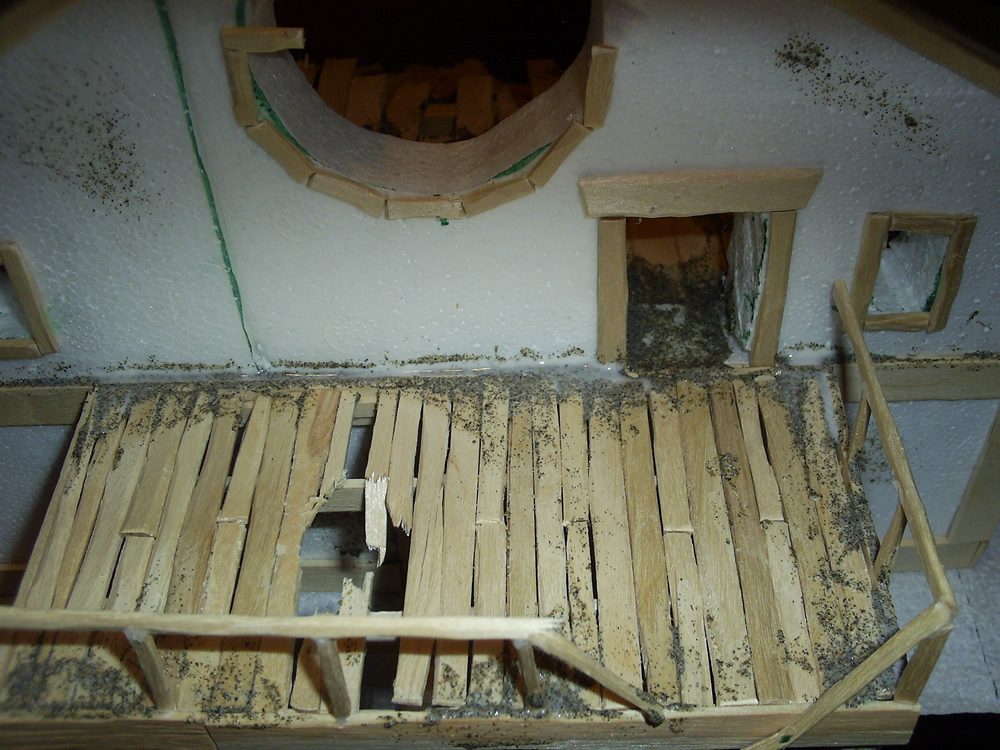
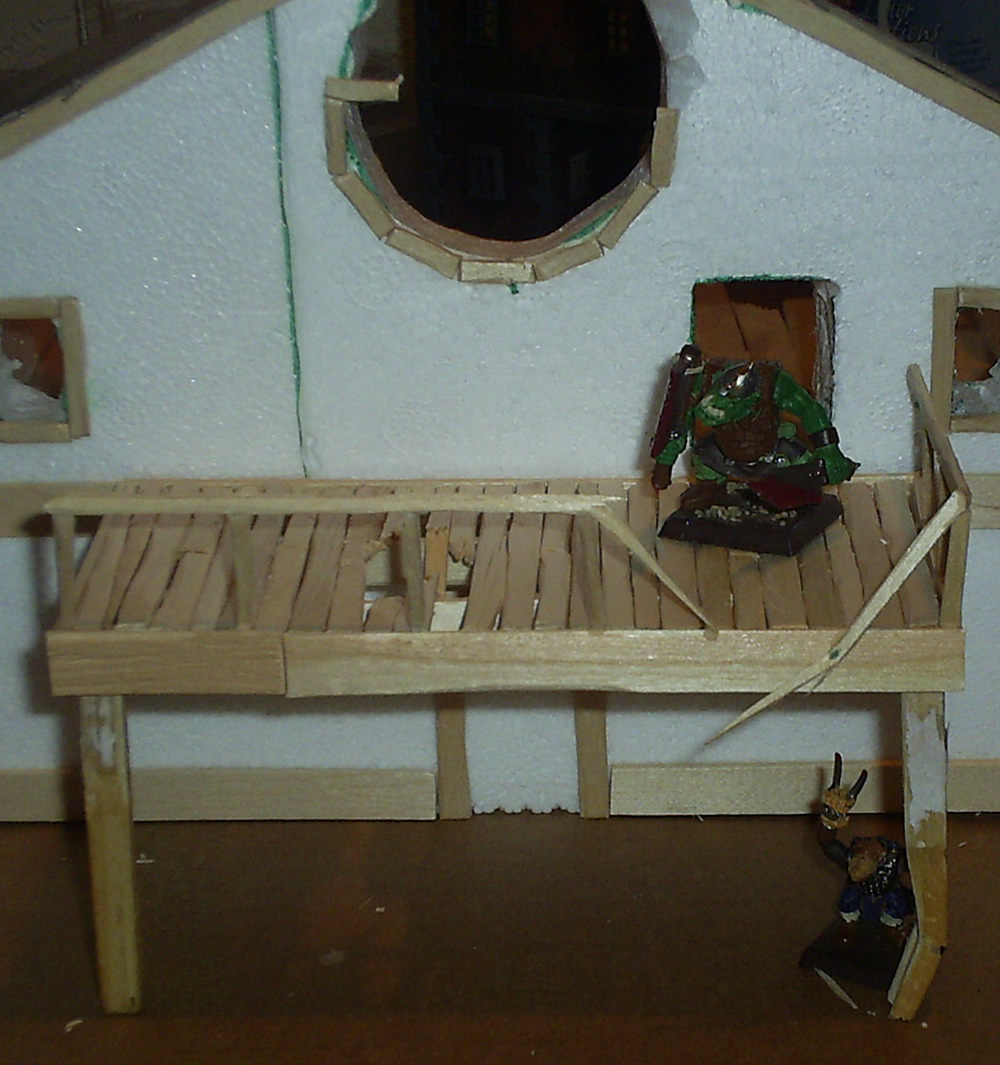
After getting half way through creating this deck, I realized I hadn’t properly destroyed the deck. Even though the front side of the Mordheim Church hadn’t been hit too hard by falling debris from the comet, it’s in the City of the Damned, so I couldn’t leave it totally untouched.
Here’s my new deck; complete with hole, wreaked post and destroyed handrails. I’ll probably be adding some more grunge, dirt and debris after I finish framing the door and windows (on the left side of the building).
I can’t think of anything else to add to this building, so I’ll probably work on a couple other of my unfinished Mordheim projects before starting the painting on this Mordheim building.
-Ashton Sanders
Dec 2
Framing the Mordheim Church
 Today I worked on framing the windows. I even decided to start framing the large circular window.
For these windows, I just cut a Popsicle stick into lengths of 1″ and 1/2″ and then cut those pieces into three (lengthwise). This gave me nice, thin and short pieces of wood to use as framing. The circlular window was framed with 1/2″ lengths with slightly slanted edges (to make the circle).
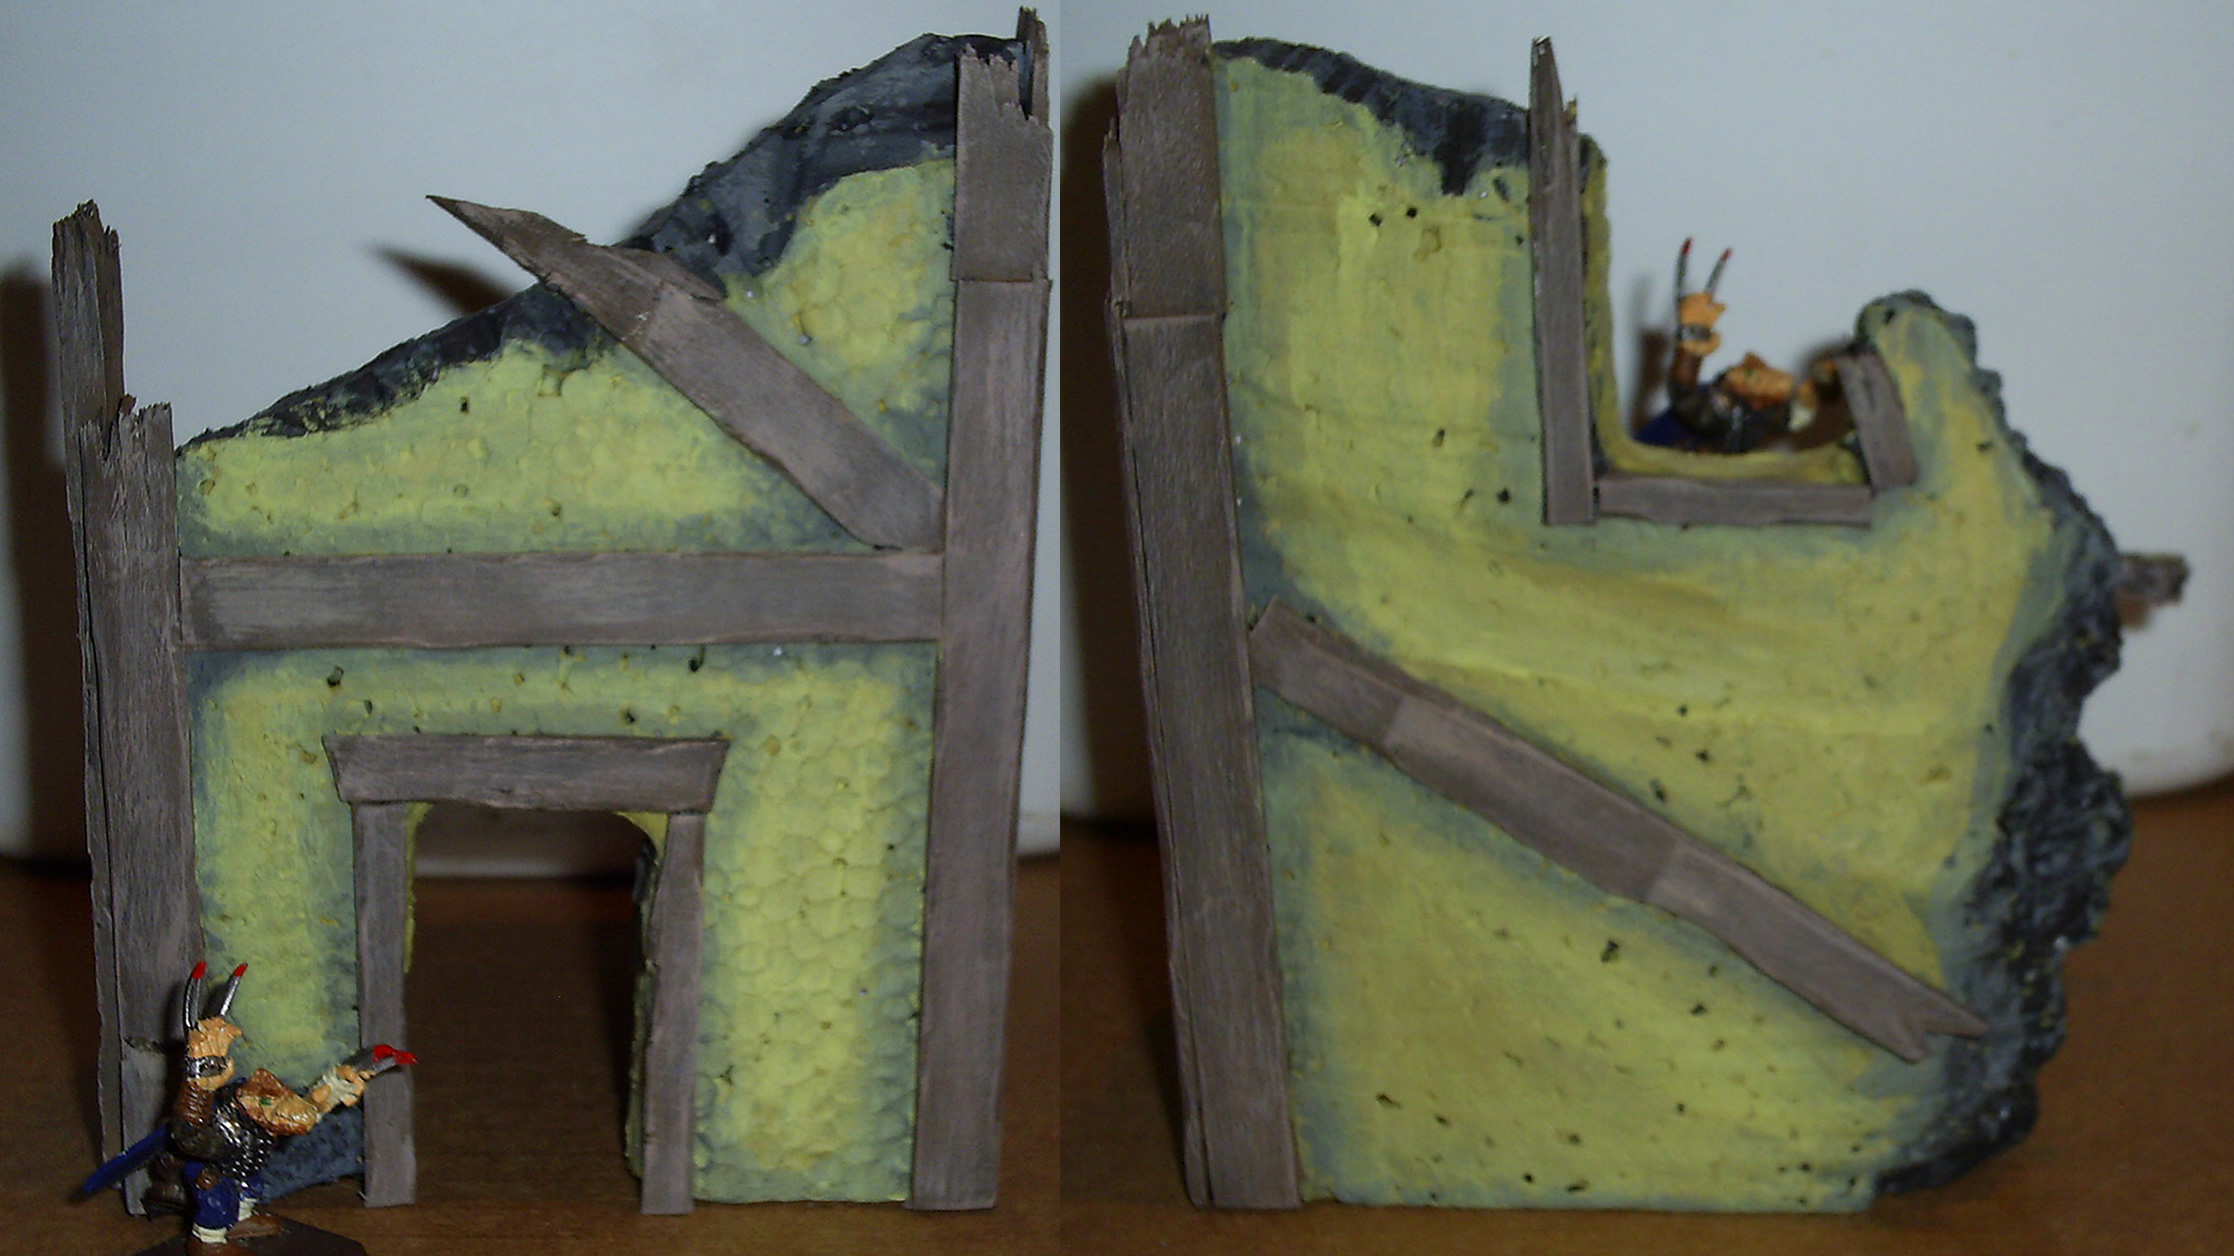
You can also see in this picture the gray boards I put in place for the roof. They will be used as the foundation to add the roof tiles too.
 Here’s another side view of the destroyed floorboards.
As I’m writing this, I’m realizing that this building only has one entrance/exit. It very well may not be used very much because of that. I think the best handling would be to make another entrance/exit on the front. I could destroy a portion of the front side of the building, or I could possibly make a second story deck on the front. That would create a door that units could come through. It would also add the character I was looking for to the front of the building. Yea, I like that idea a lot. Let’s see how it goes.
-Ashton Sanders
Dec 1
Building Mordheim Church
(continued…)
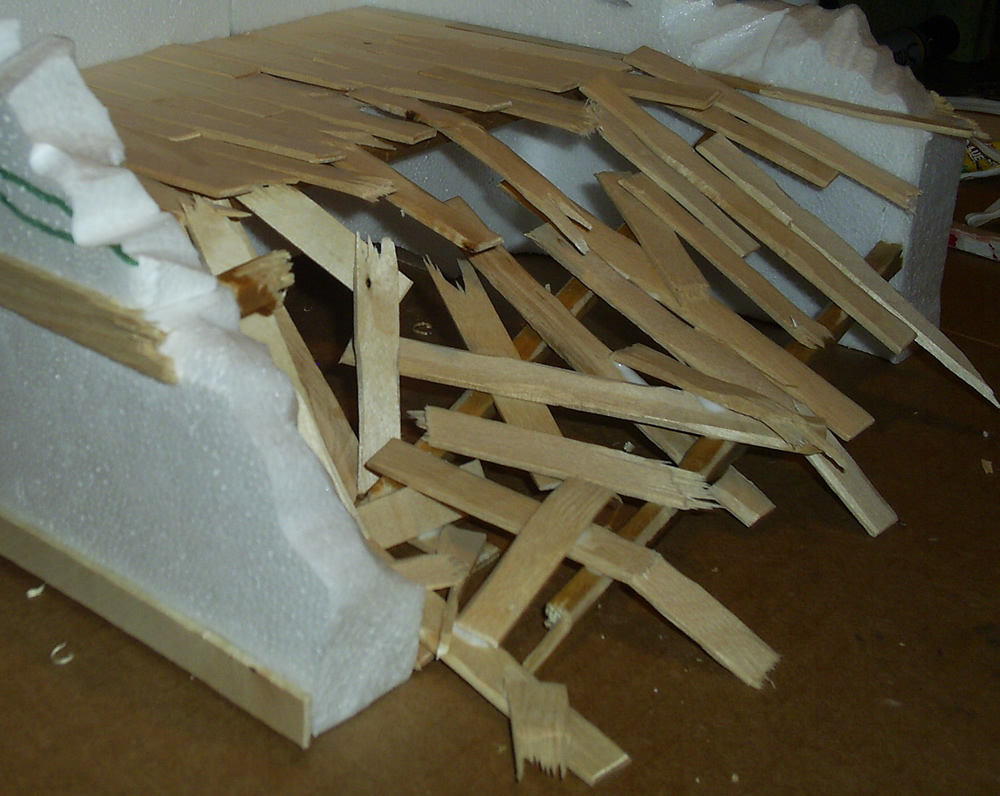
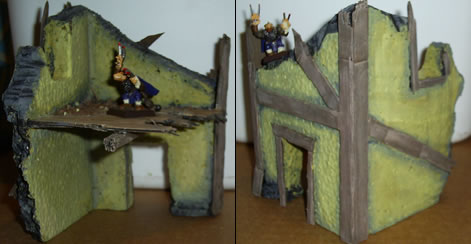
 This is my second building that I am creating for my Mordheim Board and this is my second post. I’m calling it my Mordheim Church. It isn’t going to have a (playable) ground floor. Instead, the second floor has collapsed down upon it in most places. Here are a series of images as I go through the process of creating a destroyed wood-panel floor. You can click on an image to enlarge.
The idea is that a piece of the meteor crashed through this building, and destroyed the back wall. This also caused the second story floor to collapse down onto the first floor to create a sort of ramp. This will create an easy way to get up into this building from one side only.
 Now to begin construction!
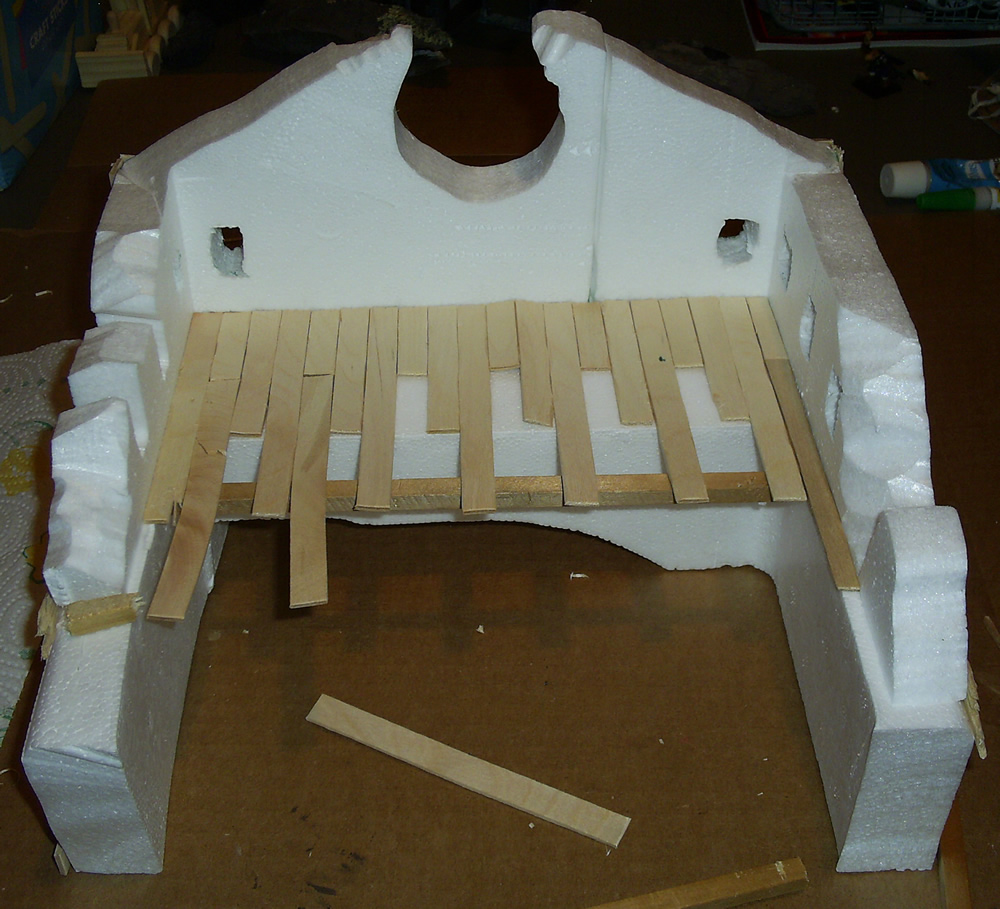
The first part of creating the floor was easy. I first cut the rounded ends off of 50 Popsicle sticks to use as Mordheim-sized floor boards. Then I cut seven of them into 1/3 and 2/3 sections. I glued the floor boards into place in a staggering manner:
Full length, 1/3, 2/3 and then back to a full length board again. This is a pretty normal construction method for normal houses. It makes the floors look nice and space the “seams” out so they aren’t so noticeable.
 I will also mention that before I put any board down, I ran my sharp knife over the edges of it to give it a beat-up look. That’s a trick I learned from a Terra Genesis article on preparing wooden beams for Mordheim. They used balsa wood, as it’s a lighter wood and easier to cut/work with. I use Popsicle sticks cause it’s 1/20th the price. =]
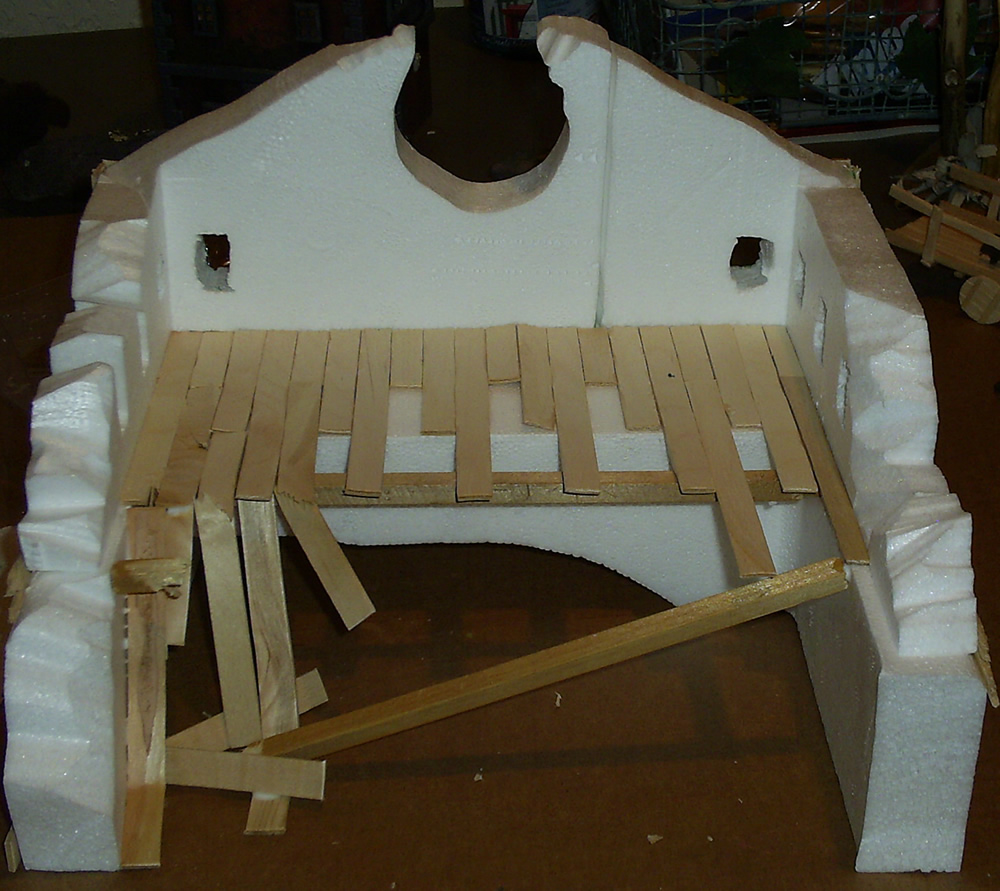
I added some crossbeams from a stick to a firework that a friend had left at my house (after launching the firework of course=]). I added three crossbeams. One is still intact at both ends, one is broken only on the left side, and the last has completely collapsed.
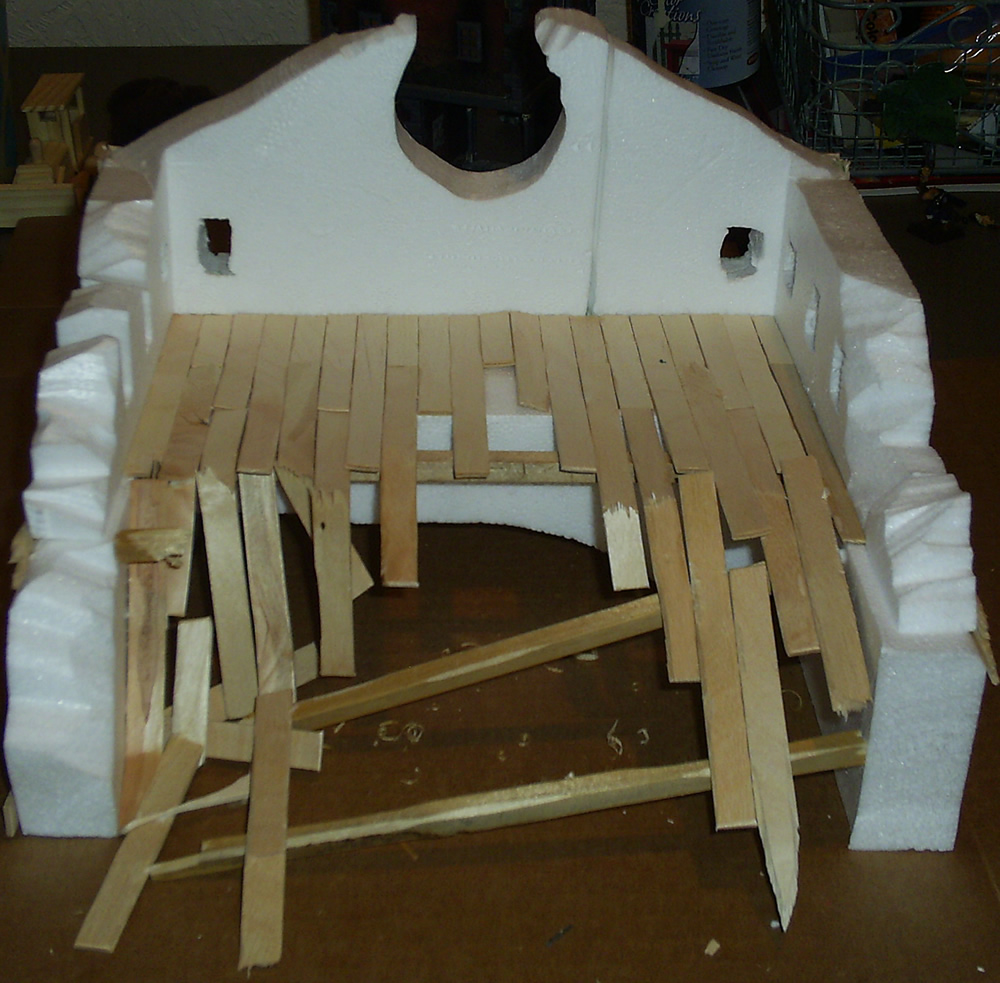
No Base! I had discussed whether to use a base or not for my Mordheim buildings. Probably the biggest reason to use a base is to make it easier to build the building (and add rubble to it) without it falling apart. I took this as a challenge to build this building without a base! 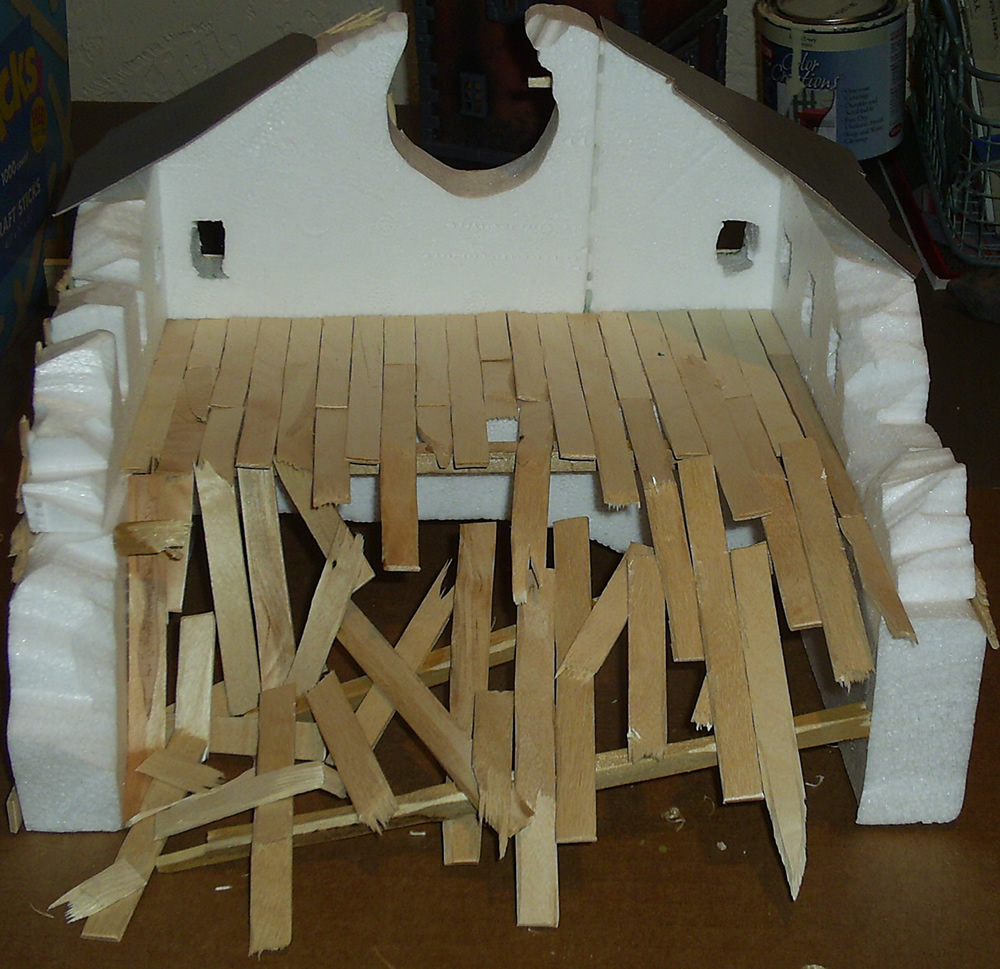 All of the destroyed Mordheim floor boards are glued together to create a firm, invisible base that holds it all together. So even though it looks like all those boards are about to fall to pieces, they are actually quite sturdy.
Now that I have finished this part, I have a little more wood framing to do for the windows and roof, and then I’ll be doing some final touches to make it look realistic.
More on it’s way!
Ashton Sanders
Nov 30
Second Mordheim Building Begins
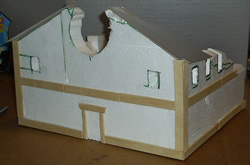
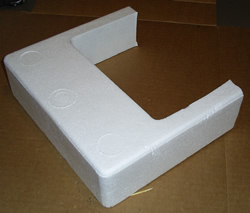 My wife bought be an electric heater as an early Christmas present, and the greatest thing about it is some sweet Styrofoam that came with it! I sliced off a section of it with my foam cutter, and you can see what I started with on the right.
I instantly decided that this was going to be a three-sided, two-story building. I also am going to use that thick block of Styrofoam to my advantage. I’m going to make the second story caved in on the first story to such a degree that you can’t actually access the first story. I can build a closed door on the front, some closed-shutter windows along the side.
 After I had my foundation, I had to create my second story. I learned from my mistakes of creating my buildings too large for the Mordheim scale, so I brought it down on this one. The only real draw back with using this Styrofoam, is the walls are almost 4 feet wide (per Mordheim standards).
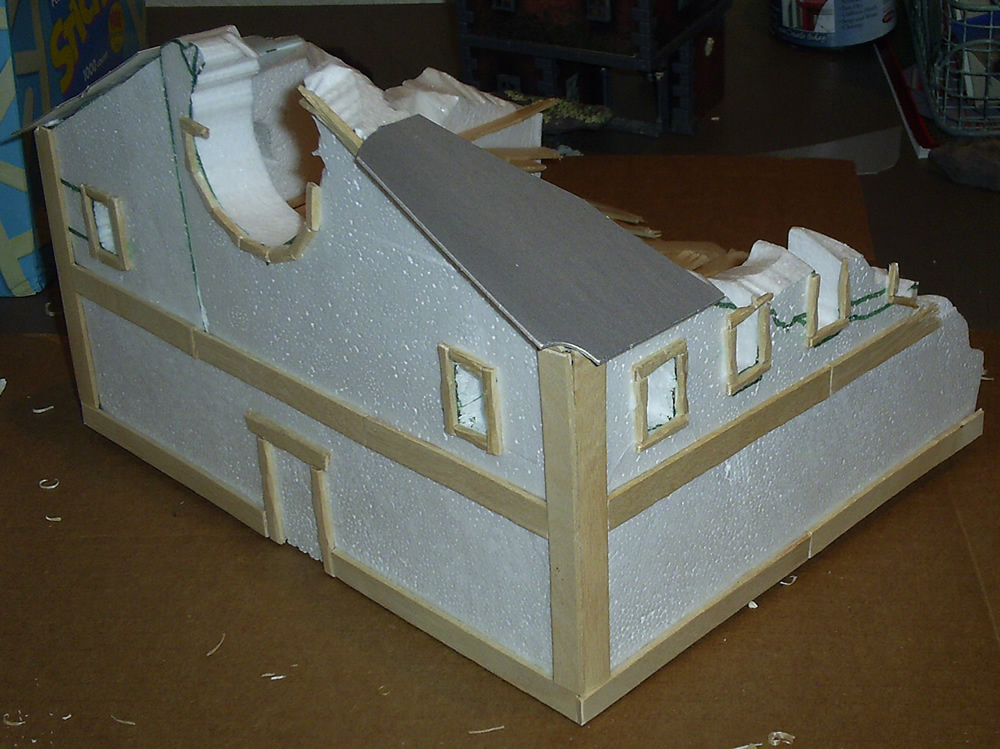
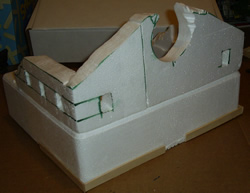
To create the top floor of this building, which I have decided is going to be a church, I took two “L”-shaped pieces of Styrofoam and cut them to fit perfectly on top of the Foundation. I used my foam cutter to cut the roof line onto this Mordheim Building. I also cut that large circle into the front wall to be the remnants of a stained-glass window.
I then measured some spots for small windows. Since these windows were so small and narrow, I couldn’t use my foam cutter or the same knife that I destroyed the first time I cut Styrofoam. So instead, I used a retractable razor blade. I heated the blade in a fire, and then stuck it into the foam to “melt” my windows into place.
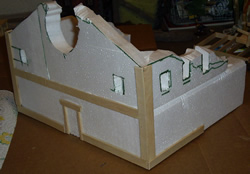 I then started working on covering up the cracks that were created by having the two different sections of Styrofoam connecting. I used wood framing to do this. I also decided to add wooden baseboards around the entire ground level as well. Of course my favorite material for wood framing in Mordheim is Popsicle sticks.
I created the door frame for the front of the church. I will probably end up painting the door onto a piece of card stock, and then gluing it into place. This will set the door back behind the door frames.
I don’t look forward to framing all of the windows, but I will probably figure out some measurements that work, and just cutting all the pieces to size.
 In this picture, I cut some pieces of thick card (from a Bed, Bath and Beyond Gift Box), and set it where it will probably go. These pieces of card will be glued into place and will be what holds up the roof leftovers. I will do my best to completely cover it with roof tiles, which probably will also be cut from the same card.
I did this whole project in about an hour, and I’m very excited to continue working on it.
-Ashton Sanders
Nov 29
First Completed Mordheim Building
I have finally completed my first Mordheim building. I started this building at about the same time I started this blog, so it’s been two weeks in the making. In my defense, this Mordheim building isn’t the only Mordheim project I’ve been working on.
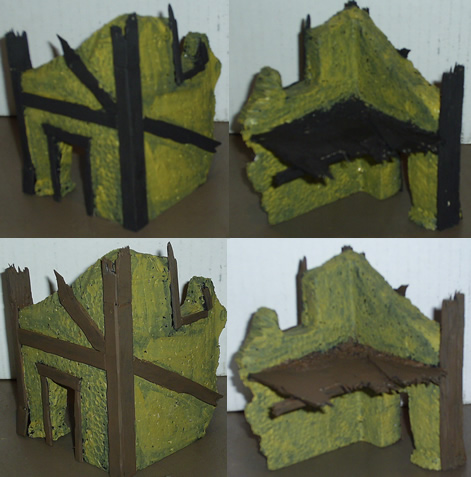
I decided to go with a yellow paint with wooden accents. Here is the completed Mordheim building:
Here are the two outside walls. Click on the image to view larger image.
I’ll be putting up another image of the “gravel pile” on the second floor. I need to get a good picture with normal daylight.
I think for my first building, it came out very well. The only problem with this Mordheim building is that its scale is too large. Where Mordheim Models are 28mm, this building is closer to 38mm. When compared to the 3-story tavern/building that comes in the Mordheim box, they are almost the same height. The second story floor of this yellow Mordheim building comes up to the windows on the second floor of the original Mordheim building. The window and door on my building are also too large.
Notes to keep in mind,
Ashton Sanders
Nov 28
Getting out the Mordheim Paints
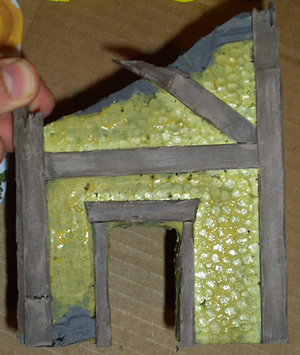
I’ve finally taken out my paints and started painting my first Mordheim Building. This picture is after my first coat of yellow (for the walls) and brown (for the wood) after the base coat.
As you can see, I went with painting the walls of this building yellow. I didn’t really have any thought or reason behind it, that’s just the color I pulled out. I should have darkened the yellow a little more before I put it on, so that the base coat for my Mordheim Building would be darker and I could add highlights on top of it. I’ll probably end up doing this anyway. It was nice how you could see the black base coat through the light layers of the yellow. I could have used that to my advantage by putting less yellow paint on the sections of the wall that I wanted to be darker. Live and Learn. =]
I haven’t really decided what I’m doing with that “rock” that is being used as a support on the left side of the door. It was a improvisation to fix a wall I melted. We’ll see how it come out tomorrow after the final coat.
Here is a picture after my second coat of paint. I also realized that the broken-off parts of the wall should be gray as the building was painted before the wall was knocked down… not after. You can also see a little bit of dry-brushing that I did on the wood to make it look more like wood. I started with a dark brown base-coat for the wood, and then got a light red-brown for the highlighting.
Until then,
Ashton Sanders
