Dec 15
Mordheim Carpenter
I’ve been working hard on my Collapsed Tower for Mordheim, and today we had a visit from the Mordheim Carpenter.
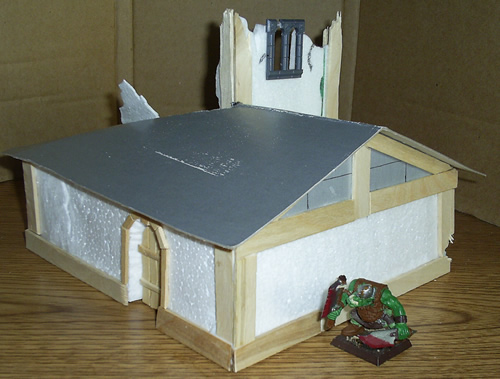
This collapsed tower almost completely destroyed one side of the main floor, but the other side of the main floor is still in perfect condition. Today, I had the Mordheim Carpenter out to add wooden framing to the entire house. I added a wooden door and door frame.
Here’s a picture of the wooden framing on my Collapsed Mordheim Tower with “Ugh” the Orc for size comparison:
More on the way,
Ashton Sanders
Dec 13
Mordheim Terrain without a Base
I’ve touched on my thoughts on Adding a Base to Terrain and my last two buildings have not had bases. As I mentioned probably the biggest Con of not having a base is the difficulty of keeping the entire building supported. This is especially true for my entry into the TerraGenesis Fallen Over Competition.
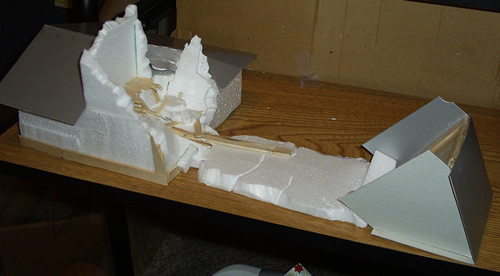
Here is the latest picture of my Entry:
 As you can see, I’m going to have to create a lot of supports between the roof of the tower, the rubble and the main building. All I had connecting the two was a thin sheet of Styrofoam, so this is what I came up with: Adding support beams under the foam.
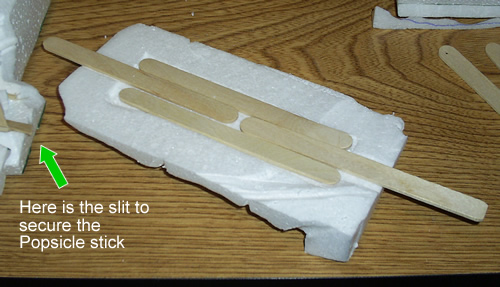
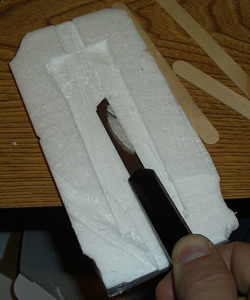
1) I cut out slits under the connecting piece of foam. I cut out enough space for two sticks to be sticking halfway out, and for two sticks to run parallel for extra support. (I did this we a fully extended (flexible) razor blade. The flexible aspect allows me to rub the blade horizontally across the bottom of the foam creating a perfect hole. See picture.
2) I cut out small slits in the bottom of the roof and the bottom of the main building; just big enough to slip in the Popsicle sticks.
3) I glued in all of these supports with Elmer Glue.
4) I am also planning on adding some supports to the top of it, in the form of fallen debris between the separate sections. They will look like they are just leaning on the main building (or roof), but they will actually act as additional support. You can see a good example of this in the first picture above.
Good thing foam is not too heavy. I think these supports will be enough to hold this terrain together.
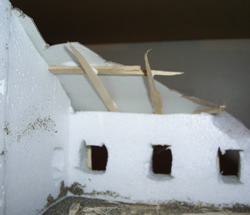
Here’s a picture of the glued in support beams:
Enjoy,
Ashton Sanders
Dec 11
Oger Warbands in Mordheim
I found a couple great links to Oger Warband Rules for Mordheim. Many of them have not been tested, but I’m putting they up because I found them interesting, and they seem pretty fair.
This first link is a post on Games Workshop Specialist Forum entitled Oger Warband, and seems pretty fair to me. You can only have a total of 3 Ogers. My only real problem with it is that you have to shoot or attack the Ogers if you can. You are not allowed to shoot their weak slaves. I would do away with that rule.
Here’s another link on another Games Workshop Forum entitled Ogre Kingdoms Warband. I haven’t evaluated this one yet, but from briefly looking it over, it looks like this one is very unbalanced. Let me know what you think.
Ashton Sanders
Dec 10
One Month of Mordheim
Today, is the end of the first month of my Mordheim in Montana Blog. I have posted at least one post per day for this first month. Now that I have accomplished that, I don’t think I’ll be keeping it up at that speed, but I’ll update it regularly.
Here’s to many more great Months of Mordheim in Montana.
(Today, I am ranked number #17 on Google for the keyword Mordheim.)
-Ashton Sanders
Dec 9
Terrain Competition
Another site that I’ve been lurking on for a while is TerraGenesis. Great site full of endless resources. I first found this site when I was looking for board creation ideas. I found this page with a great Mordheim Table Idea. I then found that they hosted a new two month, terrain competition every month (so there is always two competitions available).
They came up with a perfect competition for a Mordheim building called the “Fallen Over Competition.” I started a for a Mordheim tower that fell over. I will be posting some of my thoughts and progress on it here as well.
-Ashton Sanders
Dec 8
Mordheim Roofing Contractor
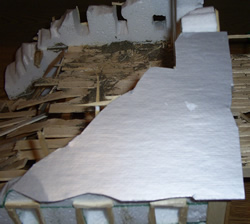
Finally the roofing contractor was called out to finish roofing the church. I’ve seen a number of different types of roofing tiles in Mordheim, and I decided to try this style out and see how it goes.
When I was making the building, I added a couple sections of triangle board to the corners of the roof to use as the roof’s “foundation.” This is actually what holds it all together. I added some wooden cross-beams to the inside for some realism. (Made out of Popsicle stick splinters.)
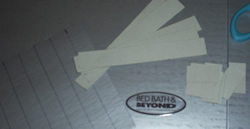
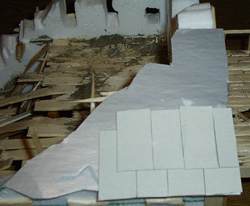
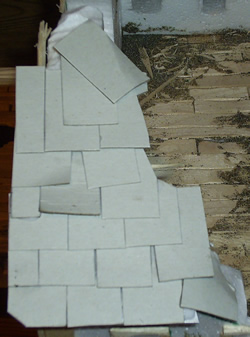
Then it was time to create the roof tiles. I didn’t have any really plan, so I went with my gut: I cut out a rectangle of a Bed, Bath and Beyond box that I had lying around, and cut it into 3/4″x 1.5″ strips. A lot of them came out with slightly different dimensions, but I guess that’s what happens when you hire the least expensive roofing contractor in the business. (I’m doing it practically for free.)
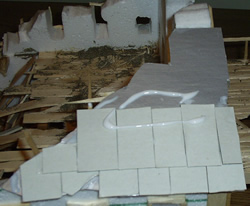
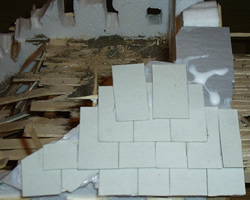
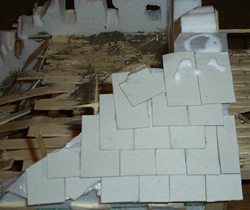
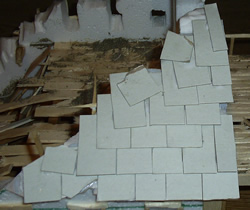
After cutting the tiles to size, I proceeded to glue them down with a good helping of Elmer’s glue. You can see the progression of adding the tiles to the right.
You can click on any of these Mordheim pictures to see a larger image.
I tried to make most of it look as professional as possible; except for some of the edges where the tiles needed to be destroyed or missing. I think I did a pretty good job of breaking, removing and destroying this Mordheim Building’s roofing tiles. One thing I realized after I had completed this roofing project is that some of the tiles should be curled up at the ends. I did that after I took the pictures, so you’ll see that in the next couple posts.
I did the other side of the roof as well, except I only did a before and after picture. You can see those here:
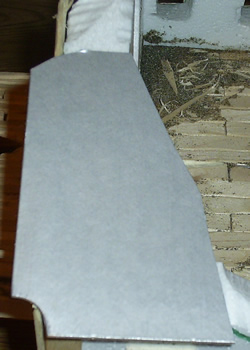
After:
I hope other Mordheim roofing contractors find this useful. If you know of any easier/better way of roofing Mordheim buildings, let me know.-Ashton SandersEDIT 12/9/07: Looking back on these tiles, I should have made them much smaller. At 28mm, these tiles are almost as big as a human… =/ They look fine when you’re not comparing them to anything, but I wanted to add a fallen tile to the debris on the floor and realized it was too freaking big; it looked like a door was sitting on the floor.
More to come.
Dec 7
Mordheim Shopping Victoriously
Living in Montana means my closest neighbor is 3 miles away, and the closest Mordheim Player is a couple hundred miles away and the closest Games Workshop isn’t in this state. So if I’m ever going to play Mordheim, it will probably be with people who haven’t played before and don’t have their own warband. So it is basically required that I have enough warbands to play with when that blue moon comes around that I can play with someone.
(If you are ever near flathead lake, drop me a line, and we can play a game or 3. =])
Currently, I have my old Skaven warband and my brother’s old Orc and Goblin warband, and since humans/empire warbands should be the most popular in a destroyed human city, I had bought the Mordheim starter set when I first started playing, but I traded the humans off to a friend for his Skaven sprues. Since I didn’t have any humans, I thought it important that I get a human warband. This started my search through eBay to find a good deal on a Mordheim human warband. Eventually I found what I was looking for: The greatest Mordheim Deal ever!
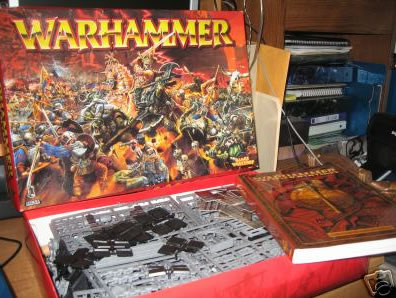
I found an old Warhammer Starter Box and a Warhammer Rulebook with a human army and an Orc and Goblin army! It’s not for sale by Games Workshop any more, so I couldn’t find any specifics as to what exactly is in it. But if it’s anything like the current Warhammer Starter Box, it’ll have about 109 models, which is more than enough for four warbands! I could probably get 6 starting warbands out of it.
Of course, it is an opened box, and some of the larger models have already been glued together, but the box definitely looks pretty full. I ended up paying (with shipping) less than I would have paid for the starter box alone (and I got a free rulebook)! Now I’ll be able to make some different human warbands. I’m very excited to get this box full of goodies!
I finally paid out some money for this Mordheim game. =]
-Ashton Sanders
Dec 6
Adding Dirt/Grime to Mordheim Church
After my last post about my Mordheim Church, i still had a couple incomplete projects to work on before I can actually start painting it. I have to add some roof tiles, and some dirt and grime. It’s not like someone is sweeping the floor every other day, and since their is no roof, the wind and rain filled the second story with dirt and grime; not to mention a large rock crashed into it.
If someone was to walk through the church, from inside to out, there would be a certain path of least resistance that is probably most taken. I tried to keep that section pretty clear, and worn down, while the rest of the floor is covered with dirt. To add dirt and grime to this Mordheim Church, I tried two different methods:
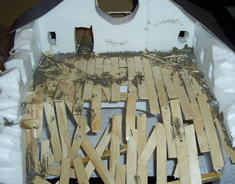
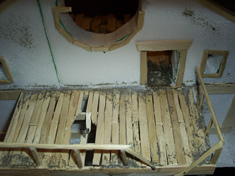
Applying Dirt Method 1: First, I put some glue direction on the floor, and spread it around the room. I filled in the corners and edges with lots of glue, and spread it around with my fingers. 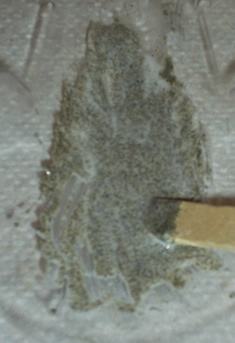 I dropped some wood chips and small wood shavings over the glue. Then I took some fine beach sand I collected at Camp Cherry Valley, and dropped it on the floor. I shook the building a little bit to get the dirt to stick to all of the glue. I needed to do this a couple times to cover all of the glue with sand. After that, I went on to…
Applying Dirt Method 2: Second, I mixed some sand, glue and water together to make a pretty fluid mix of sticky sand. You don’t want it to be too runny or too thick. Then I took a Popsicle stick to spread it around the floor of the building and into the cracks. I ran my finger over the pathway to keep the dirt in the cracks and off the worn path. When I got to the end of my second batch of sand/glue mixture, I used my fingers to rub the leftovers on the walls to add some character.
Here are some pictures of the completed product:
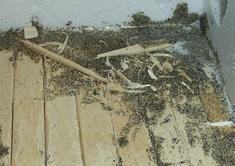
Here’s a close up of one of the corners with dirt and wood:
Next step will be adding the roof tiles. I did forget that I wanted to have some roof tiles in the dirt and grime. Hopefully I’ll be able to add it after the fact.
-Ashton Sanders
Dec 5
Impressive Wood Elf Modeling
Although I have never played with or even seen a wood elf warband in Mordheim, I have heard of them.
After a pretty long absence, Tom returned to “Tom’s Boring Mordheim Blog” with some great wood elf models. I can not express how much I love the color scheme he chose. The elves usually “have to be forest green,” but these elves aren’t, and yet they camouflage so well. He also did an amazing job on his bases. Here’s the link to view his Wood Elf Models.
-Ashton Sanders
Dec 4
Mordheim Terrain Competition
In my daily perusing the Internet, I came upon a website with lots of good content (and web ranking).
Terra Genesis has a new terrain competition that starts every month and lasts for two months. So at any given time, they’ll have two competitions going at the same time! Then all the visitors vote on the best completed submission. If you like to create Mordheim or just plain miniature terrain, Terra Genesis is a great website community to get hooked up with!
Right now, they don’t have any good competitions that I could build a Mordheim building (or terrain) for, but they should have another Competition starting on the 10th (of every month). I’ll see if I can do anything for the next competition.
I’ll keep you posted,
-Ashton Sanders
