Jan 6
Voltaire’s Magic Shop Sign
I have finally decided on what my collapsed tower used to house:
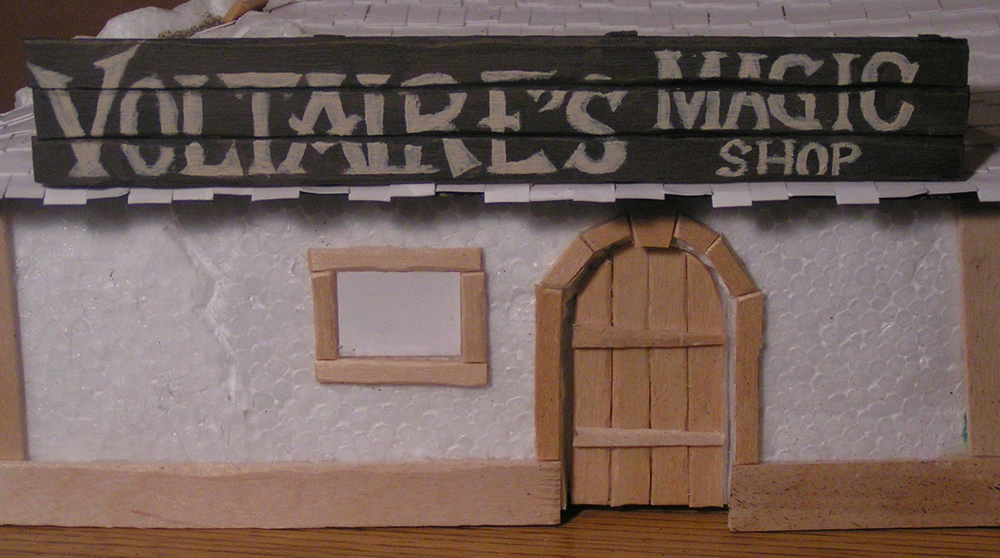
Many people don’t know that before Voltaire became famous as an author, he owned a very profitable chain of Magic Shops in Mordheim. Until, of course, the comet killed all within the city. Fortunately for Voltaire (and literature), he was spending the new year with his family in a neighboring village when Mordheim was destroyed. This tower used to be Voltaire’s research tower where he developed many of his magic potions. This is also where he gained his first love of writing.
=]
Ashton Sanders
Jan 5
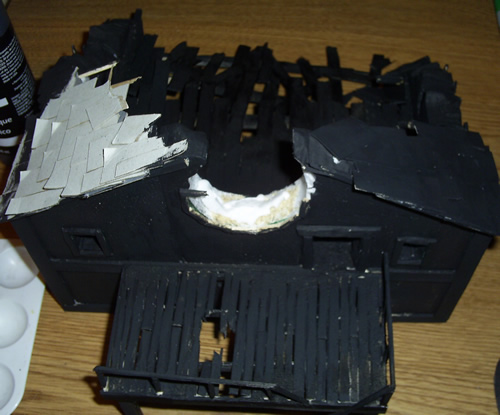
Base Coat for my Mordheim Church
I’ve started the base coat for my Church of the Broken Window. I have a couple more patches to paint, and then I’ll start on the next layers.
I should have more updates soon,
Ashton
Jan 2
Making Rubble Look Real
Here’s some tips to making a realistic looking pile of rubble!
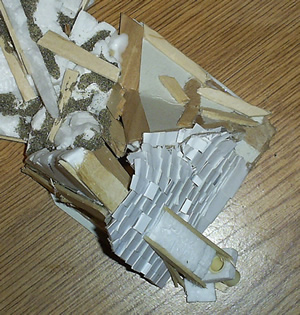
Most of the work I’ve been doing on this tower is detailing the pile of rubble. I noticed that on this competition entry on TerraGenesis.com, they made a pile of rubble to cover the batteries for the LED lights. This is the pile that he made:
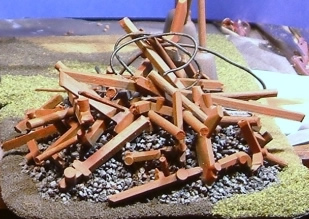
To me, this is a pretty ugly pile. I found that the reason is because the pieces of wood are on top of the gravel as opposed to in the pile. So I started making sure that my pile of rubble was very realistic. I’ve done about 4 hours of detailing work on my pile of rubble to make it look as real as possible. I’ve been filling in any deep crevices with glue and pieces of wood and foam. I filled the holes with glue and then covered it all with sand. After it dried, I shook off all the excess sand.
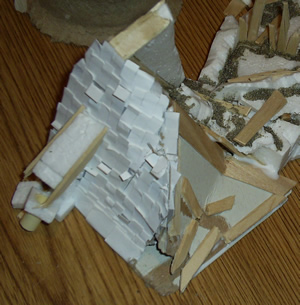
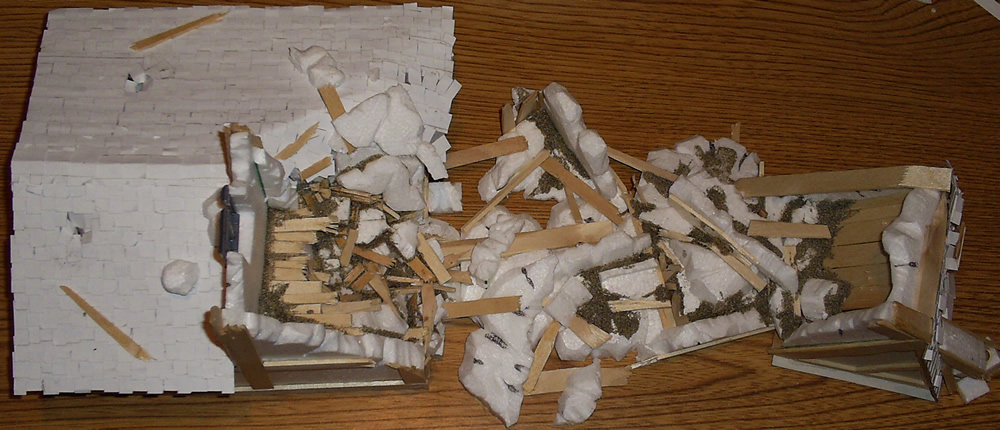
Here’s some pictures of the updates:
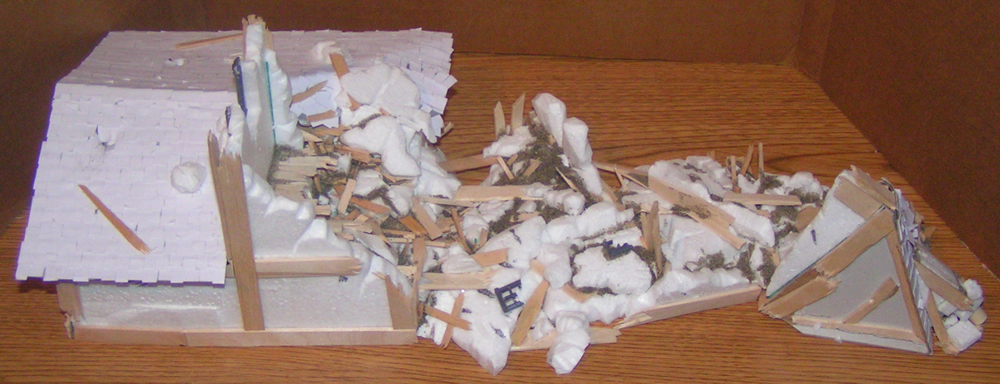
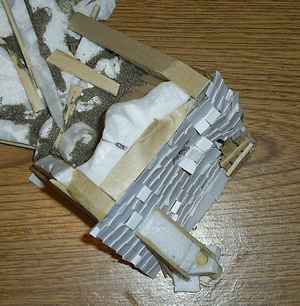
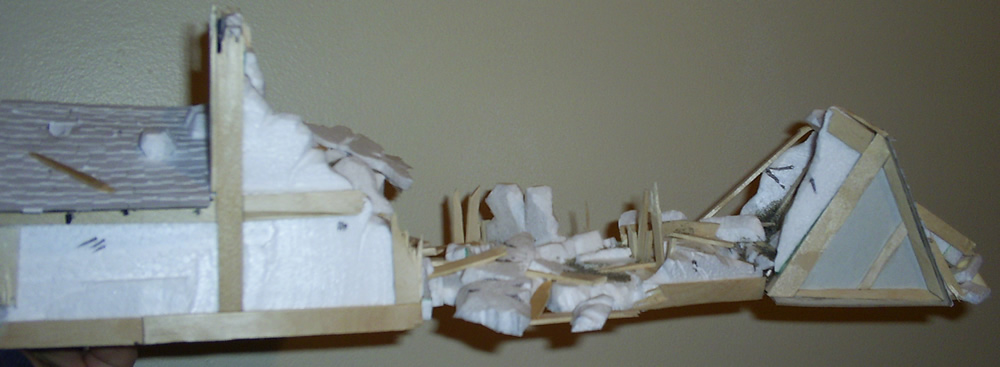
I also added a destroyed window frame to the rubble, You can see it still attached to a piece of wall in the rubble.
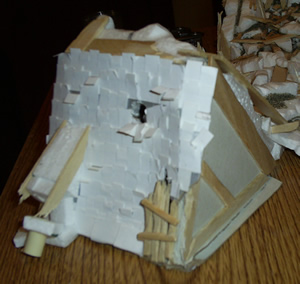
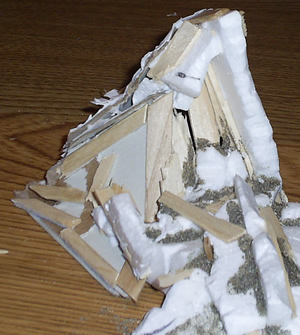
Here is a close up of the collapsed tower roof.

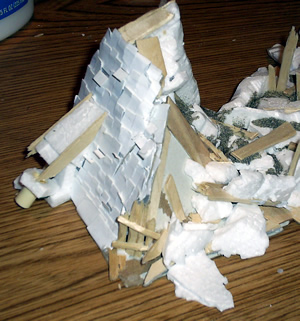
Here is a close up of the pile of rubble at the base of the building.

I hope this will help you to make great piles of rubble. =]
Enjoy,
Ashton Sanders
Jan 1
How to Destroy a Roof
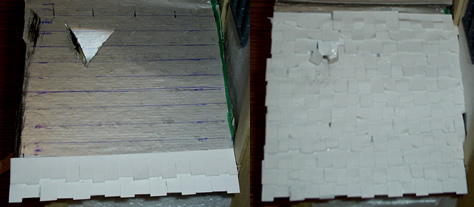
I have been working on my collapsed tower for some time now. I’ve gotten a couple comments mentioning how the roof of the tower, which fell four stories and crashed into the ground, is not destroyed enough. This is how it looked when I first create it:
That obviously is not a roof that fell four stories, so I decided to fix that. Here is the process I took to destroy my perfectly good Mordheim Roof.
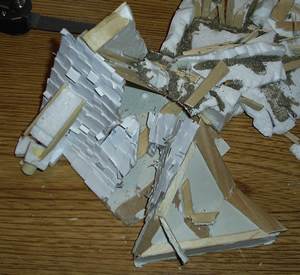

Then I glued it bent the detached section and glued it back into place:
Now I just have to do a little bit of detailing to make it fit in perfectly.
I hope you have a Happy New Year this 2008!
Ashton Sanders
Dec 28
Adding Bases to Terrain
Since my last post about adding bases to buildings, I’ve done a lot of thinking about it. I’ve compiled more points, and put them below:
Good Things About Using a Base on Your Buildings and Terrain:
- Stability: With a base, you don’t even have to worry about the stability of your large building. Just glue it down.
- Debris and Junk: Read the Rest of the Post >
Dec 27
Supporting Large Terrain Pieces Without Bases
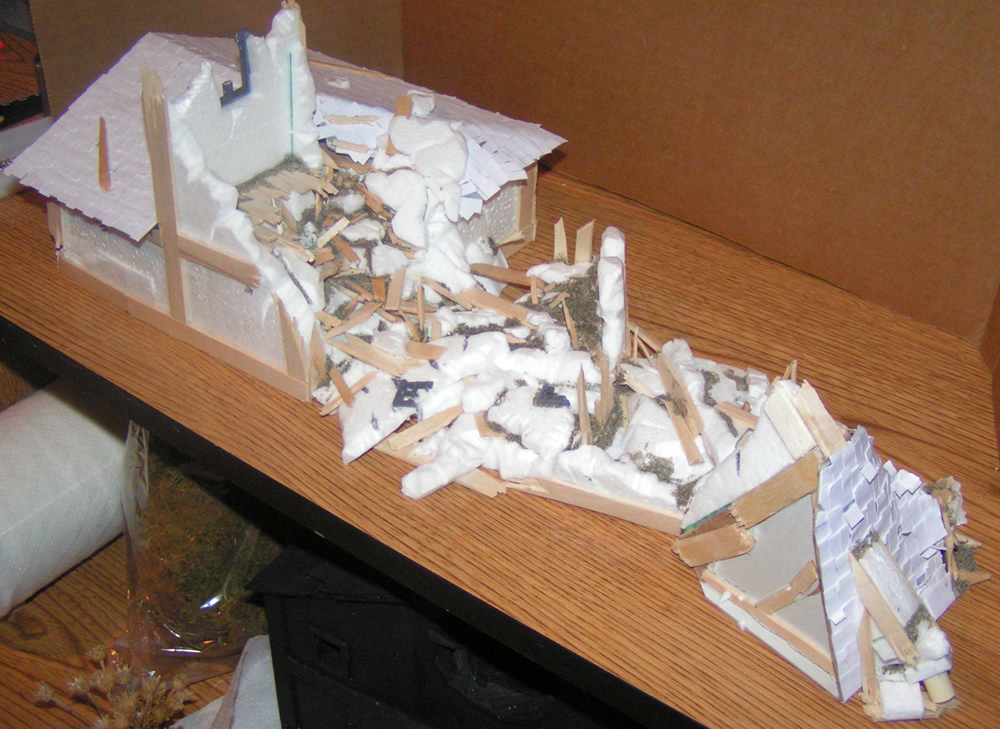
The building that I am currently working on for my Mordheim Terrain is a four story tower that has fallen over into a pile of rubble. This creates quite a long terrain piece that I am building without a base.
The biggest problem with creating this Mordheim building without a base is support. If I am not careful, after all my work, it will just break in half. There are a couple things I am doing to take care of this:
First, I’ve created, and glued into place, a Popsicle stick brace that supports the building from inside the foam. The idea behind this is similar to having rebar inside of cement walls. Here is a picture of the bottom of my terrain:
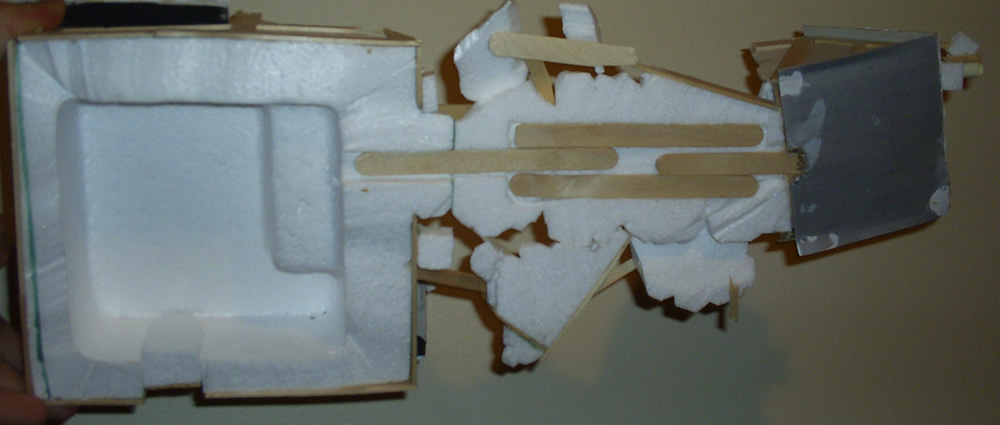
The weakest part of my terrain is on the left side of the Popsicle brace. Where the rubble meets the first floor of the building.
Second, I’ve added fallen debris that acts as support beams.
There are three sticks that look like they have just fallen over in the debris, but are actually embedded deep within the main building and glued securely to the rubble.
Lastly, I am going to create a couple piles of rubble right next to the main floor which will also add support to the weak point on my piece of terrain.
I’ve done a lot of work on the roof of the tower as well. You can see the broken chimney in this picture:
Merry Christmas,
Ashton Sanders
Dec 21
Mordheim Roof Updated
Over the last week, I’ve been trying to create a system to create small Mordheim roof tiles that look good. Most scratch-built Mordheim buildings these days have 1/2″ to 1″ wide roof tiles which translates to 2.5 – 5 feet wide. Which, by the way, is completely ridiculous. After lots of fiddling with different types of material for my roof tiles, I tore off my old Mordheim Roof and created a new one from card stock.
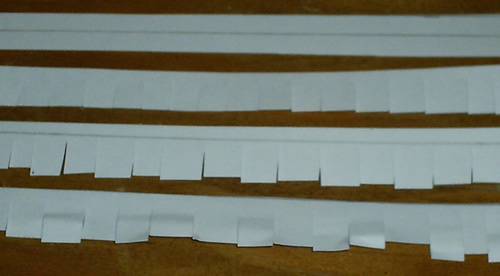
This is the process I created to make the Mordheim roof tiles:
- Cut a strip of card stock 1.1 cm wide.
- Cut slits along one side to create the different tiles.
- Then I cut off the ends of most of the tiles to give each tile a different length.
- Then for to show wear, I bent the tiles and chipped the corners of every other tile.
Here’s an image of the different steps:
As you can see the completed strip has as much character as I could think of adding (without paint). So I went ahead and cut up almost an entire 8×11″ piece of paper and glued them down on the roof of my competition building:
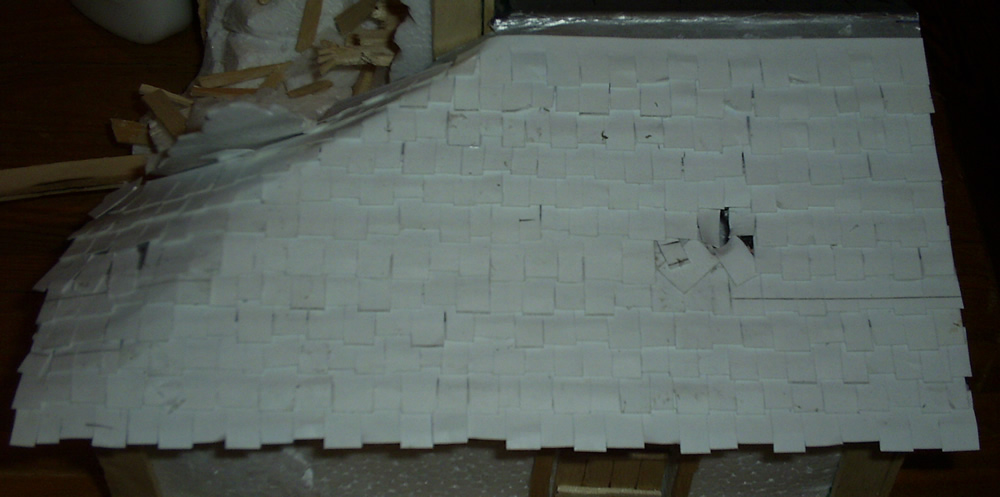
Here’s the other side:
Note the two holes I added to create the leaky roof. I think this came out looking very well. I only have one row of tiles along the peak of the roof to add, and This section of roof should be done.
The only short-coming with using card stock is that it will soak up the paint and become wet. Hopefully it won’t “melt” together and loose it’s shape.
More to come,
Ashton Sanders
Dec 19
New Roofing Tiles
My latest work has been on my Competition Entry for TerraGenesis.com.
I have a couple of minor details to work out before completing the construction phase of my project and moving on to the painting phase. One of the biggest problems I’ve faced is getting the roofing tiles to work. In almost all pictures of Mordheim roofs that I have seen, the roofing tiles are about 1/2″ wide. Which translates into almost 2 1/2 feet wide in Mordheim size. There is no way that most buildings (even in fantasy) would have roof tiles 2.5 feet wide! So began my quest for smaller roofing tiles.
I got a deck of mini playing cards for Christmas and cut those up into rows of roof tiles. This is where I ran into my problem: The playing cards were so laminated, paint wouldn’t stick to them. I tried everything I could think of, and asked for help at the TerraGenesis forum. Unfortunately nothing could solve my problem until I realized I could find a similar material that wasn’t laminated: Card Stock. I even had a couple sheets in my laptop bag!
I cut up one row of roofing and glued it down tonight. I’ll be adding and update about it tomorrow.

Enjoy,
Ashton Sanders
Dec 17
Warhammer Box Has Arrived!
After a week of nerve-racking waiting, my Warhammer starter set has arrived! It was apparently too big to fit inside my mail box, so the mailman just had it balanced on top of it. That’s definitely the first time that has happened to me.
I eagerly brought it in and spread out the contents of it. (If you didn’t read from earlier, I’m planning on using these models for my Orc and Human warband.)
Here is a slightly out of focus picture of the back of the Warhammer starter box:
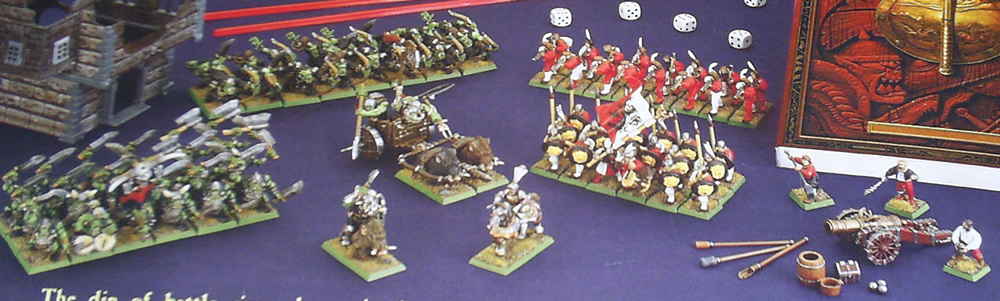
You can see in this picture sets of 4 regiments of 18 guys. From Left to Right: Orc Warriors, Orc Archers, Human Riflemen and Human Spearmen. This box also includes a Human canon and an Orc War Chariot and a General for each.
Here’s a picture of all of these models still in their sprues:
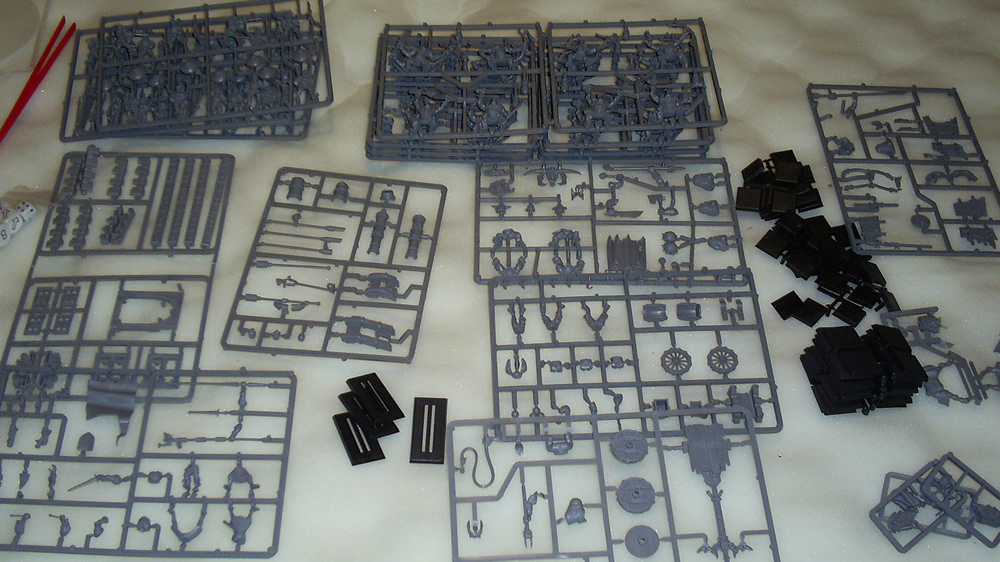
At the top of this picture, you can see two stacks of 4 sprues each. These are the regiments of warriors; one stack for the humans and one for the orcs.
Here’s a close up of the Humans and Orcs Sprues:
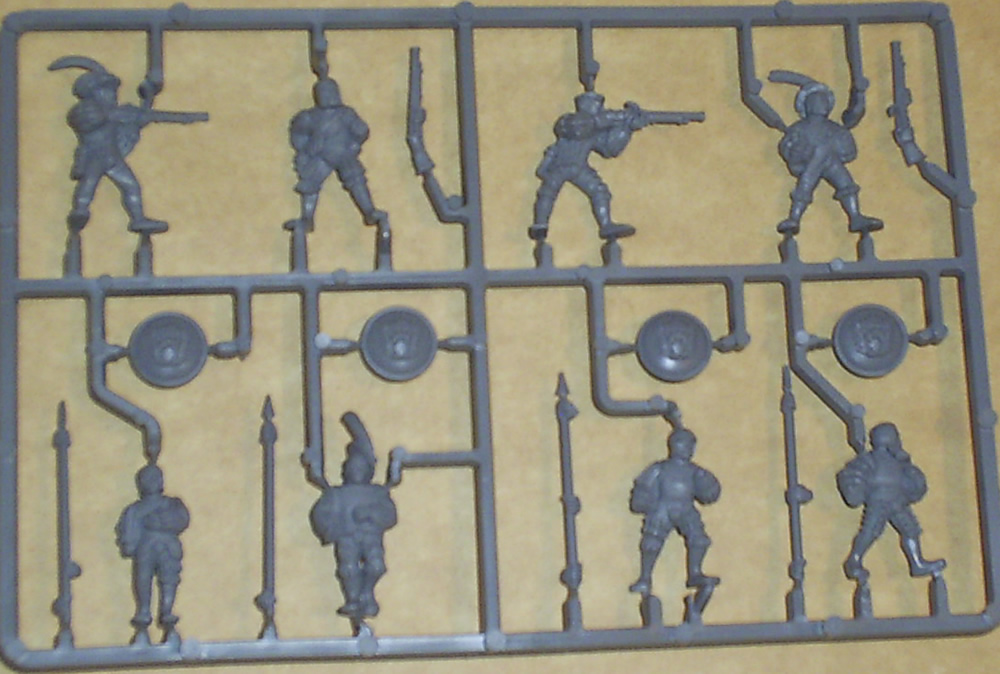
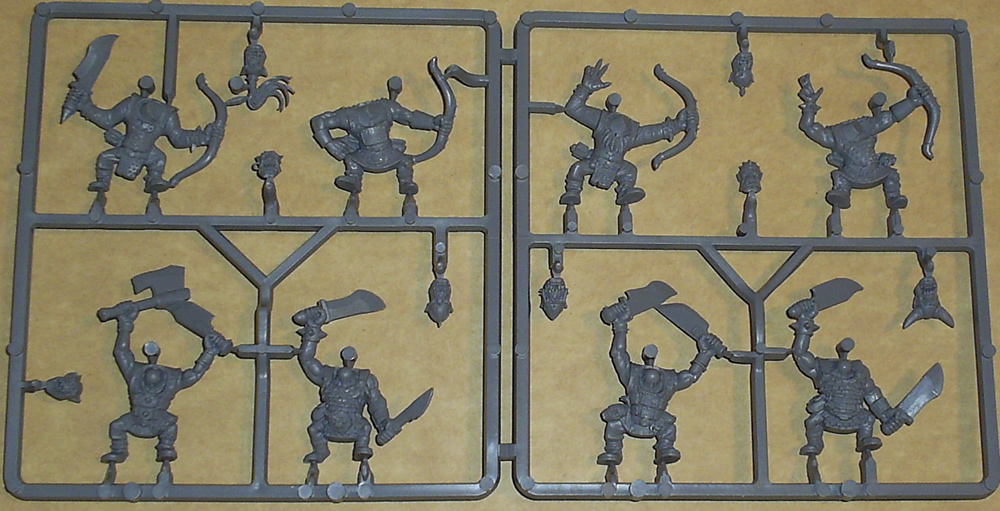
I’m looking at selling or trading some of these sprues as this is more than enough for two warbands of each species, and I’m only putting together 1 of each.
-Ashton Sanders
Dec 16
Mordheim Sprues Ariving Tomorrow!
I received a note in my mailbox late on Saturday night saying that they had a box for me at the post office! Which has to be my Warhammer Starter Set that I shopped victoriously for!
I’m very excited to get the box, but since today was Sunday, the post office was closed. So I’m having to wait almost 48 hours before I can get my package. It’s like Christmas; waiting for my presents. But that’s okay. I have patience, and the “Fallen Over Competition” is keeping me very busy/entertained until my package arrives.
I think the first thing I’m going to do, is put together a nice, well-painted Human model to display with my buildings for the sake of scale.
Enjoy,
Ashton Sanders
