Nov 30
Second Mordheim Building Begins
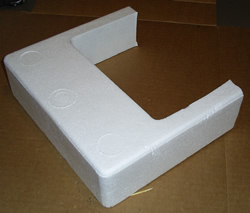 My wife bought be an electric heater as an early Christmas present, and the greatest thing about it is some sweet Styrofoam that came with it! I sliced off a section of it with my foam cutter, and you can see what I started with on the right.
I instantly decided that this was going to be a three-sided, two-story building. I also am going to use that thick block of Styrofoam to my advantage. I’m going to make the second story caved in on the first story to such a degree that you can’t actually access the first story. I can build a closed door on the front, some closed-shutter windows along the side.
 After I had my foundation, I had to create my second story. I learned from my mistakes of creating my buildings too large for the Mordheim scale, so I brought it down on this one. The only real draw back with using this Styrofoam, is the walls are almost 4 feet wide (per Mordheim standards).
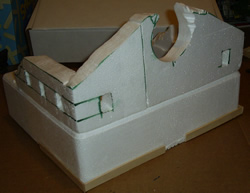
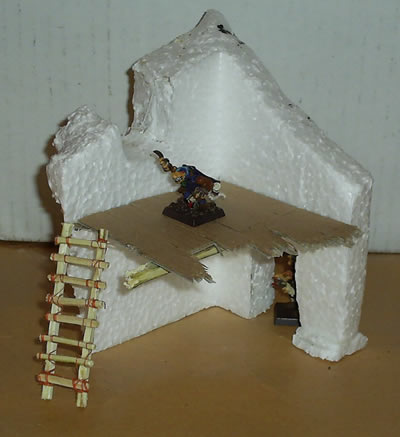
To create the top floor of this building, which I have decided is going to be a church, I took two “L”-shaped pieces of Styrofoam and cut them to fit perfectly on top of the Foundation. I used my foam cutter to cut the roof line onto this Mordheim Building. I also cut that large circle into the front wall to be the remnants of a stained-glass window.
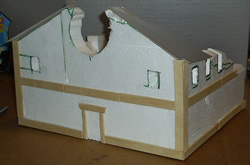
I then measured some spots for small windows. Since these windows were so small and narrow, I couldn’t use my foam cutter or the same knife that I destroyed the first time I cut Styrofoam. So instead, I used a retractable razor blade. I heated the blade in a fire, and then stuck it into the foam to “melt” my windows into place.
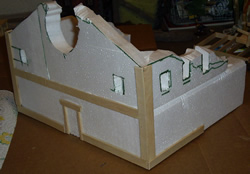 I then started working on covering up the cracks that were created by having the two different sections of Styrofoam connecting. I used wood framing to do this. I also decided to add wooden baseboards around the entire ground level as well. Of course my favorite material for wood framing in Mordheim is Popsicle sticks.
I created the door frame for the front of the church. I will probably end up painting the door onto a piece of card stock, and then gluing it into place. This will set the door back behind the door frames.
I don’t look forward to framing all of the windows, but I will probably figure out some measurements that work, and just cutting all the pieces to size.
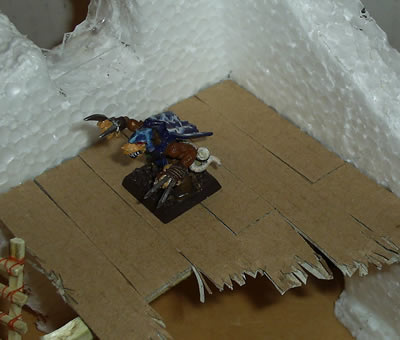
 In this picture, I cut some pieces of thick card (from a Bed, Bath and Beyond Gift Box), and set it where it will probably go. These pieces of card will be glued into place and will be what holds up the roof leftovers. I will do my best to completely cover it with roof tiles, which probably will also be cut from the same card.
I did this whole project in about an hour, and I’m very excited to continue working on it.
-Ashton Sanders
Nov 29
First Completed Mordheim Building
I have finally completed my first Mordheim building. I started this building at about the same time I started this blog, so it’s been two weeks in the making. In my defense, this Mordheim building isn’t the only Mordheim project I’ve been working on.
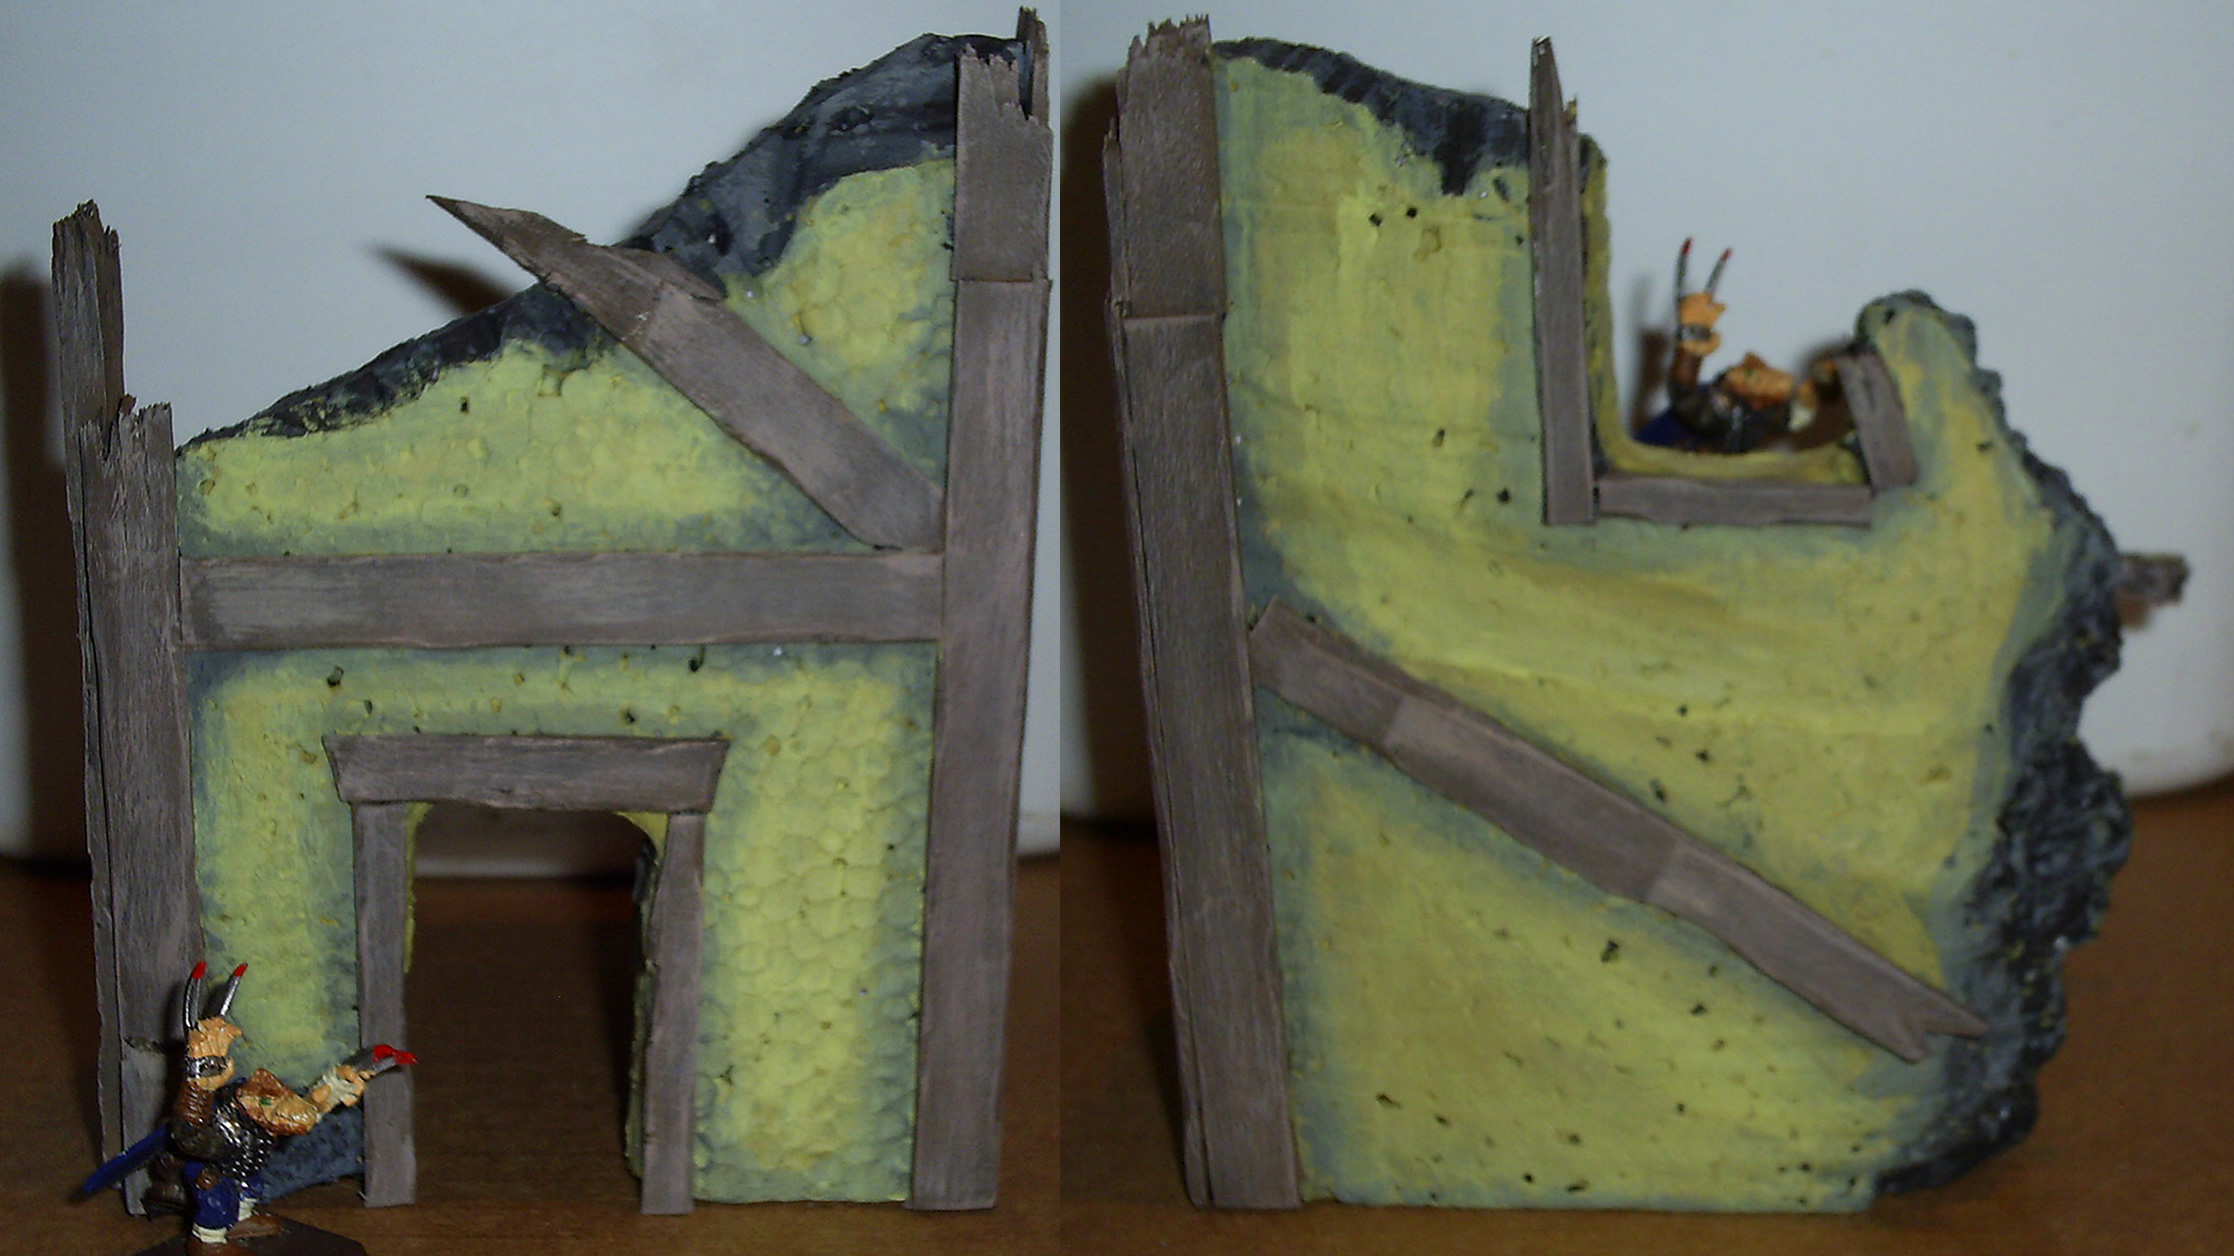
I decided to go with a yellow paint with wooden accents. Here is the completed Mordheim building:
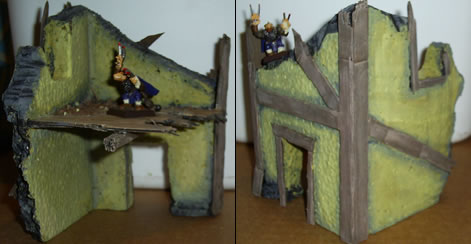
Here are the two outside walls. Click on the image to view larger image.
I’ll be putting up another image of the “gravel pile” on the second floor. I need to get a good picture with normal daylight.
I think for my first building, it came out very well. The only problem with this Mordheim building is that its scale is too large. Where Mordheim Models are 28mm, this building is closer to 38mm. When compared to the 3-story tavern/building that comes in the Mordheim box, they are almost the same height. The second story floor of this yellow Mordheim building comes up to the windows on the second floor of the original Mordheim building. The window and door on my building are also too large.
Notes to keep in mind,
Ashton Sanders
Nov 28
Getting out the Mordheim Paints
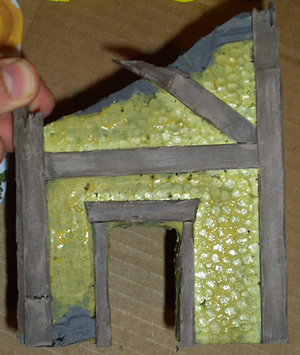
I’ve finally taken out my paints and started painting my first Mordheim Building. This picture is after my first coat of yellow (for the walls) and brown (for the wood) after the base coat.
As you can see, I went with painting the walls of this building yellow. I didn’t really have any thought or reason behind it, that’s just the color I pulled out. I should have darkened the yellow a little more before I put it on, so that the base coat for my Mordheim Building would be darker and I could add highlights on top of it. I’ll probably end up doing this anyway. It was nice how you could see the black base coat through the light layers of the yellow. I could have used that to my advantage by putting less yellow paint on the sections of the wall that I wanted to be darker. Live and Learn. =]
I haven’t really decided what I’m doing with that “rock” that is being used as a support on the left side of the door. It was a improvisation to fix a wall I melted. We’ll see how it come out tomorrow after the final coat.
Here is a picture after my second coat of paint. I also realized that the broken-off parts of the wall should be gray as the building was painted before the wall was knocked down… not after. You can also see a little bit of dry-brushing that I did on the wood to make it look more like wood. I started with a dark brown base-coat for the wood, and then got a light red-brown for the highlighting.
Until then,
Ashton Sanders
Nov 25
To Add a Base or Not to Add a Base
(That is the question…)
I’ve been toying with the idea of adding bases to my buildings. I am almost ready to add a coat of paint to my first Mordheim Building, and I need to decide whether or not I want to add a base to it. Here’s a picture of a Mordheim building with a base, and you can click on the link to my first Mordheim Building above to see a building without a base.
The Pros of adding a base to your Mordheim building:
- When a building has a base, it is much easier to add debris and trash to the floor around the building.
- It also adds a lot of stability to your building. It is much easier to keep your building from falling over from the weight of your Mordheim Models.
- You can use them to add hills and elevation to your Mordheim Board. I can guarantee the City of the Damned is not totally flat.
The Cons of adding a base to your building:
- You get that annoying lip around the edge of the base that can distract from.
- The base can easily end up as a different color than the board you are playing on. (Use a friends board, make a new one, etc.) I’m trying to build these buildings for aesthetics, this will cause them to look very ugly. Here’s an example of Mordheim bases looking ugly.
- Buildings with bases cannot be placed very close together, so if you are playing the “Street Fight” scenario, you will have trouble making a wall of buildings.
Can you think of any other Pros or Cons? I’ll try to update this list.
I think I will end up adding small bases to some of my buildings, but I’ll have to work on camouflaging the bases really well, and I’ll probably need to put together a board first. Does anyone know where I can find a tutorial about how to create a Games Workshop or Mordheim Board (with the sand on it)?
-Ashton Sanders
UPDATE: For a more detailed post on this subject check out my newer post: Adding Bases to Terrain.
Nov 24
More Mordheim Ladders
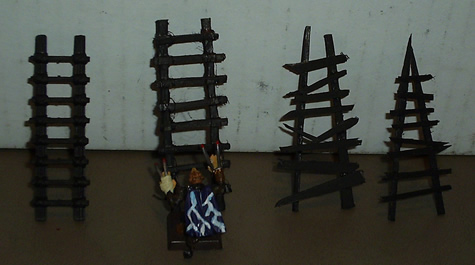
I’ve expanded my collection of Mordheim Ladders. I only have one GW ladder. (I think that’s all that comes in the box.) And ladders are extremely useful in Mordheim (not so much for Skaven, but for the other, not so agile warbands =). I’ve decided to make a couple ladders in the different construction styles of the Warbands of Mordheim.
You may remember in my first Mordheim Ladder post, I mentioned that it was a ladder that was definitely made by humans. After I said that, I went on a quest to create a ladder made by my Skaven Warband. I actually made two. Both of these were created from Popsicle sticks, and I think they came out pretty well. I still have to base coat that last ladder. Here are my four Mordheim Ladders:
Nov 23
Mordheim Fence – 10′
Over the last couple days, I’ve been trying to be as inventive as I can with my Popsicle sticks. I think I’ve done pretty well. I’ve created a number of Mordheim Terrain pieces. I’ll be posting them over the next couple days.
The first thing I made was a 8′ picket fence. Each fence plank was the normal width of a Popsicle stick, and they came to a point like a normal picket fence. After gluing it all together with Elmer’s Glue, I realized that it wouldn’t fit in at all. Even after I removed planks and make it look as destroyed as possible, it looked way to big, and the planks were too wide. (Sorry, no pictures.)
So I took it all apart, and cut all of the wooden planks in a half. I scraped all of the Elmer’s Glue off of the planks, and lied them all down with the points facing in the same direction. I think this fence came out pretty good. Here’s a picture of my final 10′ Mordheim fence:
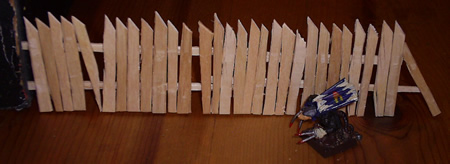
That is my Assassin Adept, and my old warband symbol.
I’ll be base coating this, and then pretty soon, I’ll start on the painting stage for all of my base-coated Mordheim terrain and buildings.
Enjoy,
Ashton Sanders
Nov 22
Base Coat for My Mordheim Building
I’ve done a lot of filling and testing with my first Mordheim Building. I’ve tested out cardboard for the 2nd floor’s wood paneling, and have worked on framing the windows, doors and corners. I was having trouble trying to find inexpensive material to use as wood, and Popsicle sticks came to the rescue. But cutting up Popsicle sticks, I’ve been able to get wood of all shapes and sizes for just about any purpose.
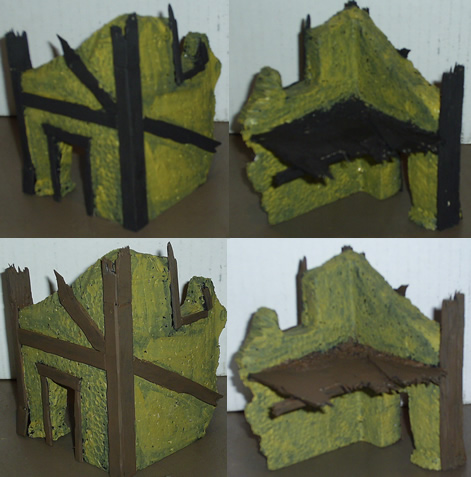
After completing the design of my first Mordheim Building and putting all of the wooden accents, I did a base coat with straight black acrylic paint. Here are some pictures taken with Ugh and Squeamish:
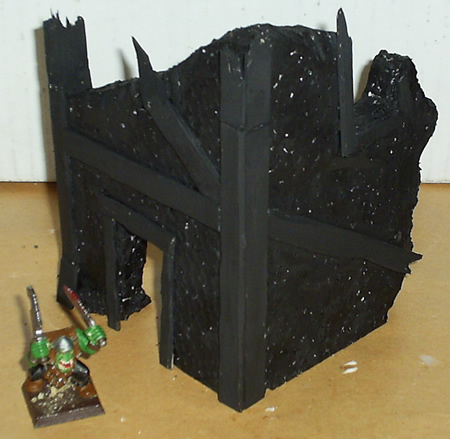
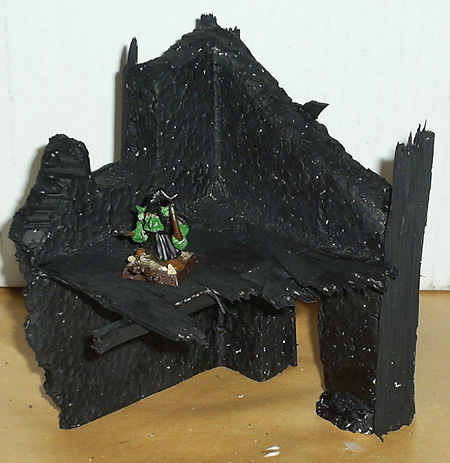
As you can see there are still a billion little white specks from the Styrofoam. I hope to have those well disguised by the time I get the final coat of detail paint on this Mordheim Building.
Happy Thanksgiving
-Ashton Sanders
Nov 16
Experimenting with Mordheim Shrubs
Most Mordheim Boards don’t have any sort of plant life or shrubbery, which is probably from the thick cloud of ash and poison that hangs over the City of the Damned. But I disagree. After the comet crashed into the city of Mordheim, it annihilated a good portion of the inhabitants instantly, and the survivors started mutating and going crazy. I figure this would be about the same process of the plant life.
I have another reason to want plant life on my Mordheim board: I have lots of creepy looking weeds, that could fit in very well to my Mordheim board and add a lot of character.
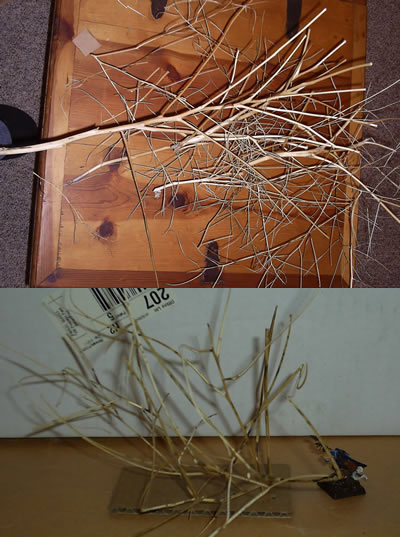
That said, lets move on to making my second Mordheim plant. This one is going to be a shrub, since my Mordheim Tree was too freaking huge. I started with the same tumble weed that I made my tree with. I clipped off a small group of the branches and stuck them into a piece of cardboard. I soon discovered how horrible this idea was. Below you can see the plant I used, and what it made. I quickly threw away the idea of using that plant for a shrub. Here is my Shrubbery FAILURE:
But I didn’t give up yet. I knew something cool could come from all these creepy weeds I have in my yard. I tried my next weed, which is a noxious weed. This one has creepy pod like flowers that don’t ever wilt away. I cut the pods off and stuck them into a piece of cardboard. I think it may have been too much, but it’s a great start. I added a layer of Elmer’s Glue to the floor to hold the plants in place.
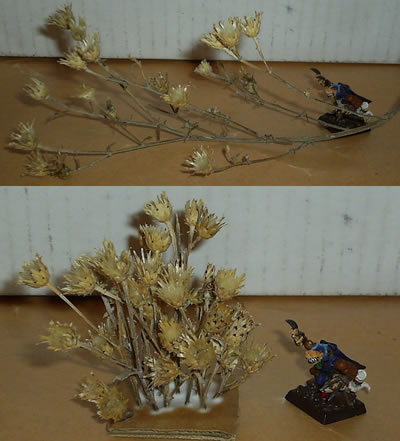
I don’t know if I’ll ever use that shrub, but it was a good start, and I’ll be developing more shrub-like plants soon.
-Ashton Sanders
Nov 15
Mordheim Construction – Cutting Foam
In my earlier post I described how I had been cutting foam. It was a slow and tiring process.
Yesterday, I went to a couple hobby shops in Kalispell. I purchased my very first Woodland Scenics Hot Wire Foam Cutter.

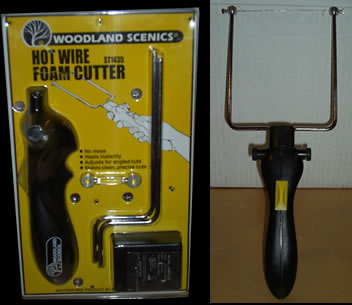
All you do is plug it into the wall, and press the yellow thumb-trigger forward, and “Voila” You have a pipin’ hot wire that glides through foam like a hot knife through… butter… (I know, that wasn’t much of an analogy, but I couldn’t think of anything else.) It works pretty well too. This foam cutter gives you a little under 4 customary inches of hot wire to cut with. So don’t get a 5″ cube, or you’ll only cut off the corners. Here is the first victim of my new tool:
My Second Mordheim Building (before and after):
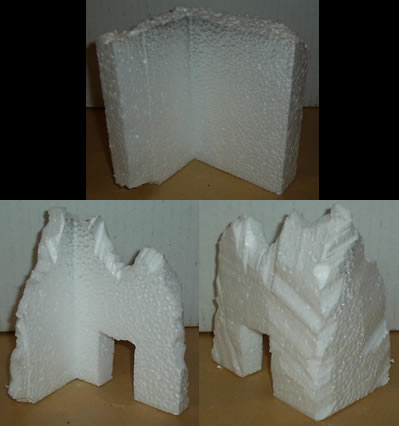
Look at that character! Both of the walls had been different sizes (one was almost twice the size of the other). Using this foam cutter, I was able to make both walls the same size, and add a good deal of character with ease. The only problem with cutting foam with a hot utensil, is the toxic fumes, so be sure to always use a hot foam cutter in a well ventilated area.
-Ashton Sanders
Nov 15
Mordheim Building – Floor Tiles
I’ve done some more work on my first Mordheim Building.
First, I added wood plants as floorboard to the second story floor. I didn’t have any balsa wood handy, so I used some thin cardboard and cut them into 1×12* strips. I had to be pretty inventive to try to make the broken ends of the cardboard actually look like wood. I tried to splinter the cardboard to make it look like very broken/thrashed wood.
Second, I cut a 4×4* support beam, and glued it to the bottom of the cardboard. Even though these houses were not built to withstand a comet, they were built to withstand normal human and furniture weight.
Third, I took a small piece of clear fiberglass, cut it to be a broken piece of glass and inserted it as a broken piece of glass in the window.
(Kitves, the Eshin Sorcerer, and Nutz, the youngblood, volunteered for this photo.
You can also see my homemade Mordheim Ladder)
This building is definitely coming along much better than I thought it would. Now I just have to do the finishing touches and get some paint on it. I went to a hobby shop yesterday and got some tips on how to paint Styrofoam, because it can definitely be a pain.
-Ashton Sanders
*This is in miniature scale. So 4×4 beam would be a 4 inch by 4 inch beam to a Mordheim model. This more like 4 mm to normal humans.
