Jan 26
Roof Painting
I’m getting very close to completing my collapsed tower.
The other day, I painted the roof tiles. Here is an image with the different dry brushing steps I went through.

Unfortunately it’s hard to see a lot of difference in the color. I can tell you though that the very left tiles are completely black, and the tiles on the right are very blue. I’ll try to take some better pictures of it soon.
Enjoy
Ashton
Jan 12
Painting the Mordheim Cement
I’ve narrowed my pile of rubble down into three main colors.
Before this Mordheim tower was destroyed, it stood four stories tall, and was made of gray cement. This gray color is definitely going to be the most prominent color in my pile of rubble.
The next most prominent material in my Voltaire’s Magic Shop is wood. Each floor and all of the stair cases were made of wood and although many of the loose pieces of weed have been hauled off by travelers to build ladders, mend fences and make shields, there is still a good portion of wood sticking out from the rubble. There are two main types of wood here. The first is the weathered, darker wood from the framing on the outside of the building. The second is the lighter wood from the interior of the tower. This wood didn’t have to endure the years of harsh weather before being knocked over by a comet.
The last color is the color on the outside of the tower/building. This color will only be on a few sections of the cement. I still haven’t made a final decision on what color I’m going to paint this building, so this color is up in the air.
I will be painting my pile of rubble (along with the building) in this order. So here we start with the gray cement. Here is the first coat of dark gray:
I will need to finish up this tower by the end of February, so look for a good number of posts from me on this project in the near future.
-Ashton Sanders
Jan 9
Mordheim Color Testing
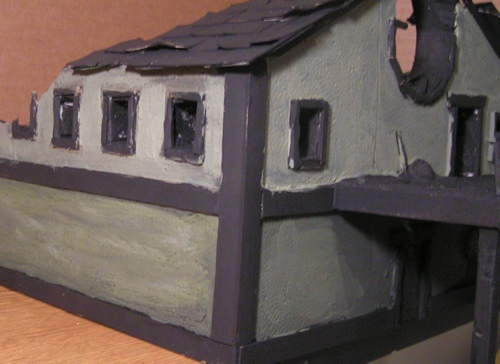
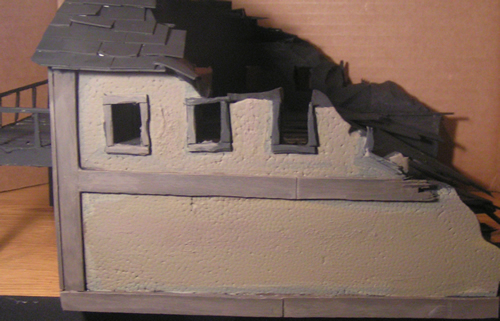
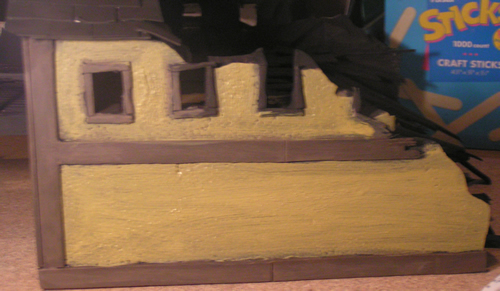
I now have two Mordheim terrain buildings that I will be painting soon. I wasn’t too excited about the wall color on my first Mordheim Building, so I thought I’d do some testing first. Here are some sample paint jobs I’ve done on my Destroyed Mordheim Church. I’ve already shown these pictures to a number of people, and so far, Green has gotten the most votes. Let me know what you think:
Green:
Brown:
Yellow:
Thanks in Advance,
Ashton
Jan 5
Base Coat for my Mordheim Church
I’ve started the base coat for my Church of the Broken Window. I have a couple more patches to paint, and then I’ll start on the next layers.
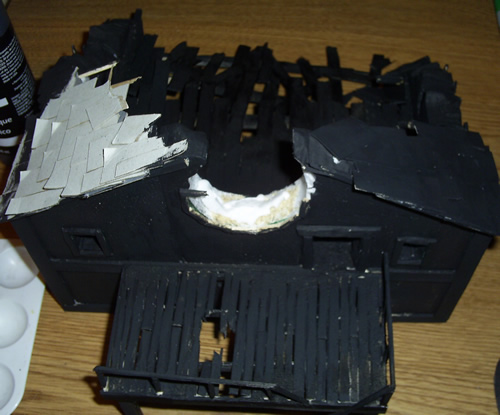
I should have more updates soon,
Ashton
Dec 5
Impressive Wood Elf Modeling
Although I have never played with or even seen a wood elf warband in Mordheim, I have heard of them.
After a pretty long absence, Tom returned to “Tom’s Boring Mordheim Blog” with some great wood elf models. I can not express how much I love the color scheme he chose. The elves usually “have to be forest green,” but these elves aren’t, and yet they camouflage so well. He also did an amazing job on his bases. Here’s the link to view his Wood Elf Models.
-Ashton Sanders
Nov 28
Getting out the Mordheim Paints
I’ve finally taken out my paints and started painting my first Mordheim Building. This picture is after my first coat of yellow (for the walls) and brown (for the wood) after the base coat.
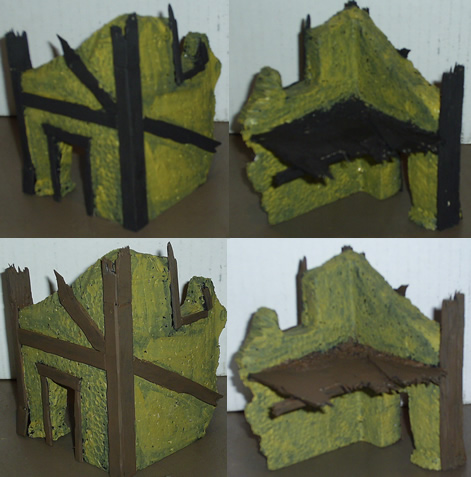
As you can see, I went with painting the walls of this building yellow. I didn’t really have any thought or reason behind it, that’s just the color I pulled out. I should have darkened the yellow a little more before I put it on, so that the base coat for my Mordheim Building would be darker and I could add highlights on top of it. I’ll probably end up doing this anyway. It was nice how you could see the black base coat through the light layers of the yellow. I could have used that to my advantage by putting less yellow paint on the sections of the wall that I wanted to be darker. Live and Learn. =]
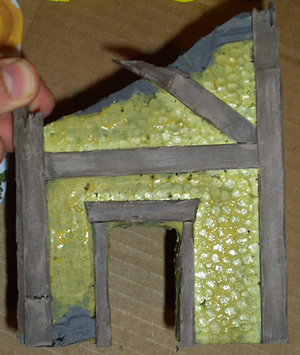
I haven’t really decided what I’m doing with that “rock” that is being used as a support on the left side of the door. It was a improvisation to fix a wall I melted. We’ll see how it come out tomorrow after the final coat.
Here is a picture after my second coat of paint. I also realized that the broken-off parts of the wall should be gray as the building was painted before the wall was knocked down… not after. You can also see a little bit of dry-brushing that I did on the wood to make it look more like wood. I started with a dark brown base-coat for the wood, and then got a light red-brown for the highlighting.
Until then,
Ashton Sanders


