Nov 23
Mordheim Fence – 10′
Over the last couple days, I’ve been trying to be as inventive as I can with my Popsicle sticks. I think I’ve done pretty well. I’ve created a number of Mordheim Terrain pieces. I’ll be posting them over the next couple days.
The first thing I made was a 8′ picket fence. Each fence plank was the normal width of a Popsicle stick, and they came to a point like a normal picket fence. After gluing it all together with Elmer’s Glue, I realized that it wouldn’t fit in at all. Even after I removed planks and make it look as destroyed as possible, it looked way to big, and the planks were too wide. (Sorry, no pictures.)
So I took it all apart, and cut all of the wooden planks in a half. I scraped all of the Elmer’s Glue off of the planks, and lied them all down with the points facing in the same direction. I think this fence came out pretty good. Here’s a picture of my final 10′ Mordheim fence:
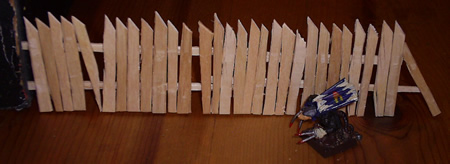
That is my Assassin Adept, and my old warband symbol.
I’ll be base coating this, and then pretty soon, I’ll start on the painting stage for all of my base-coated Mordheim terrain and buildings.
Enjoy,
Ashton Sanders
Nov 22
Base Coat for My Mordheim Building
I’ve done a lot of filling and testing with my first Mordheim Building. I’ve tested out cardboard for the 2nd floor’s wood paneling, and have worked on framing the windows, doors and corners. I was having trouble trying to find inexpensive material to use as wood, and Popsicle sticks came to the rescue. But cutting up Popsicle sticks, I’ve been able to get wood of all shapes and sizes for just about any purpose.
After completing the design of my first Mordheim Building and putting all of the wooden accents, I did a base coat with straight black acrylic paint. Here are some pictures taken with Ugh and Squeamish:
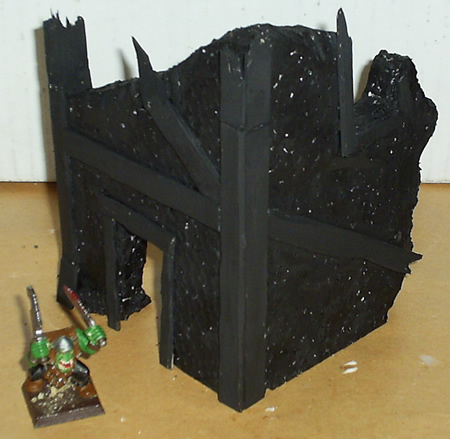
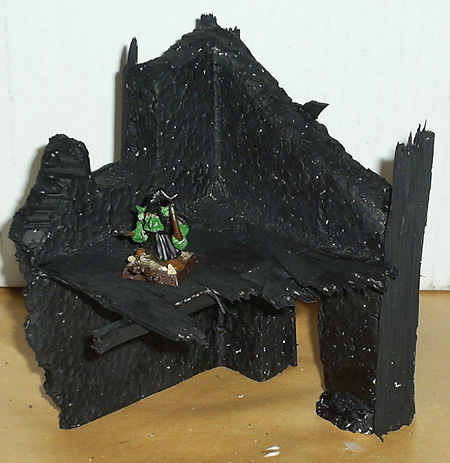
As you can see there are still a billion little white specks from the Styrofoam. I hope to have those well disguised by the time I get the final coat of detail paint on this Mordheim Building.
Happy Thanksgiving
-Ashton Sanders
Nov 21
Skaven Warband Roster for Mordheim
Here is my Skaven Warband Roster (in a zip file).
Explanation: This is my Skaven Swarm.
I have 5 heroes with minimal equipment and no armor. My Assassin Adept (Leader) has fighting claws because those claws are awesome. Besides that, every other hero has either a sword and dagger or spear and dagger. (They both cost 10g. The sword gives you a possible save to hit and the spear gives you the first hit when someone charges you.)
For henchmen, I got 1 Vermikin with a club and dagger, and the rest of the gold crowns (180) went to get 12 Giant Rats. Nothing like starting the game with 18 models while most warbands start with 6-8. This swarm with some cheap ganging tactics ends up with 3 or 4 instances of 4 vs 1, and the other team instantly has to take a route test.
Long live the Swarm!
-Ashton Sanders
Nov 20
Painting Styrofoam for Mordheim Buildings
I don’t think there’s a job more tedious than painting Styrofoam. It would be simple to spray paint it all black for the base coat, but it’s Styrofoam, and it will bubble and melt into a soggy pile of acid when it reacts to spray paint. It reacts with just about any painting or gluing material. So the only real solution is to glue it together with Elmer’s Glue and paint it with Acrylic or water based paints. But since Styrofoam has all the holes and cracks between the white balls, you have to go over it again and again with a detail brush painting the inside of the holes with black (acrylic) paint.
I have experimented with multiple things to get the holes to close up, but nothing has worked. I’ve tried heating the Styrofoam over a flame, using the hot-wire foam cutter, etc., all to no avail.
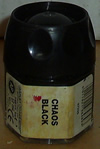
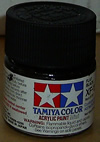
On the subject of painting Styrofoam, I thought I’d discuss paints. I have this old Games Workshop Citadel paint pot (with the screw on lid) which costs anywhere from $2.50-$3.50. The new paint pots cost $3.00 at my local Tabletop gaming store. This is the paint that says “Citadel Colors” on the back. This paint pot has 12ml of paint in it and ends up being $.25/ml.
The next paint pot to discuss I bought at a local hobby shop for two dollars. This is also black and is acrylic paint. This paint pot costs $2.00 and contains 10ml of paint. So it’s less money for a little less paint, but overall a better deal: $.20/ml. I started painting one of my Styrofoam buildings with this pot, and it’s over half gone. I couldn’t feel justified spending $2.00 to paint one corner of a building, so I went out and bought the next bottle.
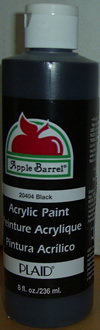
This large bottle of paint has 236ml of black paint and was $1.99. No matter which way you look at it, it was a good deal. It has a simple pop top, and has worked wonders on my Styrofoam Mordheim building. (I’m almost done with the base coat, and then I’ll post it.)
So yes, obviously the huge bottle of Acrylic paint for under $2.00 is the best deal for painting small and large Mordheim buildings. This ends up costing $.008/ml, and is what I’m looking for when it comes to base coating Styrofoam buildings for Mordheim. I have yet to see how the quality shakes down for miniatures, and only time will tell.
Until then,
-Ashton Sanders
Nov 19
Mordheim Building Materials
Obviously, the most common building material used to build Mordheim, like most fantasy worlds, is wood. I spent yesterday looking for some ways to create good Mordheim-sized wood for building construction.
I came up with some very rugged wood chips by cutting slivers off of an old, beaten-up 2×4(x8). I cut them to many different thicknesses. some were 2 Mordheim inches thick, but most were like 8-12 inches thick.
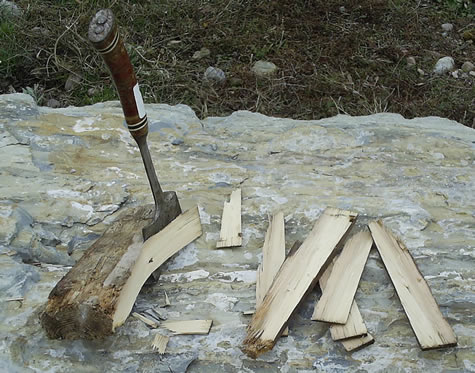
Obviously these “slivers” will still need to be cut again to make them thin. It’s hard to tell from this picture, but these pieces of wood are very ruff, and will look great dry-brushed.
I also bought a box of 1000 Popsicle sticks. After cutting off the rounded edges of a Popsicle stick, it ends up being approximately 2×12 Mordheim inches, which is perfect for construction. I have also used these Popsicle sticks for framing my first building. I should finish the base coat today, and I’ll have pictures tomorrow.
I have an illusion of grandeur of actually creating an entire building like a normal wood-framed house.
-Ashton Sanders
Nov 18
Best place to eat in Mordheim
Everyone knows that most human and Skaven warbands never sleep within the walls of Mordheim, the City of the Damned. But, where do they eat lunch? It has been an unanswered question until now! The best place to eat in Mordheim is at my tables:
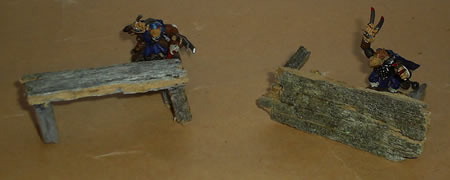
And if you’re ever interrupted by some rival warband, you can throw the table on it’s end and you have instant protection from missile weapons.
These tables are built out of a piece of bark I found in my yard. I’ll probably end up making it a permanent part of a building setup.
-Ashton Sanders
Nov 17
Mordheim Tactics for Skaven Part I
This is my first post on my (Ashton’s) Skaven Tactics in Mordheim. I first chose Skaven for their numbers. They can have up to 20 warriors, and the giant rat swarm is very entertaining.
You can play Skaven many different ways. You could start the game with 4 decked-out heros with armor and a Rat Oger. Or you can pile up 20 rats with daggers and teeth. Most would argue to strike a balance between the two, and have 8-10 rats with swords or spears. This is a fine idea, but I wouldn’t do it.
First of all, light armor in Mordheim isn’t worth the 20 points/gold pieces. I would much rather have 3 sets of fighting claws than 5 sets of light armor. Heavy armor is a waste because of the minus 1 to movement. Skaven’s movement speed allows them to run circles around every other warband. If a human gets the ability “Sprint” (when you run you can x3 your movement instead of x2), he runs the same distance a normal Skaven runs (12 inches). If a Skaven gets the ability “Sprint,” he runs more than twice that of the normal human (18″ as opposed to a human’s 8″). That’s the full length of a red Games Workshop Ruler.
Second of all, Read the Rest of the Post >
Nov 16
Experimenting with Mordheim Shrubs
Most Mordheim Boards don’t have any sort of plant life or shrubbery, which is probably from the thick cloud of ash and poison that hangs over the City of the Damned. But I disagree. After the comet crashed into the city of Mordheim, it annihilated a good portion of the inhabitants instantly, and the survivors started mutating and going crazy. I figure this would be about the same process of the plant life.
I have another reason to want plant life on my Mordheim board: I have lots of creepy looking weeds, that could fit in very well to my Mordheim board and add a lot of character.
That said, lets move on to making my second Mordheim plant. This one is going to be a shrub, since my Mordheim Tree was too freaking huge. I started with the same tumble weed that I made my tree with. I clipped off a small group of the branches and stuck them into a piece of cardboard. I soon discovered how horrible this idea was. Below you can see the plant I used, and what it made. I quickly threw away the idea of using that plant for a shrub. Here is my Shrubbery FAILURE:
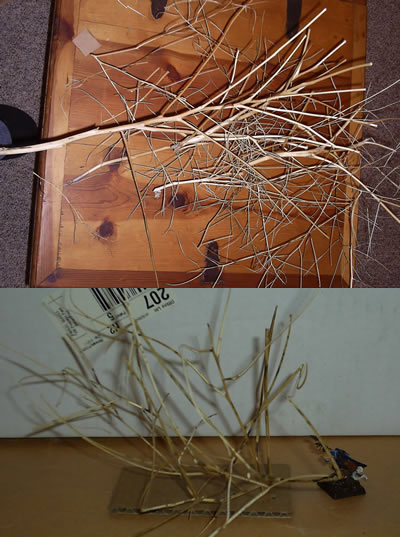
But I didn’t give up yet. I knew something cool could come from all these creepy weeds I have in my yard. I tried my next weed, which is a noxious weed. This one has creepy pod like flowers that don’t ever wilt away. I cut the pods off and stuck them into a piece of cardboard. I think it may have been too much, but it’s a great start. I added a layer of Elmer’s Glue to the floor to hold the plants in place.
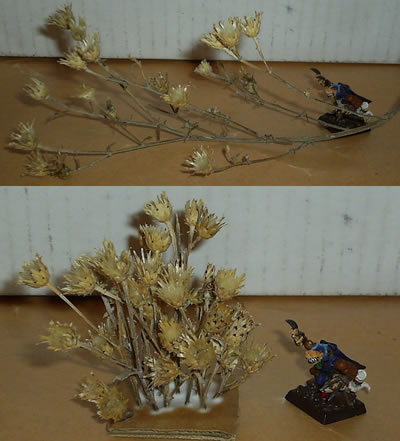
I don’t know if I’ll ever use that shrub, but it was a good start, and I’ll be developing more shrub-like plants soon.
-Ashton Sanders
Nov 15
Mordheim Construction – Cutting Foam
In my earlier post I described how I had been cutting foam. It was a slow and tiring process.
Yesterday, I went to a couple hobby shops in Kalispell. I purchased my very first Woodland Scenics Hot Wire Foam Cutter.

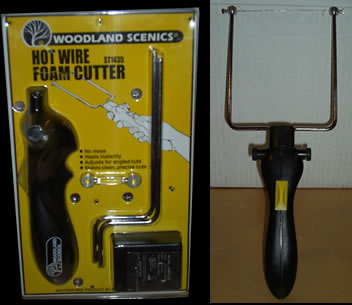
All you do is plug it into the wall, and press the yellow thumb-trigger forward, and “Voila” You have a pipin’ hot wire that glides through foam like a hot knife through… butter… (I know, that wasn’t much of an analogy, but I couldn’t think of anything else.) It works pretty well too. This foam cutter gives you a little under 4 customary inches of hot wire to cut with. So don’t get a 5″ cube, or you’ll only cut off the corners. Here is the first victim of my new tool:
My Second Mordheim Building (before and after):
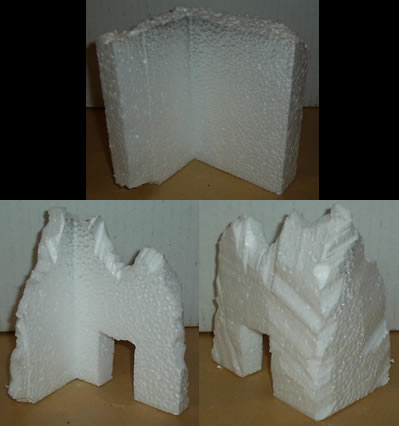
Look at that character! Both of the walls had been different sizes (one was almost twice the size of the other). Using this foam cutter, I was able to make both walls the same size, and add a good deal of character with ease. The only problem with cutting foam with a hot utensil, is the toxic fumes, so be sure to always use a hot foam cutter in a well ventilated area.
-Ashton Sanders
Nov 15
Mordheim Building – Floor Tiles
I’ve done some more work on my first Mordheim Building.
First, I added wood plants as floorboard to the second story floor. I didn’t have any balsa wood handy, so I used some thin cardboard and cut them into 1×12* strips. I had to be pretty inventive to try to make the broken ends of the cardboard actually look like wood. I tried to splinter the cardboard to make it look like very broken/thrashed wood.
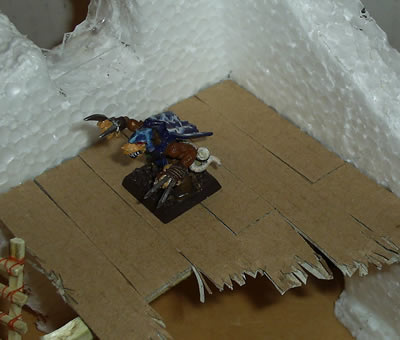
Second, I cut a 4×4* support beam, and glued it to the bottom of the cardboard. Even though these houses were not built to withstand a comet, they were built to withstand normal human and furniture weight.
Third, I took a small piece of clear fiberglass, cut it to be a broken piece of glass and inserted it as a broken piece of glass in the window.
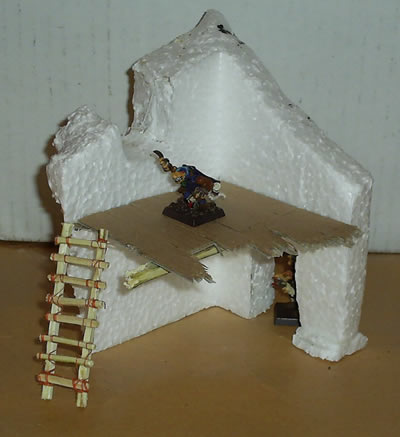
(Kitves, the Eshin Sorcerer, and Nutz, the youngblood, volunteered for this photo.
You can also see my homemade Mordheim Ladder)
This building is definitely coming along much better than I thought it would. Now I just have to do the finishing touches and get some paint on it. I went to a hobby shop yesterday and got some tips on how to paint Styrofoam, because it can definitely be a pain.
-Ashton Sanders
*This is in miniature scale. So 4×4 beam would be a 4 inch by 4 inch beam to a Mordheim model. This more like 4 mm to normal humans.
