Mar 9
Details for the Dice Tower
I’ve done a bunch more detailing on my Mordheim dice tower:

I’ve added the wooden baseboard and three corners around the outside of the building. I have also framed one of the windows. I have used Popsicle sticks for almost all of the wooden sections of this Mordheim Building. I have also used a couple stirring sticks. Some of the thin wood (like 3 sides of the window) was created by cutting a very tiny sliver from a Popsicle stick, and turning it sideways.
Here’s the front door:

Here’s the framed window. I forgot that I will need to remove the grating to add the black base paint behind the grating, so I will just have to do my best on this window to cover all of the white foam bubbles with black paint:
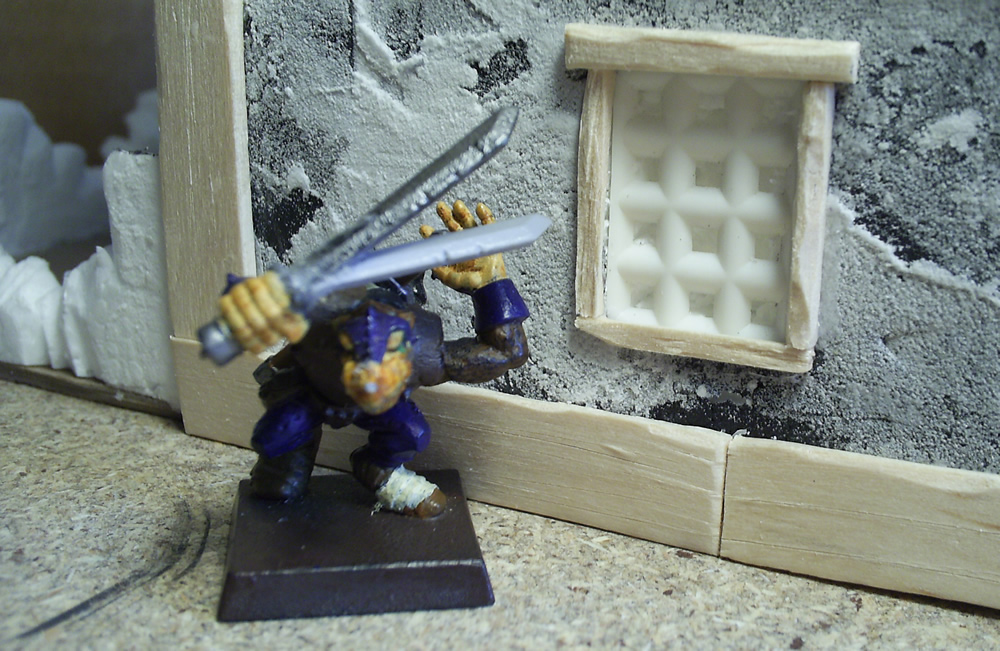
More to come:
-Ashton Sanders
Mar 7
Windows for Dice Tower Terrain
While I was at a Montana-style estate auction (in someone’s backyard) I accidentally bought a bucket of crap for $2.00 when I thought I was only buying a T-square. Instead of throwing away the bucket, I brought it home and searched through it. This bucket was full of the most random construction stuff. It had some weird foam tubing, bolts, tails, etc., etc. It also had probably 100 of these small white vent-type plastic parts about 7 inches long and 3 inches wide. I have no idea what they are for exactly but I knew they could definitely come in handy for my Mordheim Buildings. I just hadn’t figured out what I could use them for… until now!
MORDHEIM WINDOWS!
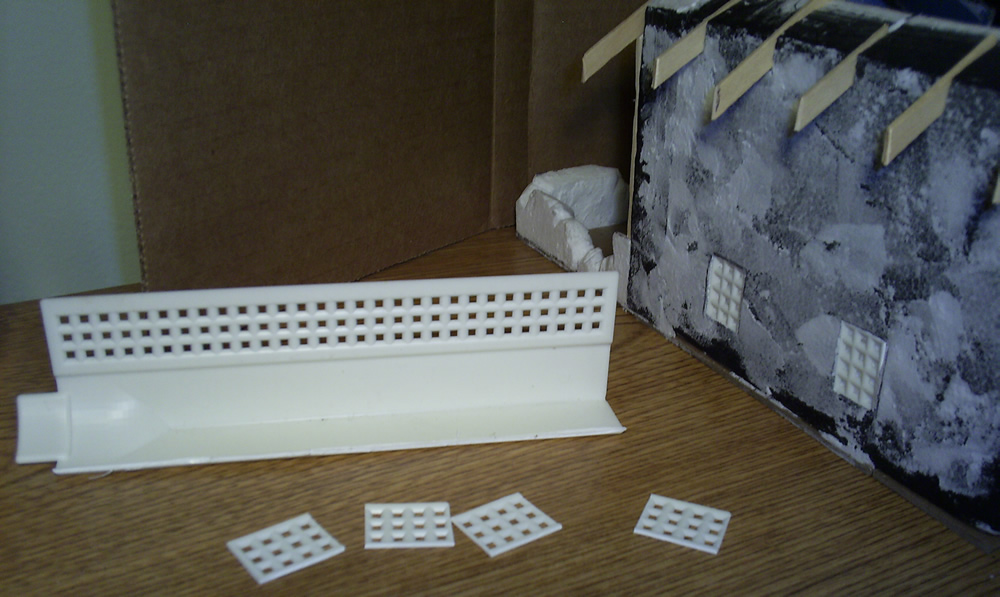
This picture shows the plastic vent with one edge cut off and sliced into nice window sized pieces, and the other side of the plastic vent left in place. They end up being kind of thick borders, but I think after painting, it will look perfect. Here’s a progress shot I took while cutting a hole for this window. It was really quite simple; I just marked the hole, and cut it out with a razor blade, leaving a small ledge around the edged to keep the window grating from sinking too far into the wall.

My next step will be adding a window frame around the window.
-Ashton Sanders
Feb 28
Painting Styrofoam
As you may have noticed, my dice tower (and most of my buildings so far) are constructed mostly of packing foam (Styrofoam). As you can see in this picture, the foam bubbles and small holes in Styrofoam is not really a desired look for model building, so I have gone on a quest to find the best way to hide the Styrofoam texture. Here’s a picture of my Dice Tower Wall after I painted the Styrofoam, and before I filled in the Styrofoam holes:
Click on any of these image for an even larger view.

If you put 3-5 coats of acrylic paint on Styrofoam, it will eventually cover up these holes. Another tactic I’ve used is to spread Elmer’s Glue or PVA Glue (White Glue) over the surface of your building. Or you can mix in the previously mentioned white glue into the paint before painting the Styrofoam or foam. All of these create a very smooth and flat surface on your foam, which is nice but not realistic.
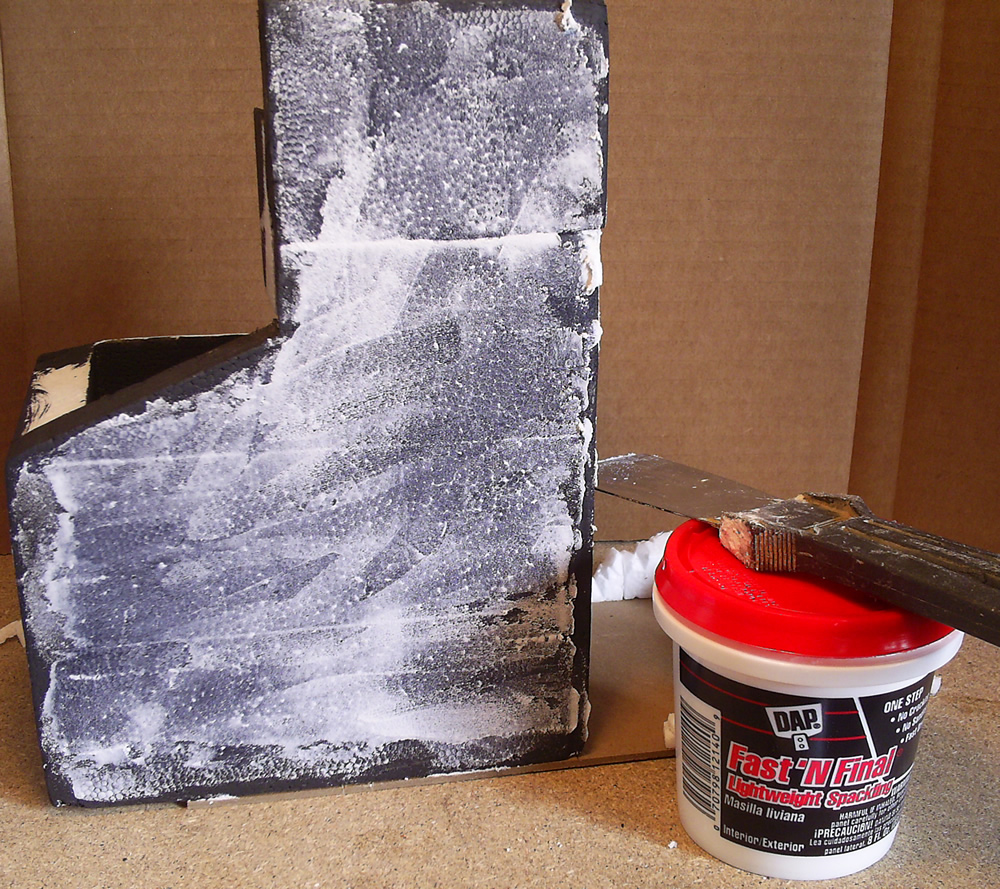
I happened to have a small tub of “light-weight” Spackle hanging out in my closet, so I spread it over the surface of my building. In this next picture you can see how the Spackle automatically filled in the Foam holes, surrounded the Styrofoam bubbles and filled in the cracks. I accidentally painted this building black before putting on the Spackle, but in the end has helped a lot for these pictures.
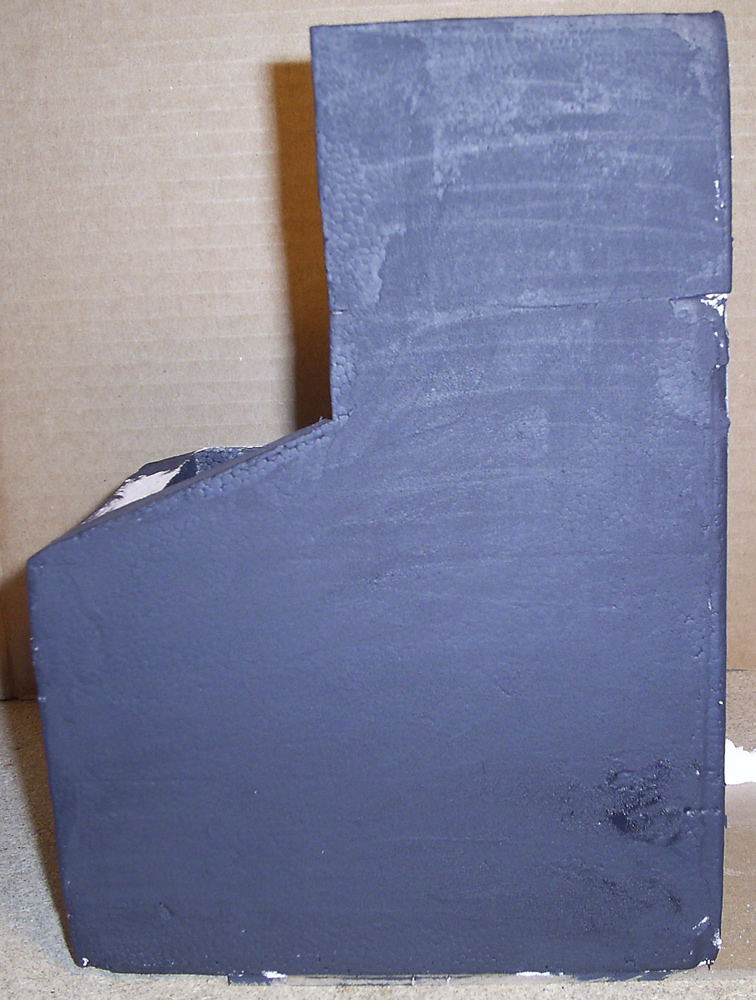
This next picture shows the thin layer of Spackle I spread on this foam dice tower building. I tried my best to thin out the Spackle and create a nice, smooth surface over the foam. In retrospect, I would definitely recommend a thicker layer of Spackle. The extra Spackle will add more texture to your building and cover the foam better.
As you can see in this final picture, the layer of Spackle is too thin and shows some of the foam bumbles. I’ll be adding another layer of Spackle for texture and to cover the Styrofoam bubbles.
I’ll be putting together a Tutorial for Covering Styrofoam and Foam in the next couple days!
-Ashton
Dec 27
Supporting Large Terrain Pieces Without Bases
The building that I am currently working on for my Mordheim Terrain is a four story tower that has fallen over into a pile of rubble. This creates quite a long terrain piece that I am building without a base.
The biggest problem with creating this Mordheim building without a base is support. If I am not careful, after all my work, it will just break in half. There are a couple things I am doing to take care of this:
First, I’ve created, and glued into place, a Popsicle stick brace that supports the building from inside the foam. The idea behind this is similar to having rebar inside of cement walls. Here is a picture of the bottom of my terrain:
The weakest part of my terrain is on the left side of the Popsicle brace. Where the rubble meets the first floor of the building.
Second, I’ve added fallen debris that acts as support beams.
There are three sticks that look like they have just fallen over in the debris, but are actually embedded deep within the main building and glued securely to the rubble.
Lastly, I am going to create a couple piles of rubble right next to the main floor which will also add support to the weak point on my piece of terrain.
I’ve done a lot of work on the roof of the tower as well. You can see the broken chimney in this picture:
Merry Christmas,
Ashton Sanders
Dec 3
Building a Mordheim Deck/Porch
 In my latest Mordheim Building post, I discussed creating an entrance at the front of my Church (even though it could easily pass as a tavern, pub or other gathering place). I did quite a number to create this deck. The first thing I did, was figure out how far forward I wanted the deck to be, and then cut up a bunch of Popsicle sticks to fit the proportions. I chose to create the porch 2.7″ deep and almost 7″ wide. To the right you can see my lumber yard, and my sticks in their assorted stages.
First I cut the ~4″ Popsicle sticks down to 2.7″, and then I cut those pieces in half lengthwise to get thinner planks. I also used some of the 1.5″ pieces as planking. I scraped my knife over every edge of each plank to add “character.”
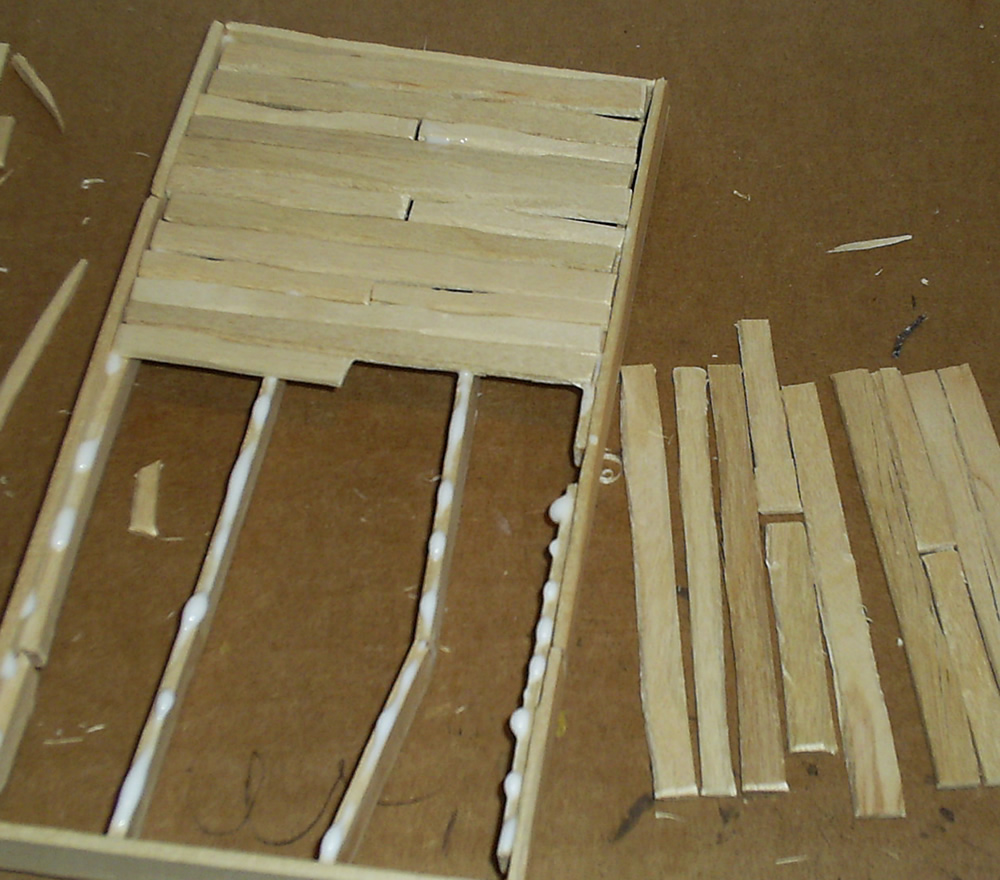 You can see in this next picture the frame I created for my Mordheim Deck. The four beams that are on the inside of the deck are suck down to allow the planks on top to sit level with the top of the outside planking.
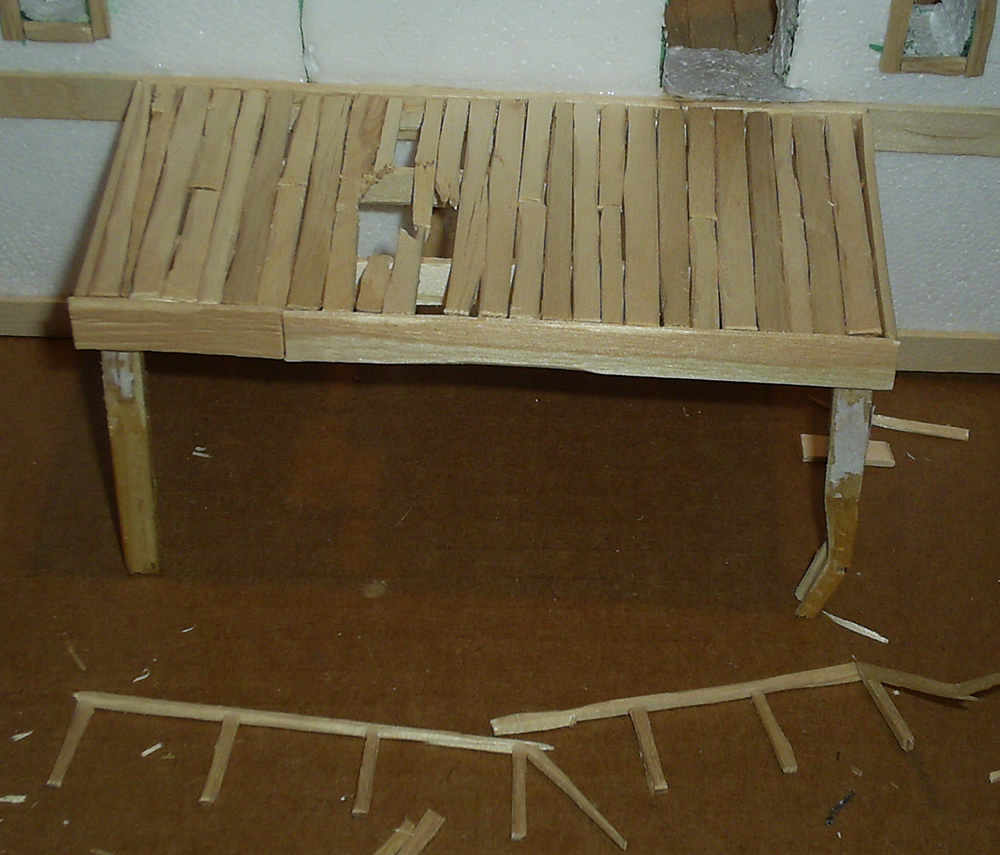
After getting half way through creating this deck, I realized I hadn’t properly destroyed the deck. Even though the front side of the Mordheim Church hadn’t been hit too hard by falling debris from the comet, it’s in the City of the Damned, so I couldn’t leave it totally untouched.
Here’s my new deck; complete with hole, wreaked post and destroyed handrails. I’ll probably be adding some more grunge, dirt and debris after I finish framing the door and windows (on the left side of the building).
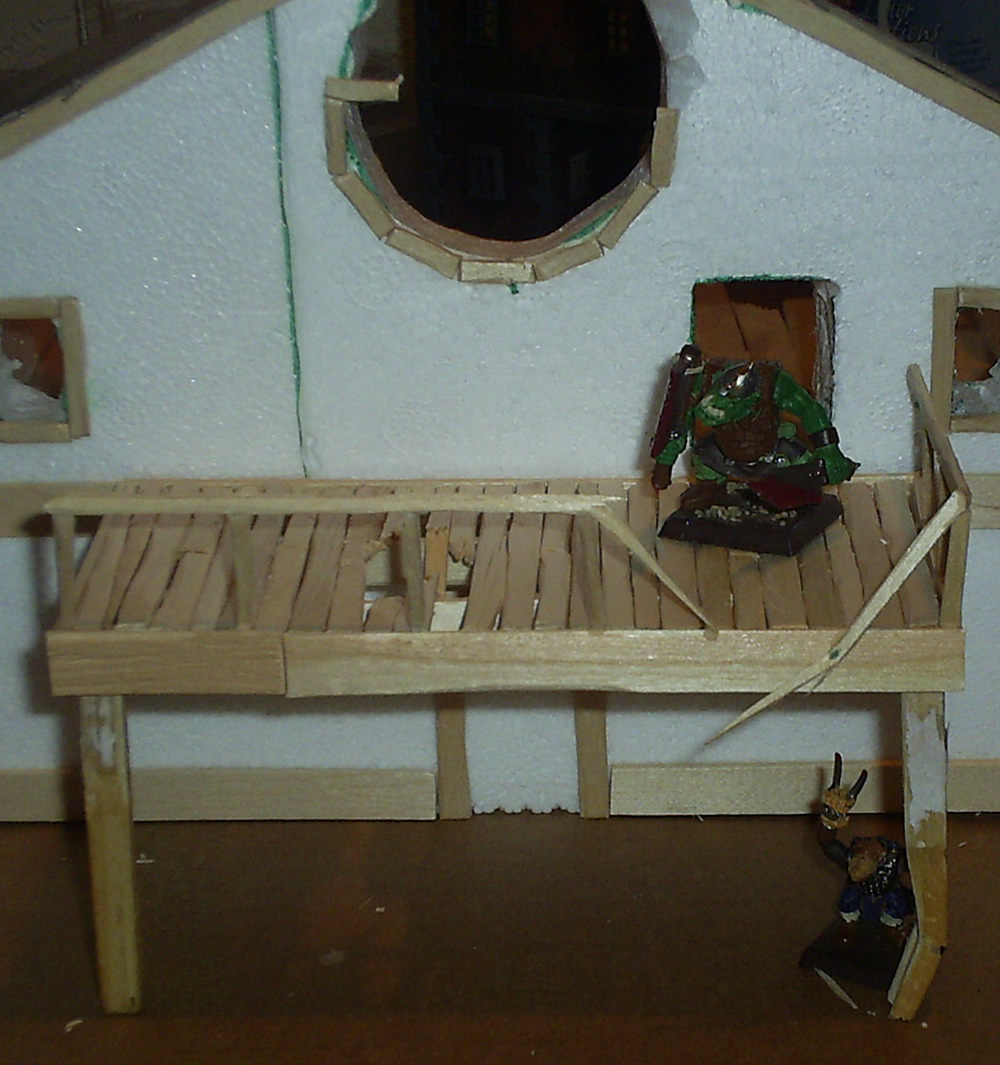
I can’t think of anything else to add to this building, so I’ll probably work on a couple other of my unfinished Mordheim projects before starting the painting on this Mordheim building.
-Ashton Sanders
