Archive for the 'Mordheim Buildings' Category
Nov 29
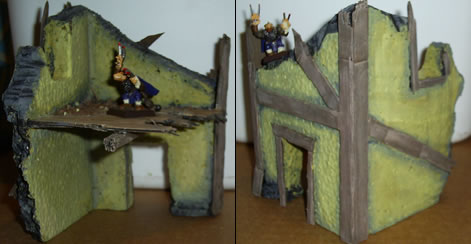
First Completed Mordheim Building
I have finally completed my first Mordheim building. I started this building at about the same time I started this blog, so it’s been two weeks in the making. In my defense, this Mordheim building isn’t the only Mordheim project I’ve been working on.
I decided to go with a yellow paint with wooden accents. Here is the completed Mordheim building:
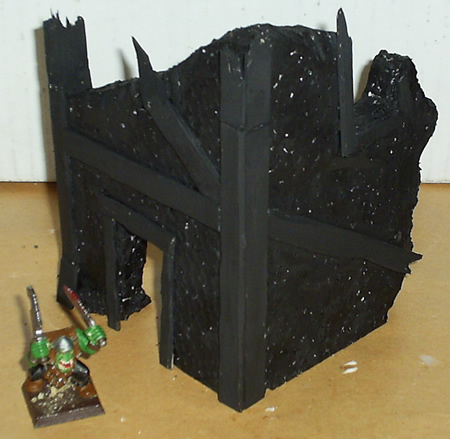
Here are the two outside walls. Click on the image to view larger image.
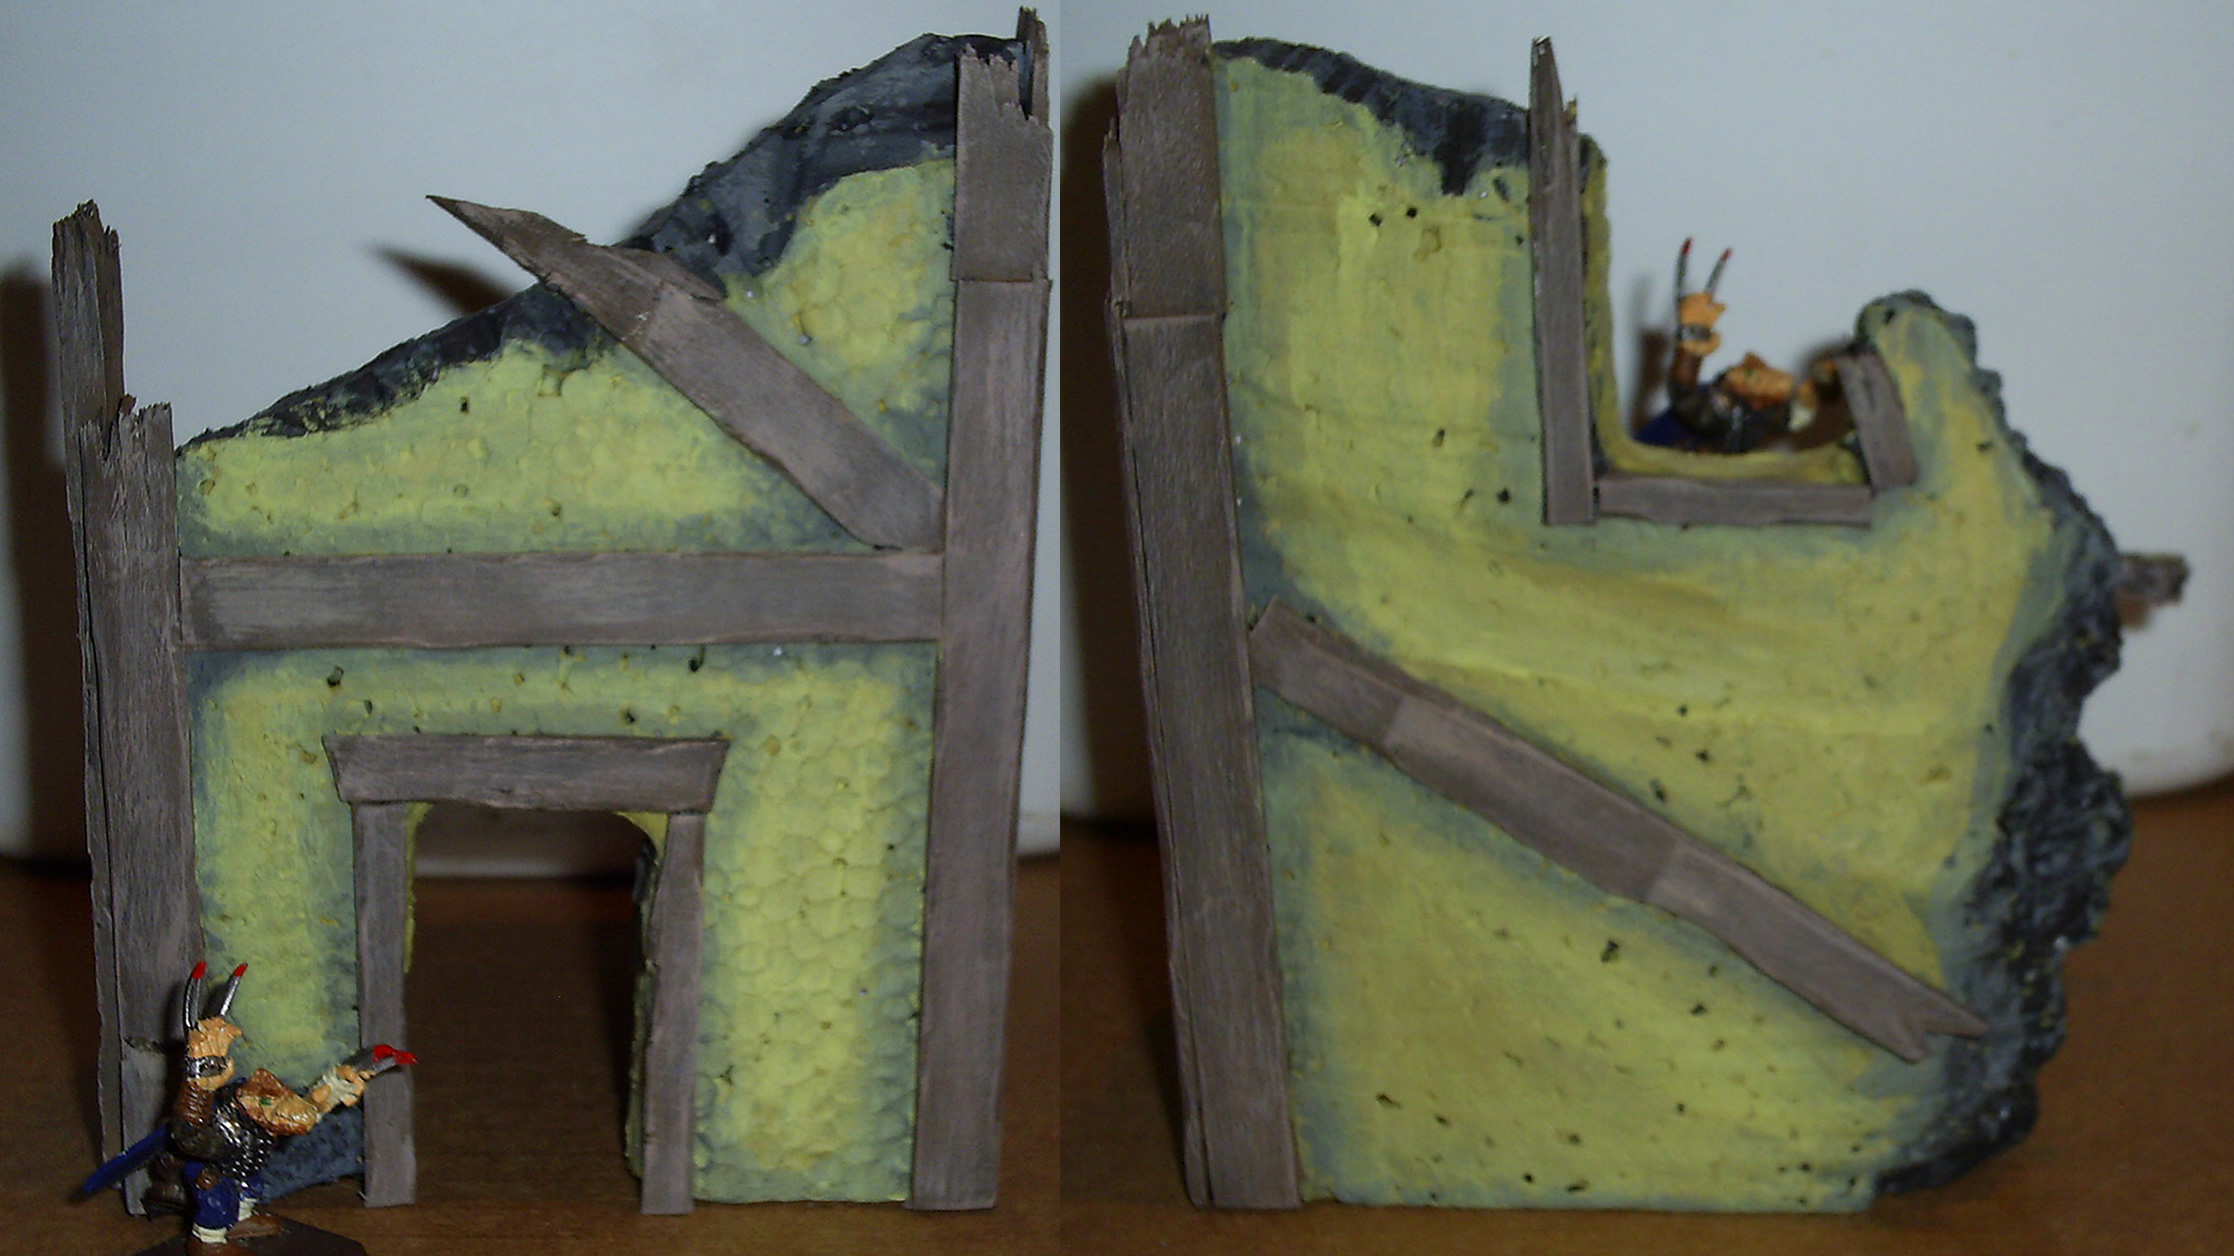
I’ll be putting up another image of the “gravel pile” on the second floor. I need to get a good picture with normal daylight.
I think for my first building, it came out very well. The only problem with this Mordheim building is that its scale is too large. Where Mordheim Models are 28mm, this building is closer to 38mm. When compared to the 3-story tavern/building that comes in the Mordheim box, they are almost the same height. The second story floor of this yellow Mordheim building comes up to the windows on the second floor of the original Mordheim building. The window and door on my building are also too large.
Notes to keep in mind,
Ashton Sanders
Nov 28
Getting out the Mordheim Paints
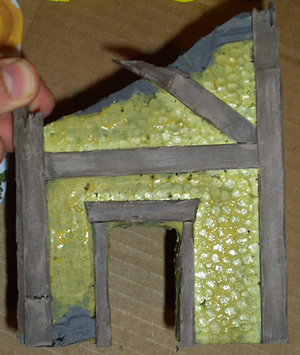
I’ve finally taken out my paints and started painting my first Mordheim Building. This picture is after my first coat of yellow (for the walls) and brown (for the wood) after the base coat.
As you can see, I went with painting the walls of this building yellow. I didn’t really have any thought or reason behind it, that’s just the color I pulled out. I should have darkened the yellow a little more before I put it on, so that the base coat for my Mordheim Building would be darker and I could add highlights on top of it. I’ll probably end up doing this anyway. It was nice how you could see the black base coat through the light layers of the yellow. I could have used that to my advantage by putting less yellow paint on the sections of the wall that I wanted to be darker. Live and Learn. =]
I haven’t really decided what I’m doing with that “rock” that is being used as a support on the left side of the door. It was a improvisation to fix a wall I melted. We’ll see how it come out tomorrow after the final coat.
Here is a picture after my second coat of paint. I also realized that the broken-off parts of the wall should be gray as the building was painted before the wall was knocked down… not after. You can also see a little bit of dry-brushing that I did on the wood to make it look more like wood. I started with a dark brown base-coat for the wood, and then got a light red-brown for the highlighting.
Until then,
Ashton Sanders
Nov 25
To Add a Base or Not to Add a Base
(That is the question…)
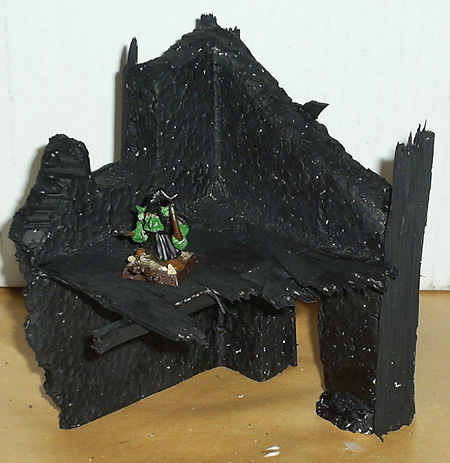
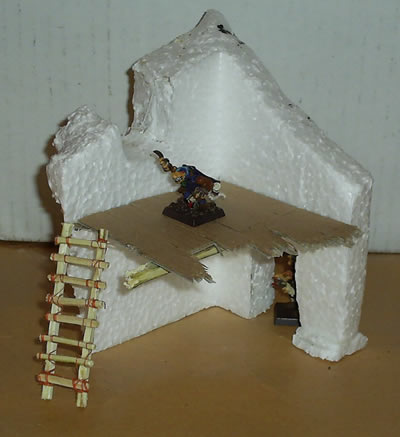
I’ve been toying with the idea of adding bases to my buildings. I am almost ready to add a coat of paint to my first Mordheim Building, and I need to decide whether or not I want to add a base to it. Here’s a picture of a Mordheim building with a base, and you can click on the link to my first Mordheim Building above to see a building without a base.
The Pros of adding a base to your Mordheim building:
- When a building has a base, it is much easier to add debris and trash to the floor around the building.
- It also adds a lot of stability to your building. It is much easier to keep your building from falling over from the weight of your Mordheim Models.
- You can use them to add hills and elevation to your Mordheim Board. I can guarantee the City of the Damned is not totally flat.
The Cons of adding a base to your building:
- You get that annoying lip around the edge of the base that can distract from.
- The base can easily end up as a different color than the board you are playing on. (Use a friends board, make a new one, etc.) I’m trying to build these buildings for aesthetics, this will cause them to look very ugly. Here’s an example of Mordheim bases looking ugly.
- Buildings with bases cannot be placed very close together, so if you are playing the “Street Fight” scenario, you will have trouble making a wall of buildings.
Can you think of any other Pros or Cons? I’ll try to update this list.
I think I will end up adding small bases to some of my buildings, but I’ll have to work on camouflaging the bases really well, and I’ll probably need to put together a board first. Does anyone know where I can find a tutorial about how to create a Games Workshop or Mordheim Board (with the sand on it)?
-Ashton Sanders
UPDATE: For a more detailed post on this subject check out my newer post: Adding Bases to Terrain.
Nov 22
Base Coat for My Mordheim Building
I’ve done a lot of filling and testing with my first Mordheim Building. I’ve tested out cardboard for the 2nd floor’s wood paneling, and have worked on framing the windows, doors and corners. I was having trouble trying to find inexpensive material to use as wood, and Popsicle sticks came to the rescue. But cutting up Popsicle sticks, I’ve been able to get wood of all shapes and sizes for just about any purpose.
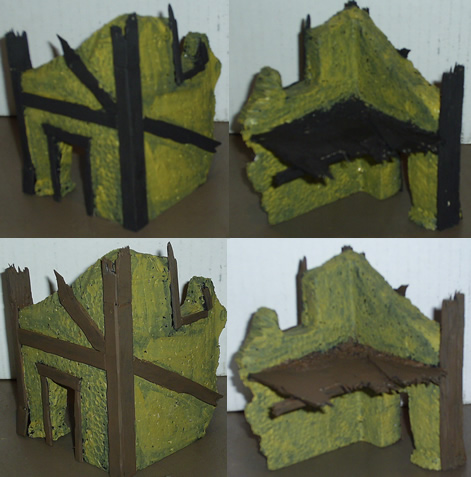
After completing the design of my first Mordheim Building and putting all of the wooden accents, I did a base coat with straight black acrylic paint. Here are some pictures taken with Ugh and Squeamish:
As you can see there are still a billion little white specks from the Styrofoam. I hope to have those well disguised by the time I get the final coat of detail paint on this Mordheim Building.
Happy Thanksgiving
-Ashton Sanders
Nov 20
Painting Styrofoam for Mordheim Buildings
I don’t think there’s a job more tedious than painting Styrofoam. It would be simple to spray paint it all black for the base coat, but it’s Styrofoam, and it will bubble and melt into a soggy pile of acid when it reacts to spray paint. It reacts with just about any painting or gluing material. So the only real solution is to glue it together with Elmer’s Glue and paint it with Acrylic or water based paints. But since Styrofoam has all the holes and cracks between the white balls, you have to go over it again and again with a detail brush painting the inside of the holes with black (acrylic) paint.
I have experimented with multiple things to get the holes to close up, but nothing has worked. I’ve tried heating the Styrofoam over a flame, using the hot-wire foam cutter, etc., all to no avail.
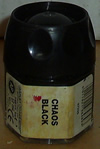
On the subject of painting Styrofoam, I thought I’d discuss paints. I have this old Games Workshop Citadel paint pot (with the screw on lid) which costs anywhere from $2.50-$3.50. The new paint pots cost $3.00 at my local Tabletop gaming store. This is the paint that says “Citadel Colors” on the back. This paint pot has 12ml of paint in it and ends up being $.25/ml.
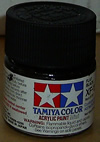
The next paint pot to discuss I bought at a local hobby shop for two dollars. This is also black and is acrylic paint. This paint pot costs $2.00 and contains 10ml of paint. So it’s less money for a little less paint, but overall a better deal: $.20/ml. I started painting one of my Styrofoam buildings with this pot, and it’s over half gone. I couldn’t feel justified spending $2.00 to paint one corner of a building, so I went out and bought the next bottle.
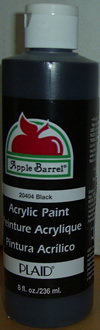
This large bottle of paint has 236ml of black paint and was $1.99. No matter which way you look at it, it was a good deal. It has a simple pop top, and has worked wonders on my Styrofoam Mordheim building. (I’m almost done with the base coat, and then I’ll post it.)
So yes, obviously the huge bottle of Acrylic paint for under $2.00 is the best deal for painting small and large Mordheim buildings. This ends up costing $.008/ml, and is what I’m looking for when it comes to base coating Styrofoam buildings for Mordheim. I have yet to see how the quality shakes down for miniatures, and only time will tell.
Until then,
-Ashton Sanders
Nov 19
Mordheim Building Materials
Obviously, the most common building material used to build Mordheim, like most fantasy worlds, is wood. I spent yesterday looking for some ways to create good Mordheim-sized wood for building construction.
I came up with some very rugged wood chips by cutting slivers off of an old, beaten-up 2×4(x8). I cut them to many different thicknesses. some were 2 Mordheim inches thick, but most were like 8-12 inches thick.
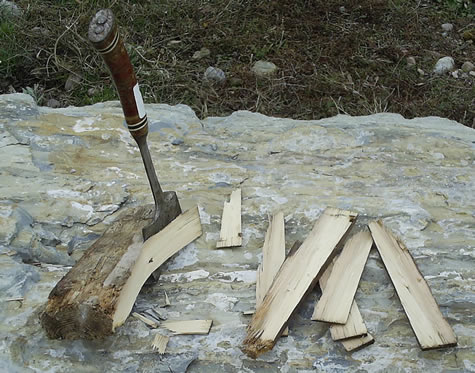
Obviously these “slivers” will still need to be cut again to make them thin. It’s hard to tell from this picture, but these pieces of wood are very ruff, and will look great dry-brushed.
I also bought a box of 1000 Popsicle sticks. After cutting off the rounded edges of a Popsicle stick, it ends up being approximately 2×12 Mordheim inches, which is perfect for construction. I have also used these Popsicle sticks for framing my first building. I should finish the base coat today, and I’ll have pictures tomorrow.
I have an illusion of grandeur of actually creating an entire building like a normal wood-framed house.
-Ashton Sanders
Nov 15
Mordheim Building – Floor Tiles
I’ve done some more work on my first Mordheim Building.
First, I added wood plants as floorboard to the second story floor. I didn’t have any balsa wood handy, so I used some thin cardboard and cut them into 1×12* strips. I had to be pretty inventive to try to make the broken ends of the cardboard actually look like wood. I tried to splinter the cardboard to make it look like very broken/thrashed wood.
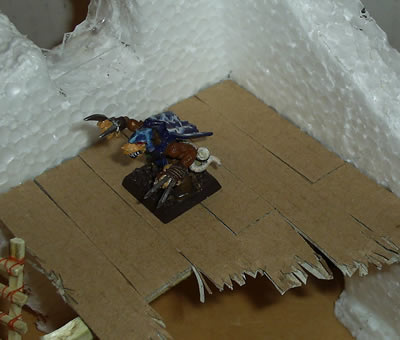
Second, I cut a 4×4* support beam, and glued it to the bottom of the cardboard. Even though these houses were not built to withstand a comet, they were built to withstand normal human and furniture weight.
Third, I took a small piece of clear fiberglass, cut it to be a broken piece of glass and inserted it as a broken piece of glass in the window.
(Kitves, the Eshin Sorcerer, and Nutz, the youngblood, volunteered for this photo.
You can also see my homemade Mordheim Ladder)
This building is definitely coming along much better than I thought it would. Now I just have to do the finishing touches and get some paint on it. I went to a hobby shop yesterday and got some tips on how to paint Styrofoam, because it can definitely be a pain.
-Ashton Sanders
*This is in miniature scale. So 4×4 beam would be a 4 inch by 4 inch beam to a Mordheim model. This more like 4 mm to normal humans.
Nov 11
First Destroyed Building Section
Welcome to this post on my First Mordheim Building. (Click to view all posts for this Mordheim Building.)
I’ve spent the last couple months saving all of the packing foam/material I could find. Now I’ve got a couple boxes full of Styrofoam, and finally have some time to test it out. I remember having trouble with Styrofoam because of how it reacts with both spray paint and some types of glue.
I started with a thin yet tough piece of cardboard (from a Logitech Speaker box) and a edge section of Styrofoam:
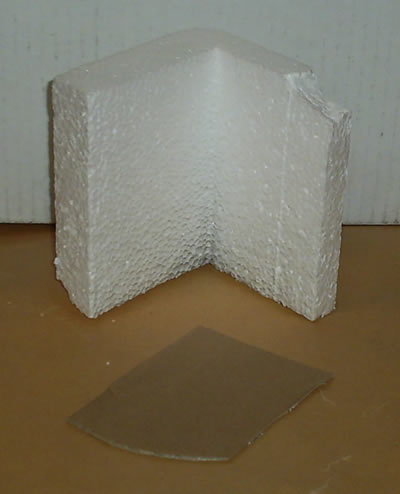
I took an old pocketknife I had lying around, and heated it over the fire on my stove. When it was hot, I’d make a quick cut through the foam. Then, I’d repeat the process. This is great for making straight cuts for doors, windows and the like.
If you’re looking at destroying an entire wall, probably the easiest way I’ve found is to break/cut off the section. This will make lots of loose foam bubbles and your wall will look like foam. To smooth out the foam, just hold it over some heat. This will melt all of the loose foam pieces and create a fairly smooth wall.
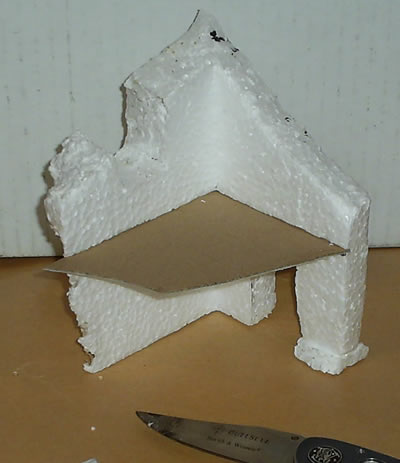
To get the piece of cardboard into place, I first drew a straight line with a marker, and then using my hot-knife technique, I cut along the line. This left a perfect slot to slide the cardboard into.
More to come,
-Ashton Sanders
