May 21
Wyrdstone
In my cruising through random Mordheim pictures, I saw a picture of some custom(?) wyrdstone counters that seemed to be made out of plastic. They just looked like large green rocks, and I remembered that I had started putting together some wyrdstone counters when I was playing the game (in 2000?). Being a packrack, I still had a couple zip lock bags in my Mordheim Box! So, I pulled them out, and put together these sweet Wyrdstone Counters:
Wyrdstone Counters by Ashton Sanders
How to Make Cool Wyrdstone Counters
by Ashton Sanders
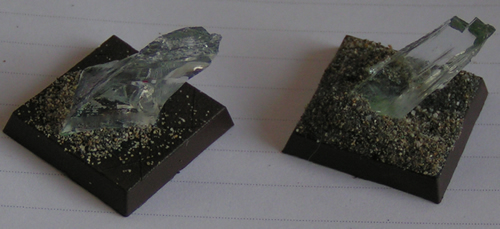
These Wyrdstones are made out of pieces of broken (window?) glass. This is definitely the hardest part of making these counters: Finding broken glass. I was lucky enough to happen upon a pile of broken glass on the street outside of my house (when I was living in LA), and I instantly knew what I was going to do with them. I took a handful (careful not to cut myself of course) and put them in a plastic bag.
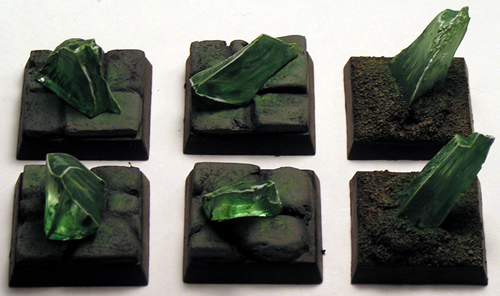
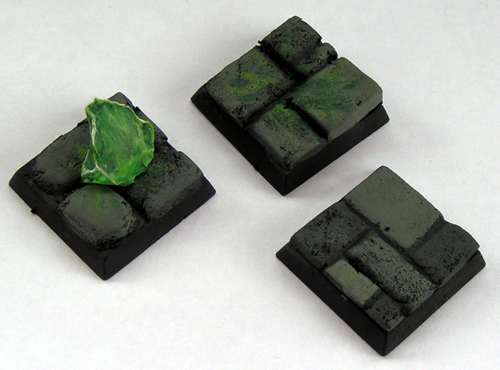
I have tried to do a number of different things with my broken glass, and finally (now that I’m “grow’d up”) I have created the effect I was looking for. As you can tell from the pictures above, I used a couple different kinds of bases (dirt and cobblestone). Here is how I created them (dirt one first).
Step 1) Take your shard of glass, and glue it to your base. I used Super Glue.

Step 2) Glue on a pile of dirt (fine sand) around your shard. (I made mine look like they hit the ground at an angle, so I piled up a bunch of dirt on all but one side of the shard.)
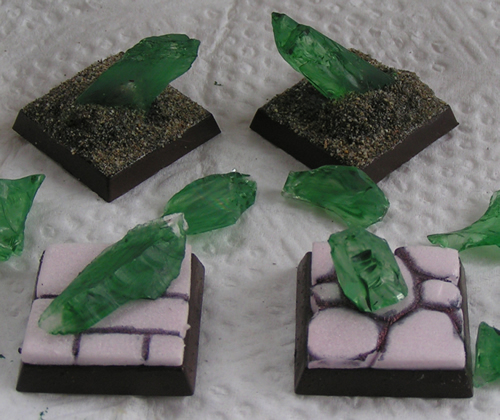
Step 3) Paint the shard with a very watery dark green wash. (I used watered down green paint.)

(You can see two more bases I created out of pink foam. Note: Don’t use Super Glue or Rubber Cement (etc.) on Pink foam)
Step 4) Paint the base as you normally would.
Step 5) Now you need to make the Mordheim wyrdstone look like it glows. You do this in two ways:
5A) First, highlight the all of the sharp edges of the rock with two shades of lighter and lighter green, then highlight *portions* of the edges with white.
5B) Second, very lightly drybrush the center of the base (around the wyrdstone) with a couple shades of green. This is to make the rock look like it’s shining light onto the ground around it.
Step 6) Now glue the shard to your base. Since I used Pink foam for my base, I couldn’t use super glue. I didn’t think PVA (white) glue would do the trick, but I have used it, and it seems to be working great! (I will update here if I run into any problems after I have used my Mordheim Wyrdstone Counters a bunch.)
And you’re done! I hope that helps in making some bad-ass Wyrdstone Counters.
-Ashton Sanders
(P.S. There are two problems with this tutorial that I need help with: 1) *Updated above* 2) I need to figure out a way to “seal” the paint on the glass so it doesn’t get rubbed off from handling. What do you use? Thanks for your help.)
(P.P.S. Mordheim Regulations require me to include the following warning on any page mentioning Wyrdstone:
SURGEON GENERAL’S WARNING: Wyrdstone can cause dry skin, vomiting, diarrhea, insomnia, hallucinations, constant mumbling, mutations, loss of sanity, extra limbs, death and even undeath. Always consult your priest before becoming addicted to Wyrdstone.)

