May 13
Mordheim Miniature Basing Tutorial
I am in the process of making 5 more Orcs for my Mordheim Orcs and Goblins Warband, and I figured I might as well share with you how I’ve been basing my Mordheim Miniatures. I’ve put together this very basic tutorial to create a very simple and effective base for your table-top miniatures.
Basing the Base:
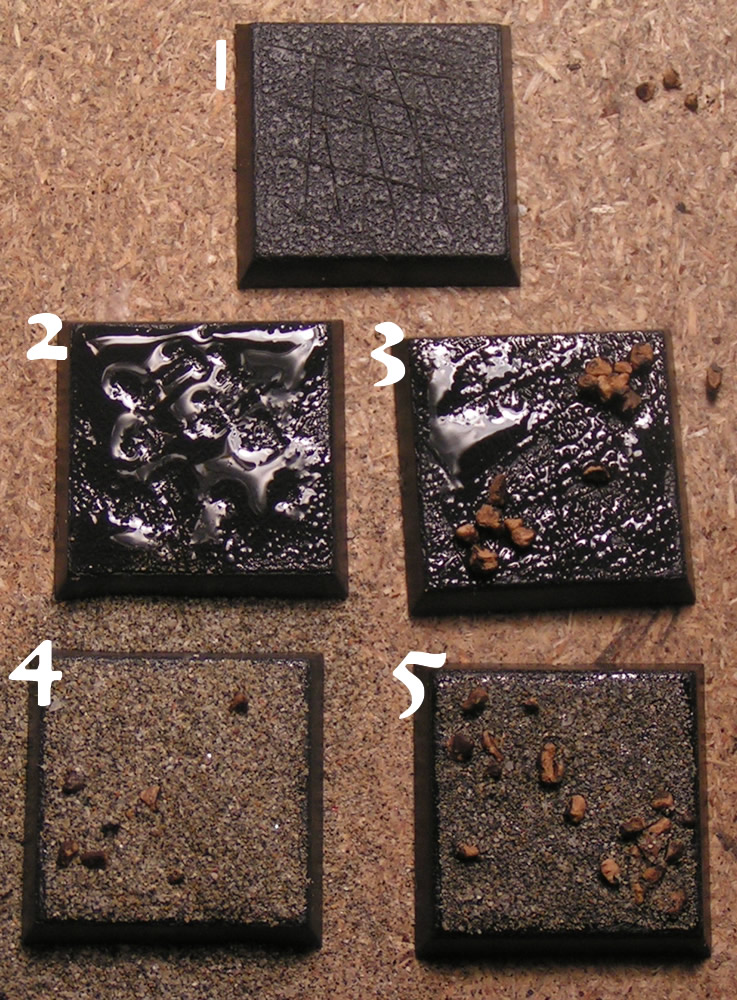
Step 1) The first thing I do, is take a razor blade and make a ~6-line tick-tack-toe board. Scoring the base in this way helps to give the glue something to stick to, and helps to keep everything glued down.
Step 2) Then I give the base a good layer of glue (not PVA or white glue). I use rubber cement for plastic models, but super glue will work fine.
Step 3) I sprinkle a few small rocks onto the glue. Notice how the rocks leave two corners open (for the models feet), as all of my Mordheim Orcs are in the process of walking forward, so this works perfectly.
Step 4) I take a half a spoon of nice beach sand (from Catalina Island), and sprinkle it onto the glue. I then let it sit for an hour or two. (Another possible method is to wait a little while for the glue to start to harden, and then press the sand into the glue.) This will keep the glue from covering the sand completely, and instead leave a nice coarse texture.
Step 5) After the glue has dried, shake off the excess sand, and you have your base. Leaves and other items can be added to your base as well.
Here’s a picture of an Orc and a couple squigs on their new bases:

Feel free to ask any questions,
-Ashton Sanders
UPDATE: If you put a lot of glue on the base, you will end up with a large pile of sand (obviously). So make sure you pay attention to how much glue you put on the base.