Jun 1
Destroying Pink Foam Elevation
Since my last post, I’ve been slowly hacking away at my section of pink foam that I am using for a Mordheim Urban Hill, and in general for easy elevation. I have also cut some low walls and pillars for the terrain. Here is a view from the front:

May 28
Mordheim Terrain – Stairs
I have done some more work on my companion piece for my Mordheim Urban Hill Terrain. I have cut out the three sets of stairs, and come up with an idea for the low wall.
How to create stone stairs out of Pink Foam:

Here is how I did it: Read the Rest of the Post >
Apr 23
Mordheim Stone Wall v2.0
It’s been almost a week since I created Mordheim Stone Wall v1.0, and I have finally gotten around to creating the next version. (Thank you for all your ideas.)
Here’s what I did:
First I grabbed the worst piece of Styrofoam I could find to become my test piece for my Mordheim Stone Wall v2.0. It just happened to be a little over 3.5″ tall, so it was a perfect height. (Here’s a picture with my newly-painted Orc Archer.)

Apr 15
Mordheim Stone Wall v1.0
Since I acquired my latest piece of packing foam, I have been trying to figure out the most believable way to create this large section of elevation. I have decided to make all of the edges of the foam look like it was created with a wall of stone, like a retaining wall. Then the rest of the elevated section of ground can be dirt ground like a normal Mordheim board.
I grabbed a spare piece of packing foam as a test piece and through some ideas together. Let me know what you think:
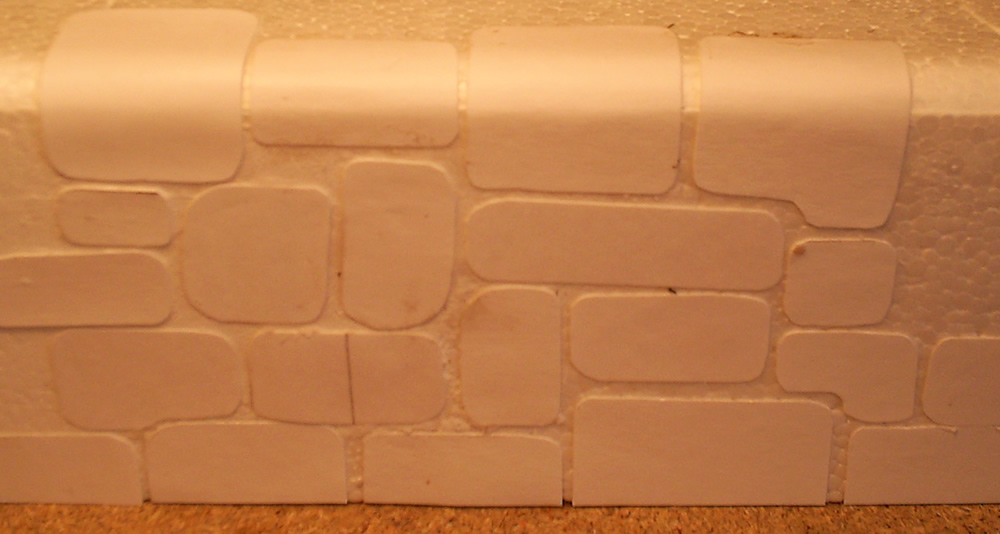
First, I started with my piece of packing Styrofoam about 3.5″ tall:

Second, I spackled the left half of the foam (for testing purposes) and cut out 20 different-sized stones from a sheet of business-card-thickness card stock. I glued them to the wall:
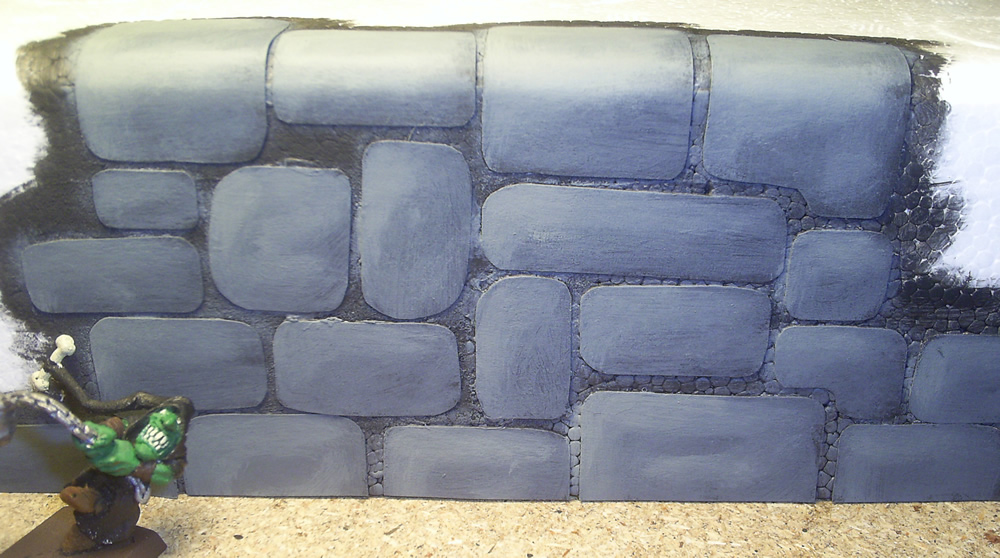
Third, I painted everything black, and highlighted the rocks (goblin fanatic for scale):
(You can see in this picture how much better the side with the spackle (left side) turned out. I definitely recommend spackling/texturing Styrofoam before using.)
Finally, I took a thick-bristle brush with very little paint on it, and added some speckling and texture to the rocks. Since I was so sloppy painting the stones, I had to take paint over the black again with a thin paint brush:
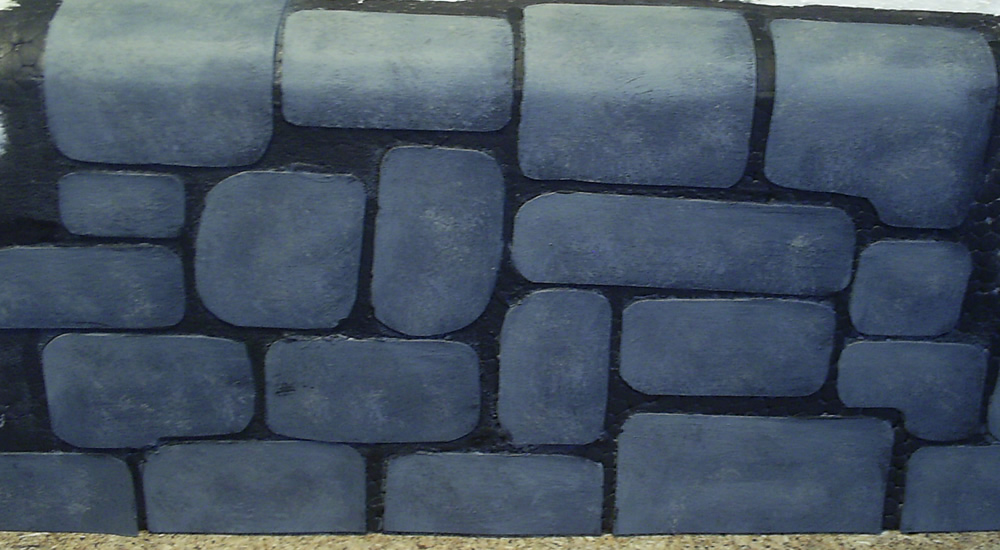
“Voila!” (Or in the words of Ness: “Tadi-UMP!”) Instant Rock Wall.
I’m pretty happy with how it came out. I’ll update this if I come up with any other good ideas.
-Ashton Sanders
